Before you create a Meta ads campaignThe campaign is the foundation of your Facebook ad. This is where you'll set an advertising objective, which defines what you want your ad to achieve. More, it’s important to understand what is done at each step. This will help you better plan campaign creation.
This process involves three levels:
- Campaign
- Ad Set
- Ad
Each selection that you make will impact the options you have throughout this setup.
Let’s walk through the process of creating a campaign from start to finish…
1. Campaign
The following steps and customizations happen within the campaign:
- Name the campaign
- Special Ad Categories
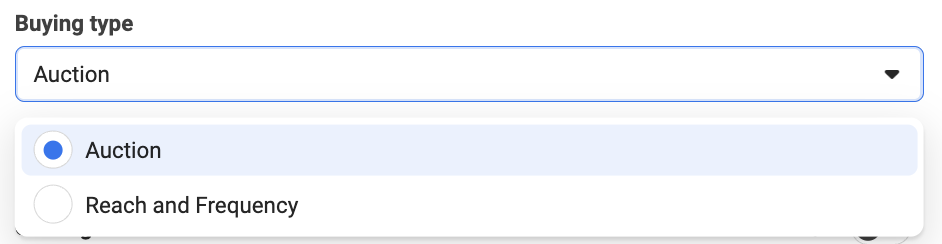
- Buying TypeThere are two buying type options when determining how you will pay for a Facebook ads campaign: Auction and Reach and Frequency. More
- Campaign ObjectiveWhen you create a campaign, one of the first things you'll do is select an objective. The campaign objective is your ultimate goal. Your selection will impact options, including optimization and delivery. Options include Awareness, Traffic, Engagement, Leads, App Promotion, and Sales. More
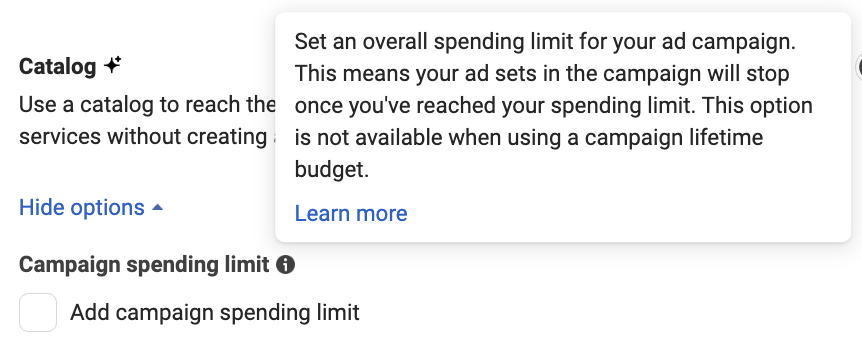
- Campaign Spending LimitA Campaign Spending Limit is set by the advertiser in the campaign. It is a hard cap on how much will be spent during the life of the campaign. This is different from a lifetime budget because it will not impact the way that your ads are delivered. You'll typically use daily budgets and your campaign will stop delivering once you hit that limit. More
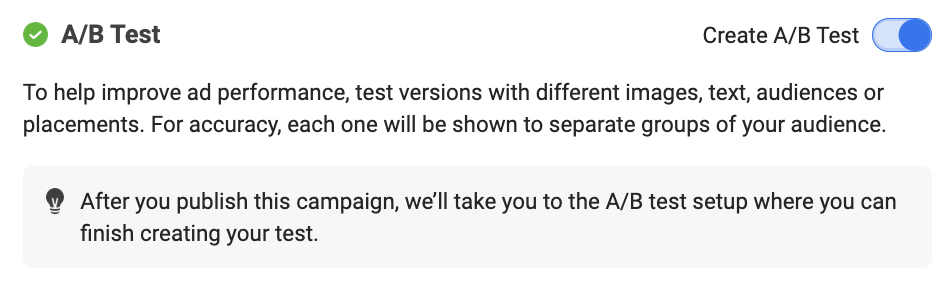
- A/B TestSplit testing (or A/B testing) allows you to test changes in Facebook variables like ad creative, audience, or placement to determine which approach performs best. More
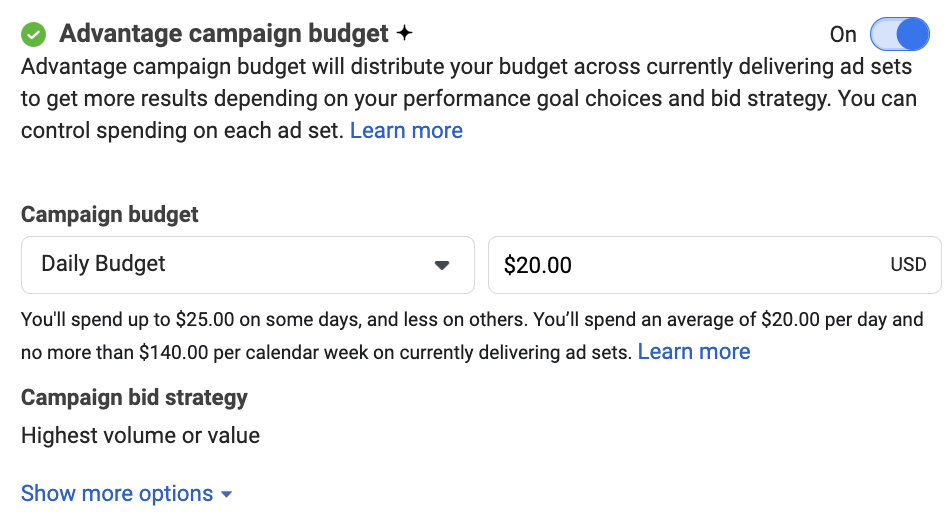
- Advantage Campaign BudgetAdvantage Campaign Budget (formerly Campaign Budget Optimization) automatically manages your Facebook campaign budget across ad sets to get you the overall best results. More
First, name your campaign. This is only visible to you, but I recommend you use this space to explain the purpose of your campaign and what you’re doing at this level.

Next, indicate whether you are creating a campaign that will promote a special ad category. While this will limit your targeting options, this transparency will also make it less likely you will run into approval issues.

The Campaign Details section includes settings for Buying Type, Campaign Objective, and Campaign Spending Limit.
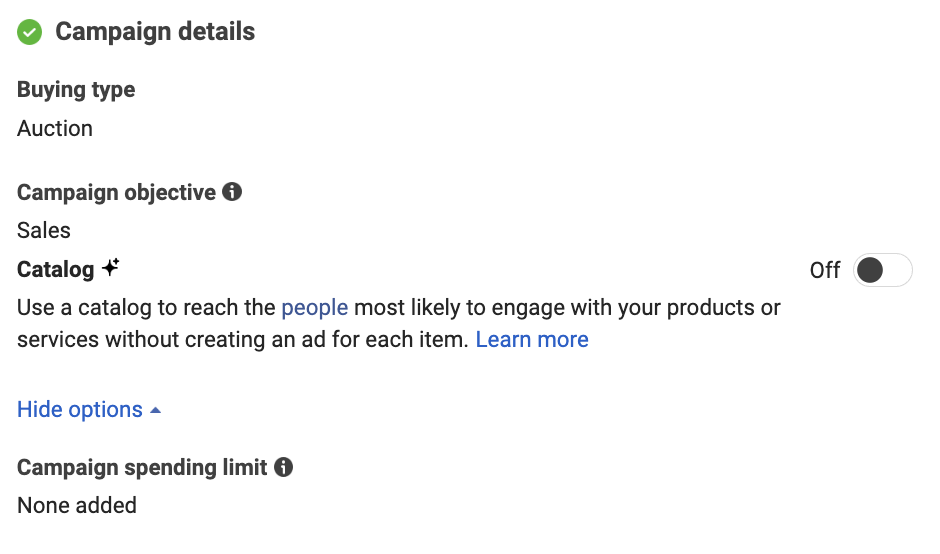
In almost all cases, you’ll use the default AuctionFacebook uses an ad auction to determine the best ad to show to a person at a given point in time. The winner of the auction is the ad with the highest total value, based on bid, estimated action rates, and ad quality. More buying type. Reach and Frequency requires a very large budgetA budget is an amount you're willing to spend on your Facebook campaigns or ad sets on a daily or lifetime basis. More.
You’ll have six options for campaign objective:
- Sales
- Leads
- Engagement
- App Promotion
- Traffic
- Awareness
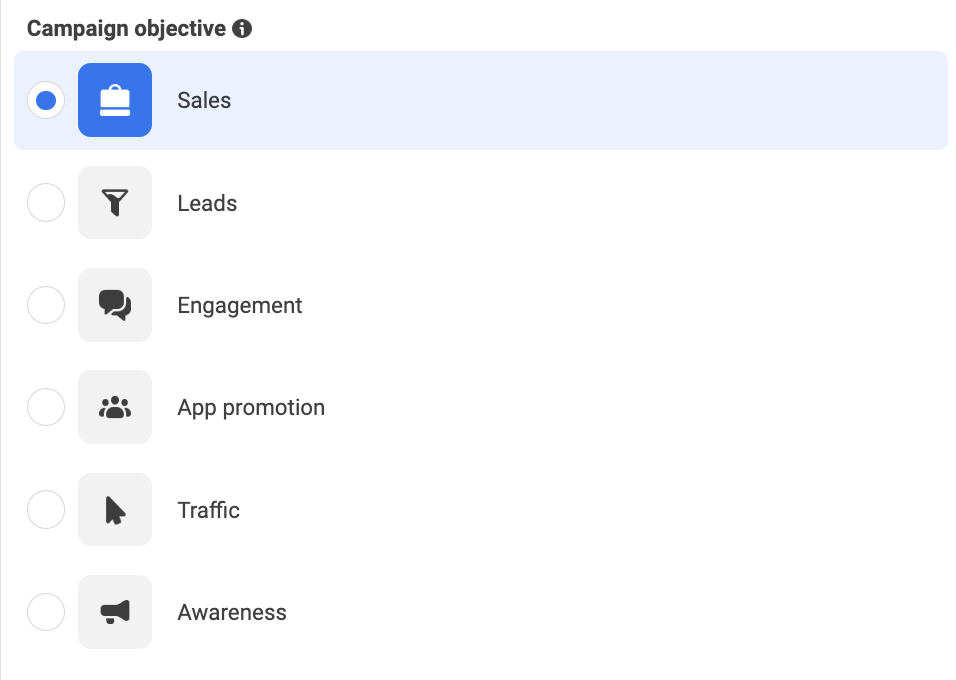
What you select here will impact the optimization options that are available to you in the ad set.
You can set an overall spending limit for your campaign with a Campaign Spending Limit, but that’s not typically recommended. This can create confusion when you run into that limit. In most cases, use ad set budgets or Advantage Campaign Budget (coming shortly).
If you’d like to create an A/B Test, you can start that process here. Just know that you can also choose to start it later after you’ve published your campaign.
If you’re running multiple ad setsAn ad set is a Facebook ads grouping where settings like targeting, scheduling, optimization, and placement are determined. More, you can choose to turn on Advantage Campaign Budget. When used, you’ll set a campaign budget which will get distributed optimally between ad sets.
If you aren’t sure about any of these settings that can be turned on, just leave them off.
2. Ad Set
The ad set will focus on the following:
- Ad set name
- Conversion location
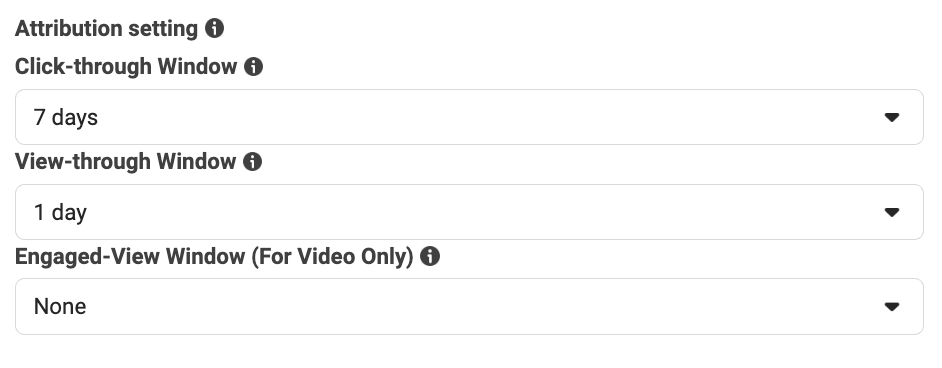
- Performance goalThe Performance Goal is chosen within the ad set and determines optimization and delivery. How you optimize impacts who sees your ad. Meta will show your ad to people most likely to perform your desired action. More and attribution settingAttribution is how Meta gives credit to an ad for a conversion. Your Attribution Setting determines how your ad will be delivered and the reporting attribution window. The default Attribution Setting is 7-day click and 1-day view, which means that anyone who converts within 7 days of clicking or 1 day of viewing your ad will be counted as a conversion. More
- Bid strategyWhen you enter an ad into the auction, Meta will bid for you. But in some cases, it may benefit you to adjust the bidding strategy to get better results. Options include Highest Volume, Cost Per Result Goal, Highest Value, ROAS Goal, and Bid Cap. More
- Dynamic creative
- Budget and schedule
- AudienceThis is the group of people who can potentially see your ads. You help influence this by adjusting age, gender, location, detailed targeting (interests and behaviors), custom audiences, and more. More
- Placements
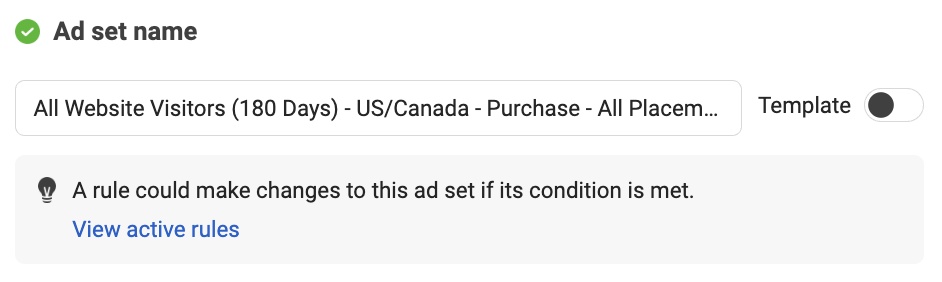
First, name your ad set. As with the campaign name, it’s recommended that you use the name to make clear what you’re doing within the ad set.
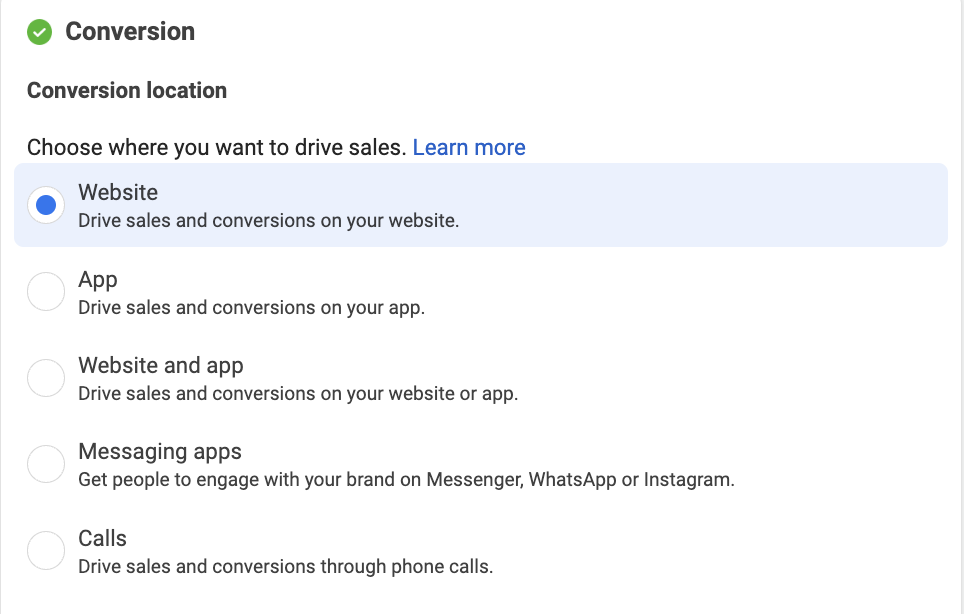
Now set a conversion location. The options here will depend on the objective you’ve selected. Once you select a conversion location, it will impact your performance goal options.
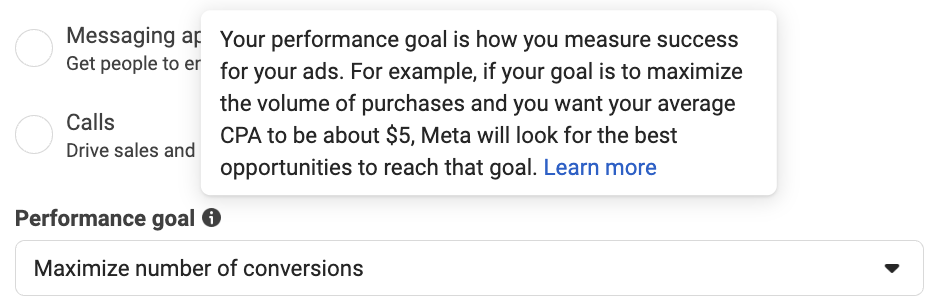
Your performance goal is how Meta will optimize ad delivery and determine success. The options available here will depend upon the selections you’ve made so far.
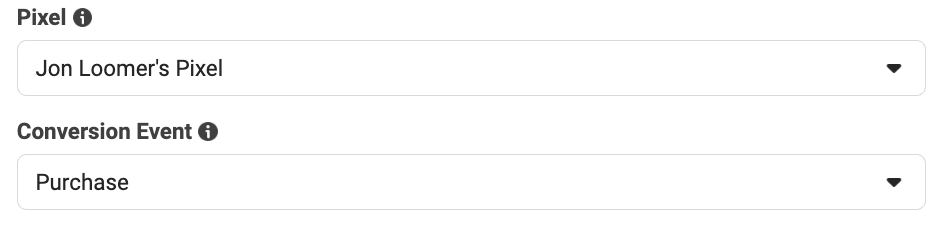
If you’re using the website conversion location, you’ll need to select your pixel and the specific conversion event.
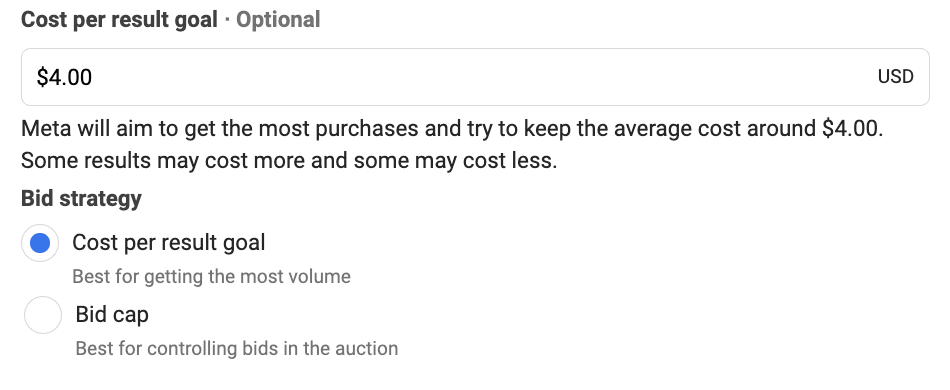
By default, Meta will utilize the Highest Volume bid strategyThe default bid strategy for most objectives. Meta will attempt to get you the highest volume of optimized actions within your budget. No concern will be given to value, ROAS, or cost per action. More. If you are advanced, you can try out other bid strategies as well.
If you chose the website conversion location, Meta will utilize an Attribution Setting for determining how conversionsA conversion is counted whenever a website visitor performs an action that fires a standard event, custom event, or custom conversion. Examples of conversions include purchases, leads, content views, add to cart, and registrations. More are attributed to your ads.
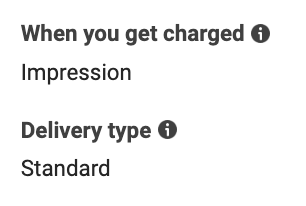
By default, you’ll be charged by the impression and utilize the Standard delivery type. In most cases, these settings can’t be changed.
You can turn on Dynamic Creative.

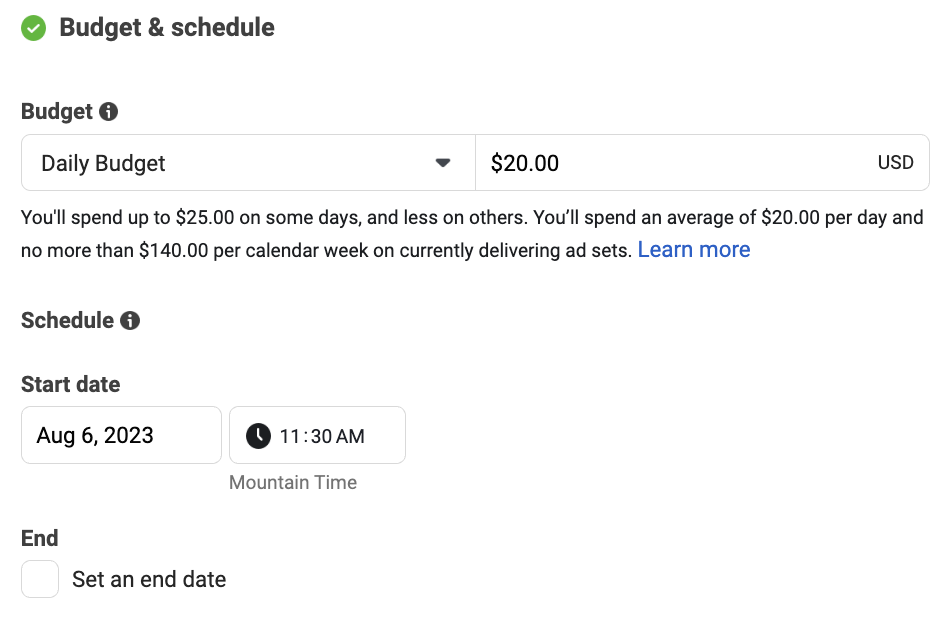
Set a daily or lifetime budgetAdvertisers have the option of setting a daily or lifetime budget. A lifetime budget lets you set a spending limit for the lifetime of an ad set. Meta will attempt to evenly spread the amount you spend across the dates that you've selected. More and determine when your ads will run.
Determine the people you will reachReach measures the number of Accounts Center Accounts (formerly users) that saw your ads at least once. You can have one account reached with multiple impressions. More within the Audience section.
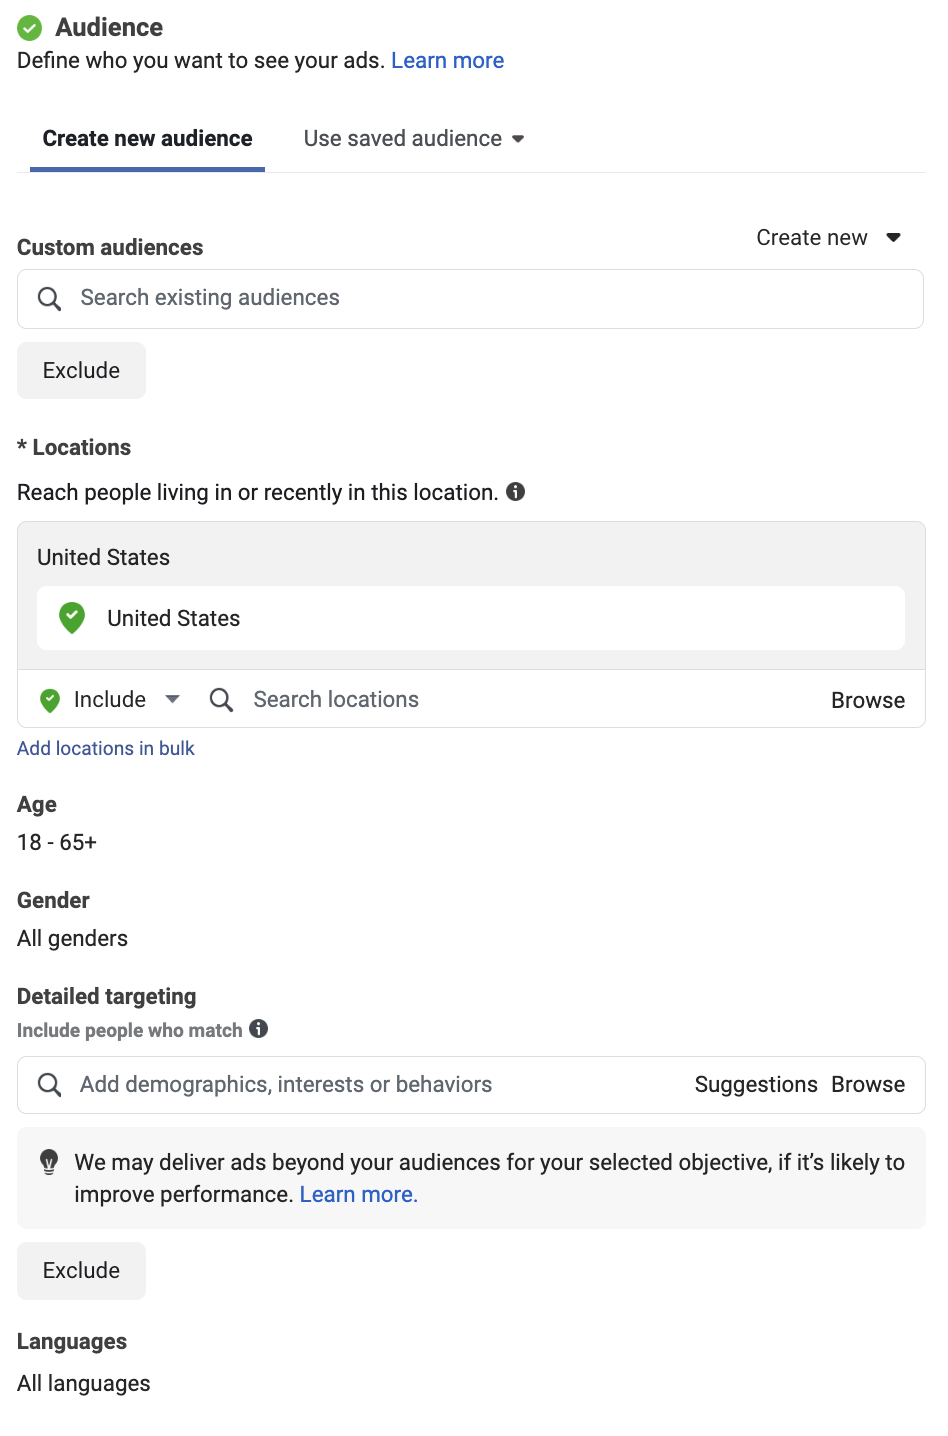
This includes:
- Custom audiences and lookalike audiences
- Locations
- Age
- Gender
- Detailed Targeting
- Languages
Read this post for more details about your targeting options.
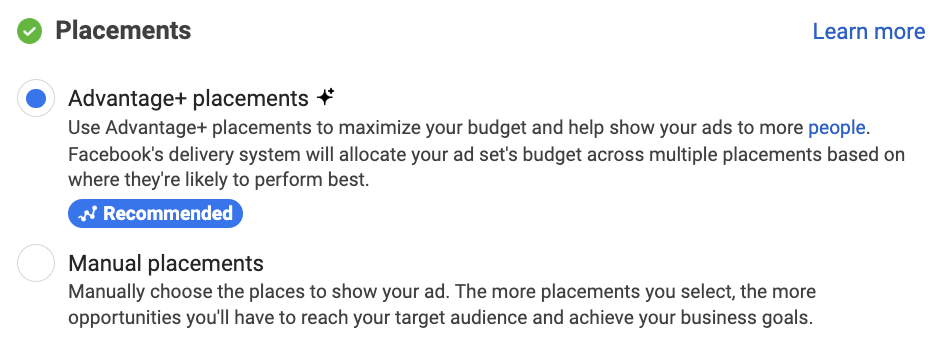
Choose your placements. It’s generally recommended that you use Advantage+ PlacementsFormerly known as Automatic Placements. When you utilize Advantage+ Placements, Meta will automatically optimize which placements are used and when to get you the most results for your budget. More, but there are exceptions.
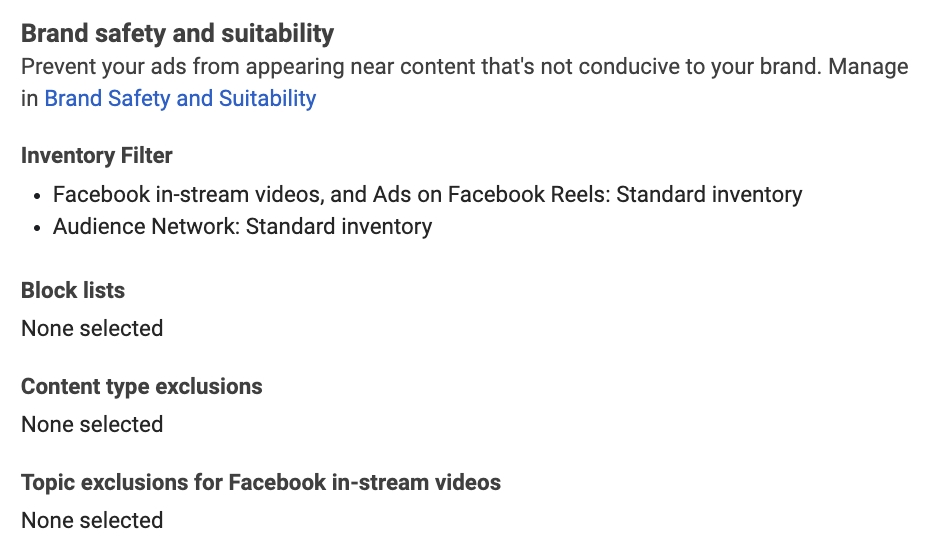
There are some buried Brand Safety and Suitability options to restrict where your ads are shown. This won’t be used in most cases.
3. Ad
Within the ad, you’ll…
- Name your ad
- Select your Facebook page and Instagram account
- Determine ad setup
- Choose an ad format
- Add copy and creative
- Add a CTAA call-to-action is a button or link on your ad that suggests the action you want your audience to take. Examples: "Learn More" or "Sign Up." More button
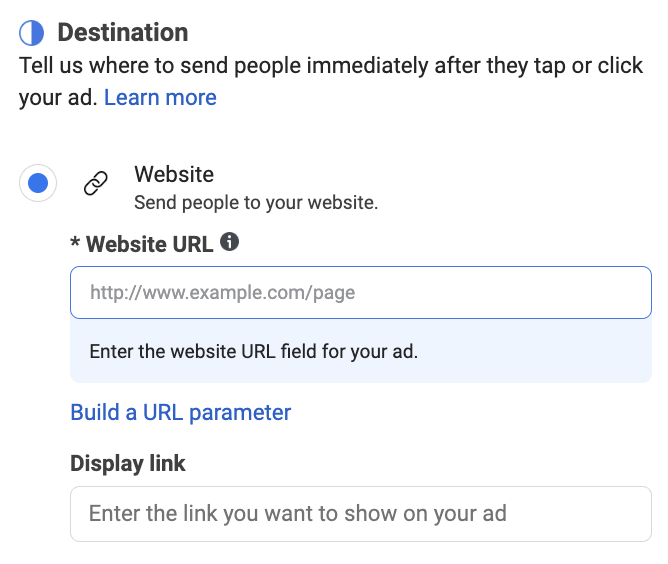
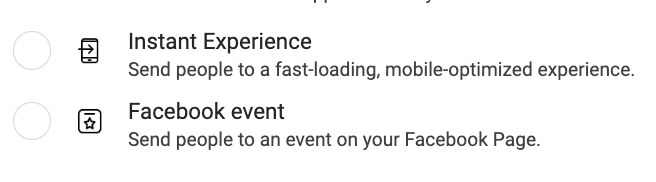
- Choose your destination (website, instant experience, or Facebook event)
- Control tracking
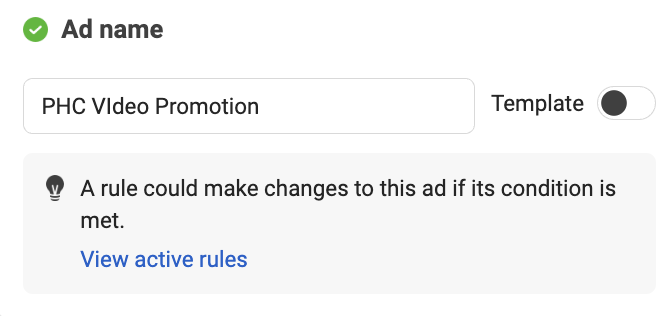
Name your ad.
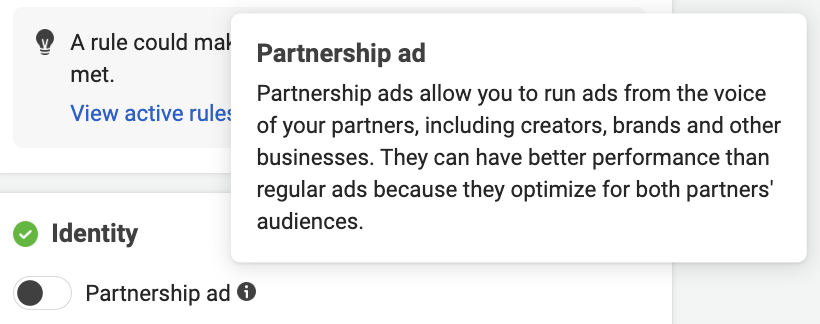
If you’re running a Partnership Ad with partners or creators, you’ll need to indicate that here.
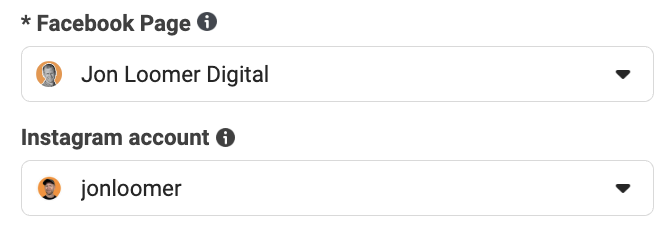
Select your Facebook page and Instagram account.
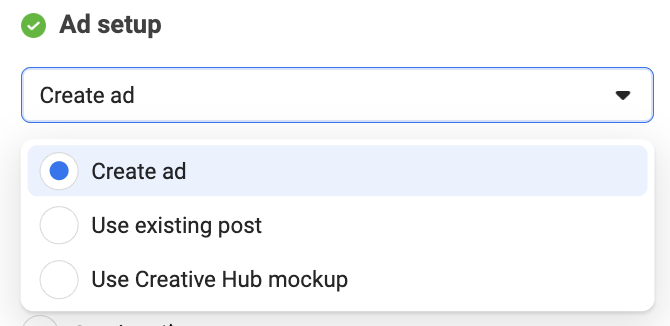
Choose whether to create an ad from scratch, promote an existing post, or import a Creative Hub mockup.
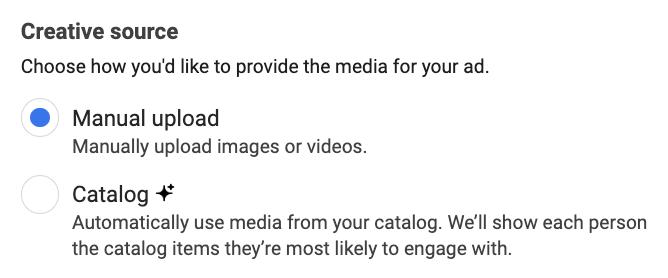
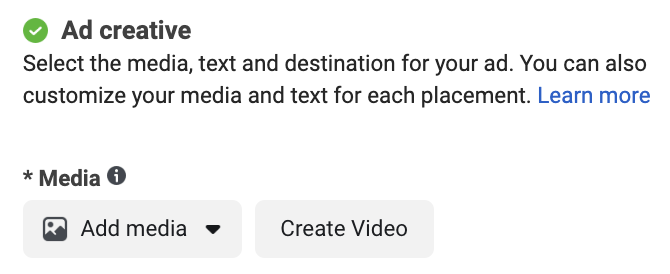
Manually upload your images and videos or have them pulled from a catalog.
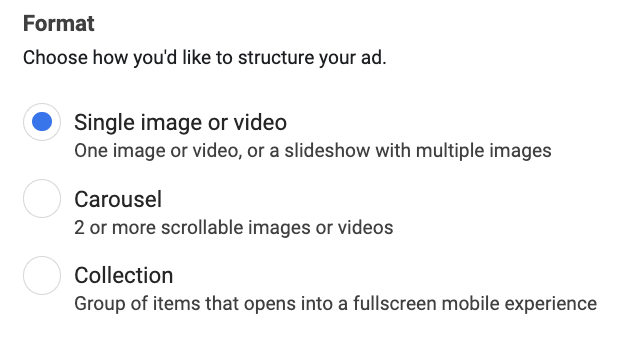
Choose an ad format (single image or video, carouselA carousel allows you to display two or more scrollable images or videos in the same ad, with the ability to link each to a different URL. More, or collection).
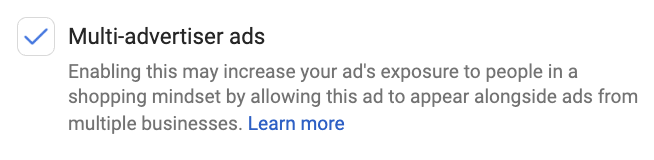
Determine whether you want to opt-in to Multi-Advertiser Ads and have your product displayed in a carousel alongside other advertisers’ products.
Add the image or video you’ll use for your ad.
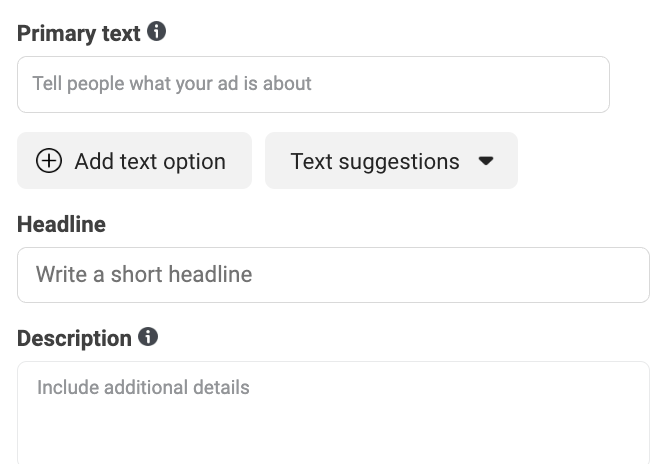
Provide your primary text, headline, and description. Submit multiple options if you’d like.
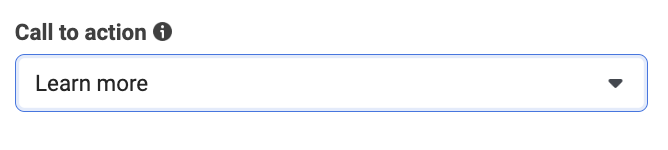
Select a CTA button that is appropriate to inspire action on your ad.
Provide the website URL (where the user will be sent when they click) and display URL (the domain that is displayed under your ad).
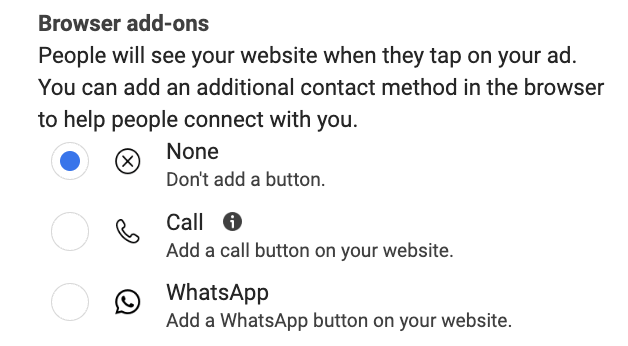
Add a browser add-on like the Call Extension or Instant Form.
Instead of sending people to a URL, you can choose to send them to an Instant Experience or Facebook Event.
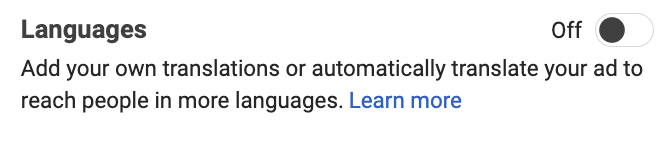
Add manual translations for multiple languages.
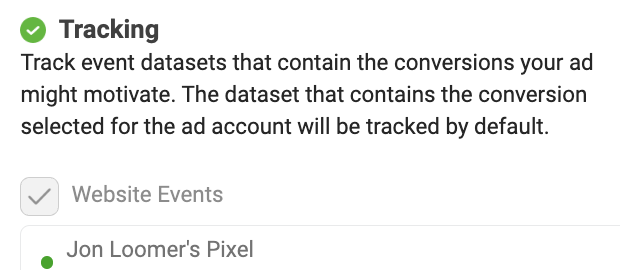
Choose how conversions will be tracked (website events, offline events, or app events).
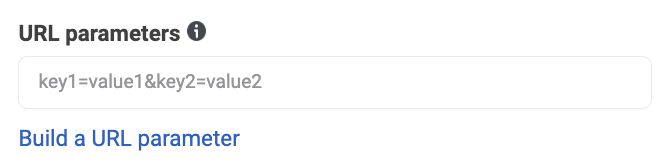
Set URL parameters for tracking using third-party analytics tools.
Your Turn
There’s a lot that goes into creating a campaign, but this should get you started. For more information about these steps, make sure to click through to the links provided throughout this post.
Have any questions? Let me know in the comments below!