The process of adding standard events can be confusing and overwhelming for some publishers. Automatic Events can help.
Let’s explain what Automatic Events are and how you can turn them on.
What Are Automatic Events?
Assuming that you already have the Meta pixel on every page of your website, Automatic Events can be generated without adding code — or any effort at all.
Facebook detects these events through contextual activity happening on your website. Facebook doesn’t provide clear examples, but we can make some assumptions about how this might work. Button clicks, submitting forms, and submitting payment info are examples of context the pixel could detect to set up an event automatically.
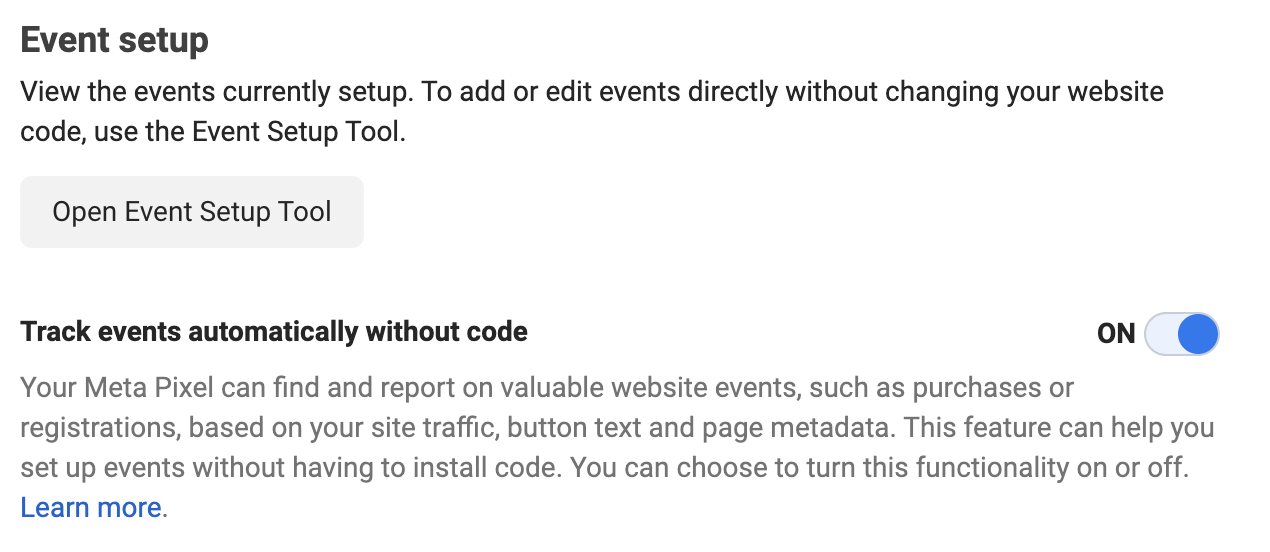
How to Turn Automatic Events On
To turn this feature on, go to Events Manager and select your pixel from among the data sources on the left. Then go to Settings.
Find “Track Events Automatically Without Code” under Event Setup and toggle it “on,” assuming it wasn’t on already.
What Happens?
Assuming you hadn’t previously created events and you toggle this on, you should start to see events generated — assuming, of course, you have traffic and events that Facebook can detect.
Once those events start happening, you’ll be able to get reporting for those actions, optimize for those events, and create website custom audiences to target people who performed those events.
Know that this shouldn’t necessarily be seen as a replacement for creating events manually. And if you create events manually, it doesn’t mean that you should toggle Automatic Events off (Facebook recommends you do both).
If duplicate events are ever created, Facebook will deduplicate them. You won’t multiply your reporting because you use both automatic and manual events.
Don’t expect any noticeable changes, necessarily, but using Automatic Events is just good practice.
Your Turn
Do you have Automatic Events turned on?
Let me know in the comments below!