


Local, federal, and national governments on social media have a tough job. They need to educate their audiences, build trust, communicate essential information, and respond to complaints and queries.
When it comes to reaching and engaging audiences, Facebook is still hard to beat. According to Pew Research Center, seven in ten Americans use the platform, making it the second most used social media site behind YouTube.
Before you worry about your posting strategy, getting your Facebook page in decent working order is essential. With that in mind, in this article, we’re going to look at how government agencies can get the most benefit from their Facebook Pages.
1. Encourage Followers to Join the Conversation
Social media for government agencies shouldn’t be a one-way dialog; it should be an opportunity to strike up a two-way conversation with your followers.

When people comment on your posts, it shows they’re engaged with your message or have something to add to the narrative. Not only that, but the more people engage with your posts — by commenting, liking, and sharing — the more widely your content will be seen.
However, if you’ve spent more than a few seconds on social media, you’ll know that not all comments are equally deserving of attention.
If your followers see an endless stream of low-quality comments, they’ve got little incentive to get involved.
But you likely don’t have the time to go through every new comment on your Facebook page and only approve those of the highest quality.
For that reason, we recommend government agencies switch on comment ranking.
That means Facebook will give greater prominence to:
- Posts with lots of likes
- Posts with lots of replies
- Posts from verified pages and profiles
Only page admins can activate comment ranking.
To do it, log in to your Facebook account on a computer, then follow these steps:
- Click Pages in the left menu
- Navigate to your page
- Click Page settings
- From the General tab, click Comment ranking
- Tick the box next to: “See most relevant comments by default.”
- Click Save changes
2. Allow Followers to Reach You Via Live Chat
There are many reasons why Facebook users might want to speak to government agencies.
They might want to learn about your work or have questions or complaints. Maybe, just maybe, they want to congratulate you on a job well done!
Either way, it should be as easy as possible for them to get in touch.
And when it comes to simplicity, live chat wins every time.
According to research from Kayako, live chat is consumers’ favorite way to communicate with brands and organizations:
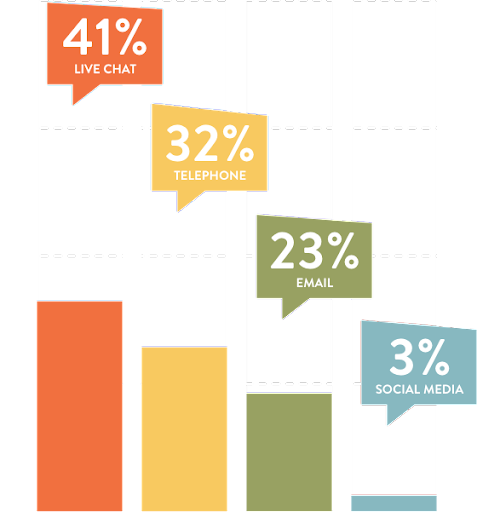 Image source
Given its speed and convenience, it’s not hard to imagine why live chat has become so popular. So it makes sense to add live chat support to your Facebook page.
Again, you’ll need to be a page admin to switch on private messaging. Follow these steps to make it happen:
- Click Pages in the left menu of your news feed
- Head to the relevant Facebook page
- Click Settings
- Go to General and click Messages
- Tick the box next to: “Allow people to contact my Page privately by showing the Message button.”
- Click Save Changes
You can also set up automated greetings so that people know what to expect from your live chat support the first time they reach out to you.
For instance, the Transportation Security Administration provides the hours that its support staff are on duty and advises users on how to get started:
To set up your greeting, click Messaging in your page settings and switch on “Show a Messenger greeting.” Then click Change and edit your greeting.
3. Drive Engagement With Top Fan Badges
Think how useful it’d be to identify your most engaged followers quickly.
You could prioritize responding to their comments and even reach out to them to help spread key messages among their followers.
You can, thanks to Facebook’s top fan badge feature. Launched in December 2019, it adds a “top fan” tag to the people who most frequently like, share, and comment on your posts.
Here’s how it looks on the National Park Service’s Facebook page:
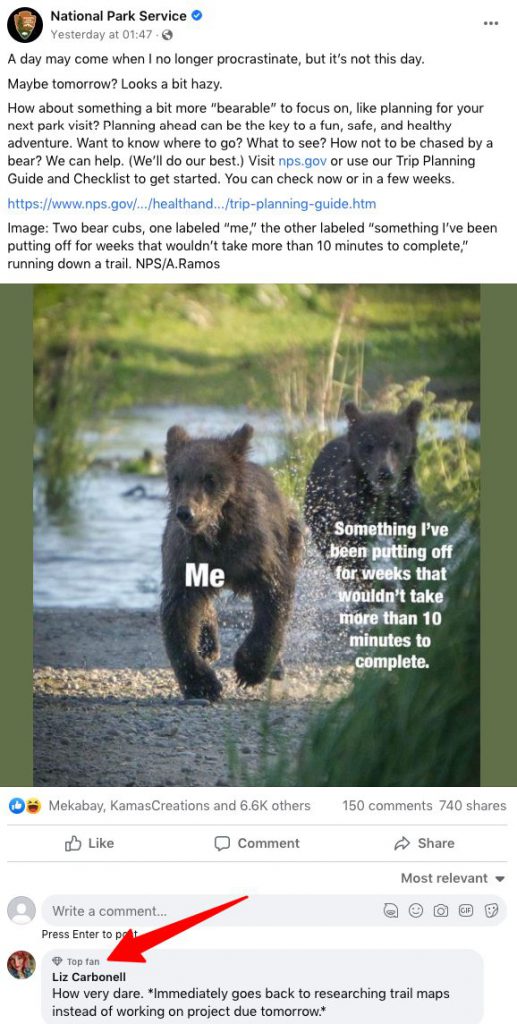 Image source
As well as flagging engaged followers, this feature helps you build a stronger community by encouraging people to get more involved to earn their badges.
It’s easy for page admins to activate top fan badges:
- Click Settings on the relevant Facebook page
- Click Facebook badges in the left column
- Click to turn them on
Everything else happens automatically.
4. Pin Your Best (Or Most Important) Content
Social media users have short attention spans.
So when someone lands on your Facebook page for the first time, you want to put your best foot forward.
Just as a swanky restaurant might employ a maître d’ to greet diners, government agencies on Facebook should ensure new visitors get to see their best — or most important — content first.
You can make that happen by pinning a post to the top of your Facebook page, like the Department of Health and Human Services does here:
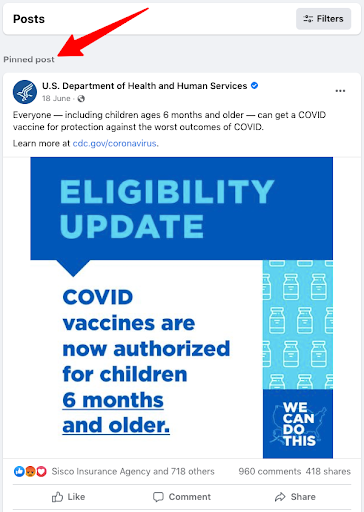 Image source
Admins can pin a post to the top of their Facebook page by:
- Clicking Pages in the left menu
- Navigating to the Facebook page and scrolling to find the post you want to pin
- Clicking the three dots in the top right corner of the post
- Selecting Pin to top of Page
5. Manage Facebook Page Tabs
Using social media for government is about amplifying important messages and helping people find the information they need.
Part of the puzzle lies in effectively organizing your content.
Beyond adding a pinned post to the top of your page, there’s not much you can do to organize your posts. But you can play around with your Facebook tabs — navigational elements that appear toward the top of the page and guide visitors toward specific content sections.
You can re-order, add, and remove certain tabs, allowing government agencies to prioritize the most important information and delete any irrelevant ones.
For instance, the US Department of Commerce has chosen to feature About, Mentions, Followers, Photos, and Videos as its primary tabs:
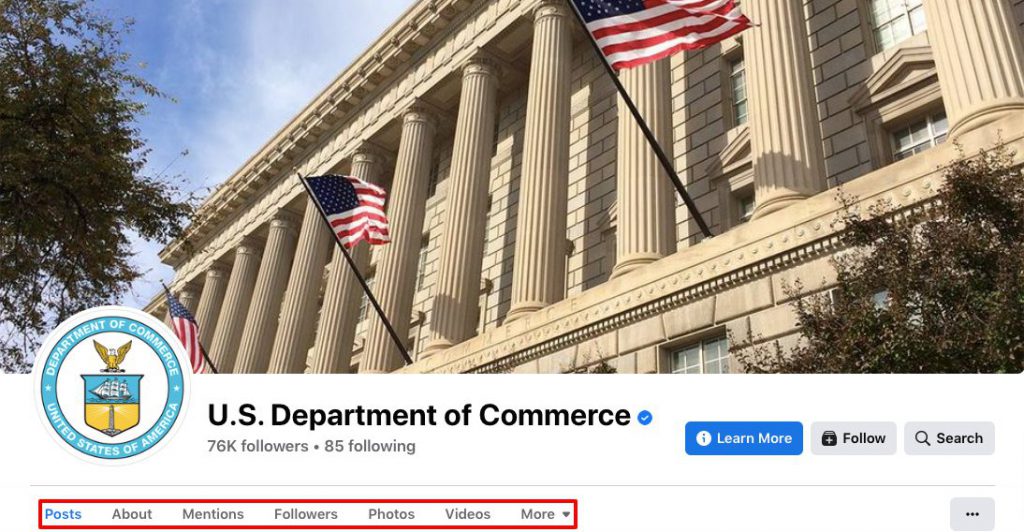 Image source
While the Department of Agriculture has swapped Videos for Reviews:
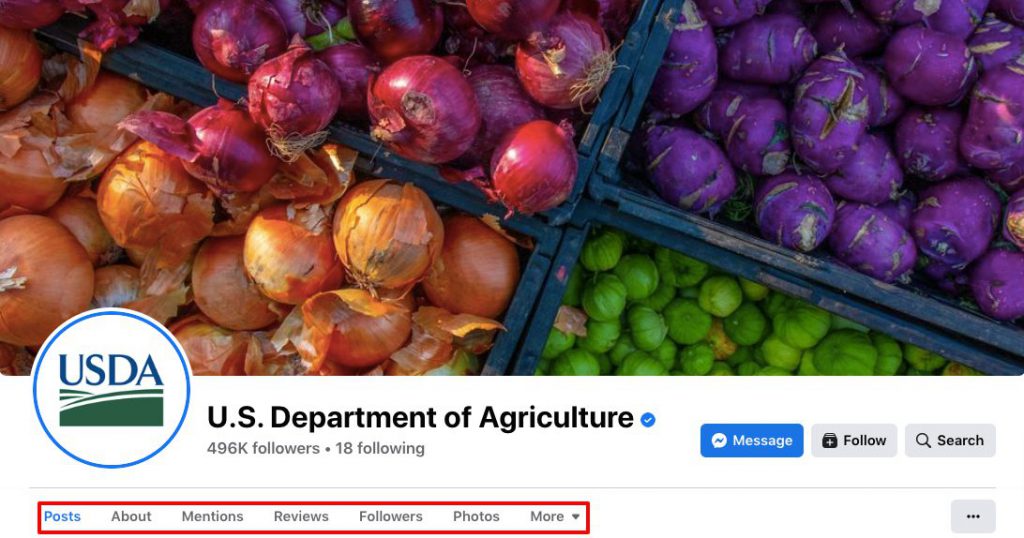 Image source
To reorder, add, or remove tabs from your Facebook page:
- Click Pages in the left menu
- Click Settings on your page
- Click Templates and tabs in the left column
- Click and drag a tab to reorder it
- Click “off” the tab you want to remove
- Click “on” the tab you want to add
That way, your followers only see tabs that are relevant and useful to them.
6. Create Complementary Facebook Profile & Banner Images
Government agencies need to look polished and professional at all times.
You (probably) wouldn’t expect a city mayor or a senior government official to show up for a TV interview in shorts and sandals. And you shouldn’t cut corners with your Facebook page.
One of the best ways to build a professional-looking page is to add complementary images to the profile picture and banner image sections.
The Department of State gets this right by using similar color schemes and even replicating its profile logo within the banner image:
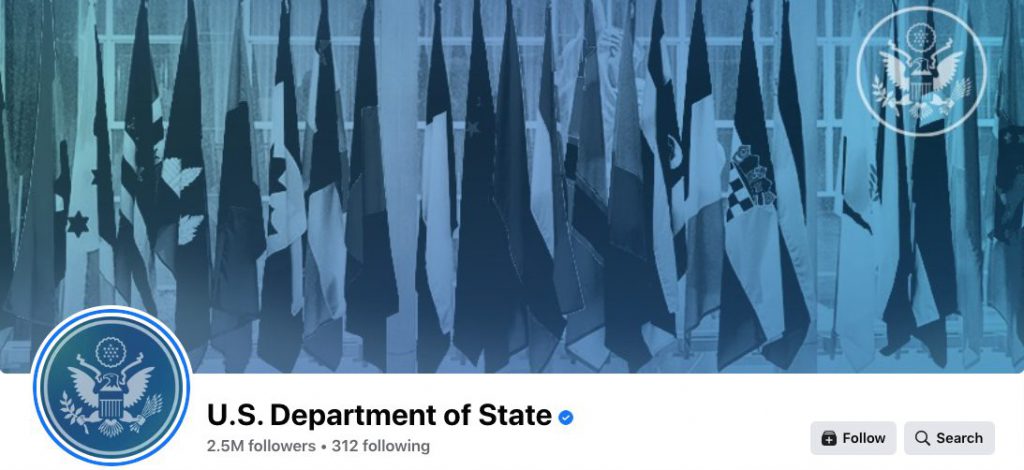 Image source
Don’t worry if you don’t have access to a graphic designer because Canva offers many fully customizable templates for Facebook banners and profile pictures.
(Want more software recommendations? Check out our roundup of the best time-saving tools for small social media teams.)
7. Get Verified
Having a verified Facebook page makes you look more trustworthy. And as we discussed in the section about comment ranking, it gives your comments greater prominence, which is a great way to grow awareness of your agency.
While pretty much every big government agency is already verified, we know plenty of smaller agencies that aren’t. You don’t need hundreds of thousands of followers; we’ve seen verified pages with only a few hundred followers.
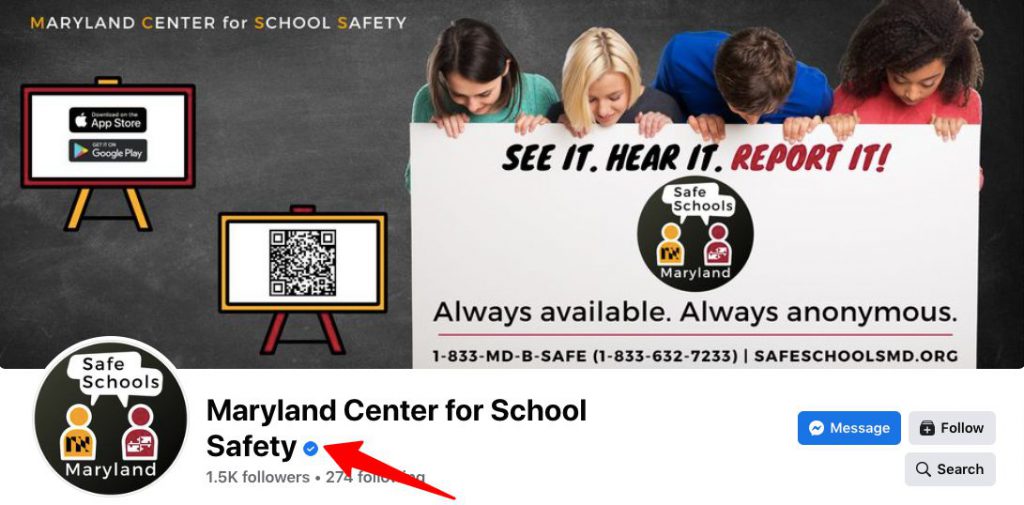 Image source
Before you apply, make sure your Facebook page is complete. As a minimum, it needs:
- An About section
- A page or profile photo
- Recent activity, including at least one post
You should also only have a single page for your organization. If you’ve previously set up additional pages, close them down if you want to get verified.
Provided you tick all those boxes, you can apply for verification by completing a simple online form.
Claim a Vanity URL
When you first set up your page, Facebook provides a generic URL containing a bunch of random letters and numbers. Not very memorable and not very shareable.
If you’re still using a lengthy address or haven’t created your Facebook page yet, swap it for a vanity URL, like facebook.com/youragency (e.g., the Centers for Disease Control and Prevention has the URL facebook.com/cdc).
Follow these steps to claim your vanity URL:
- Click here
- Select your page from the dropdown menu
- Enter the name of your agency or how you want it to appear in the URL
- Click the Check Availability button
- As long as your chosen name is available, click Confirm to set it as your URL
9. Add Clear Instructions to Your About Tab
The About tab allows you to spell out what your Facebook page is about. Use it to explain:
- Who you are and what you do
- The purpose of your Facebook page
- How you want people to interact with it
Here’s how the US Postal Service does it:
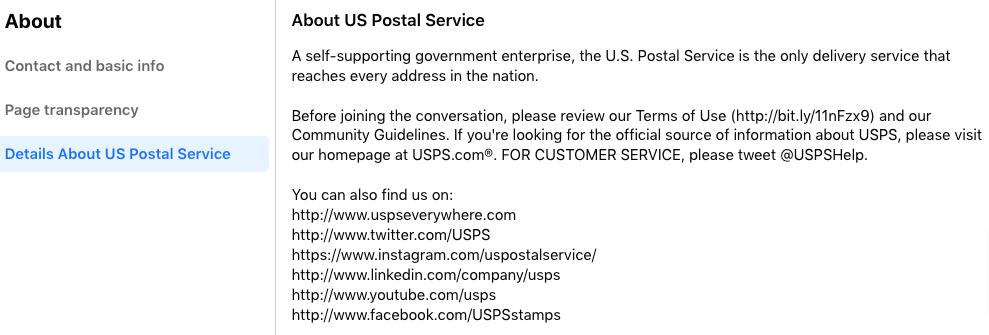 Image source
In just a few sentences, it presents its terms of use and community guidelines, instructs people to visit its website for official information, and points them toward Twitter for customer service queries.
That way, followers know what to expect.
10. Add a CTA Button
Calls to action (CTAs) are more typically associated with businesses. Ecommerce sites might compel visitors to “shop now,” while restaurants use CTA buttons to drive reservations.
However, they can be just as applicable to government agencies. For instance, the Department of Justice uses a CTA button to encourage users to “learn more” about the agency:
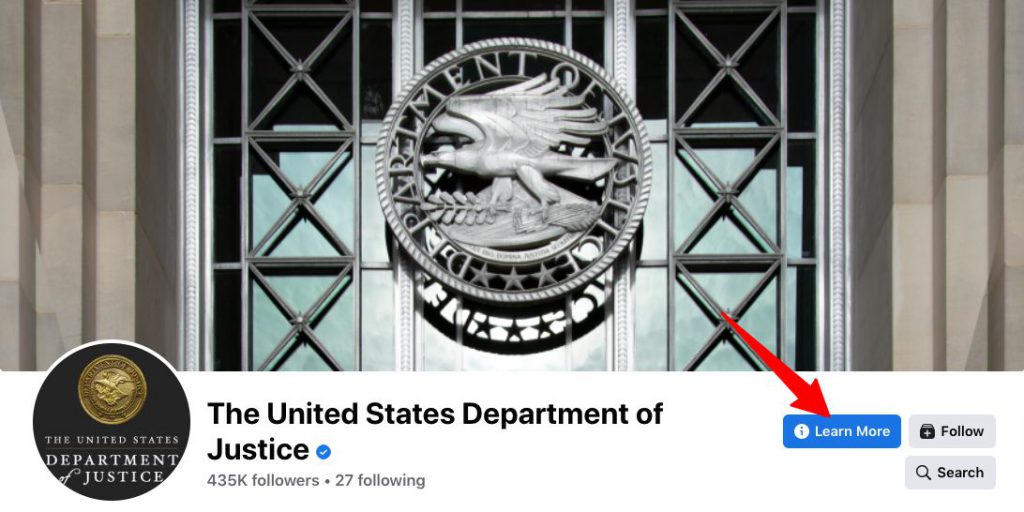 Image source
You can edit the text on your CTA button and choose what happens when someone clicks it, such as sending them to a landing page or opening a live chat conversation.
Follow these steps to add a call-to-action button to your page:
- Log in to Facebook and navigate to the relevant page
- From your page, click the three dots, then click Add Page Button
- Choose a button and click Next
- Run through the on-screen instructions and click Save
Don’t miss our next government social media conference to learn more about social media marketing for government agencies.
Here are some similar articles you might enjoy:
- 10 Government Agencies Killing it on TikTok
- 6 Things to Know About Building Your Brand Voice as a Government Agency
- How Government Agencies Can Best Engage Their Communities on Facebook


