
Don’t like waiting for the macOS software update to complete? You are in luck, there’s another way to update your Mac. Using the Terminal, you can update your Mac and can dump the traditional way of updating macOS. Moreover, if you are using an older Mac device, you can download updates quickly, this process update macOS in the background. In simple words, this means you can continue using the Mac when the updates are installed. This makes updating Mac via Terminal a great idea.
Fact Check – Using a script, you can remotely install updates on the Mac machines connected to the server.
Also Read: Best CleanMyMac X Alternatives to Clean Mac
How to update macOS via the Command Line
Before following the steps explained below make sure you have a full backup of all the important data. This helps stay safe from any unforeseen situations. Also, the update process explained only helps update iTunes, printer driver, Photos, and other Apple systems apps. You cannot update apps that don’t come pre-installed.
Steps to update macOS
Keep administrator password handy as you will need it to download and install updates.
1. Type Terminal in Spotlight or open Finder and head to Applications > Utilities > Terminal

2. Type the following command:- softwareupdate -l

3. Wait for it to search for available updates present in Apple’s servers. If no updates are available, you will get a message “No updates available.” However, if updates are available. The terminal will show a list of updates with the file size.
4. To download and install the update type: – sudo softwareupdate -i ‘NAME’
Make sure you replace NAME with the update you want to download and install. Say if you want to update macOS 10.14.13 replace NAME with macOS 10.14.13 update.
Tip: The name of the update is also known as an identifier, and it is written next to the star/bullet.
1. To perfectly download and install the update, type the correct identifier. Make sure there are no extra spaces at the end of the identifier.
2. To install the updates type:- sudo softwareupdate -i -a
-a command gives instructions to the Terminal to install updates. Since both the commands are sudo, entering the administrator password when asked for is a must.
Note: You won’t see any progress bar, instead Terminal will display a text message for each process.
3. If restarting the Mac is required to install updates, Terminal will show a message. Enter the password to allow Terminal to restart Mac automatically.
That’s it, using these simple steps you can download and install the specific update. Using this method, you can download macOS and Apple’s major app updates via Terminal. However, to download third-party updates, you will need to head to the Mac App Store or go to System Preferences > Software Updates.
How to keep Mac Optimized after installing updates?
Now that the updates are installed, it’s time to learn how to keep Mac optimized for fast and better performance. Like all machines, Mac also slows down over time. Hence, it is important to keep it cleaned and clutter-free.
Doing this manually, is surely a cumbersome process, as it becomes complicated to locate where all junk files and unnecessary data reside. To make things easy, using the Best Mac Optimizer like Cleanup My System is suggested!
Running this excellent Mac optimizer will help you identify junk files, caches, log files, old/large files, local mail attachments, and other unnecessary data cluttering your Mac.
How to Optimize Mac Using Cleanup My System?
To use Cleanup My System to optimize your Mac, follow the steps below:
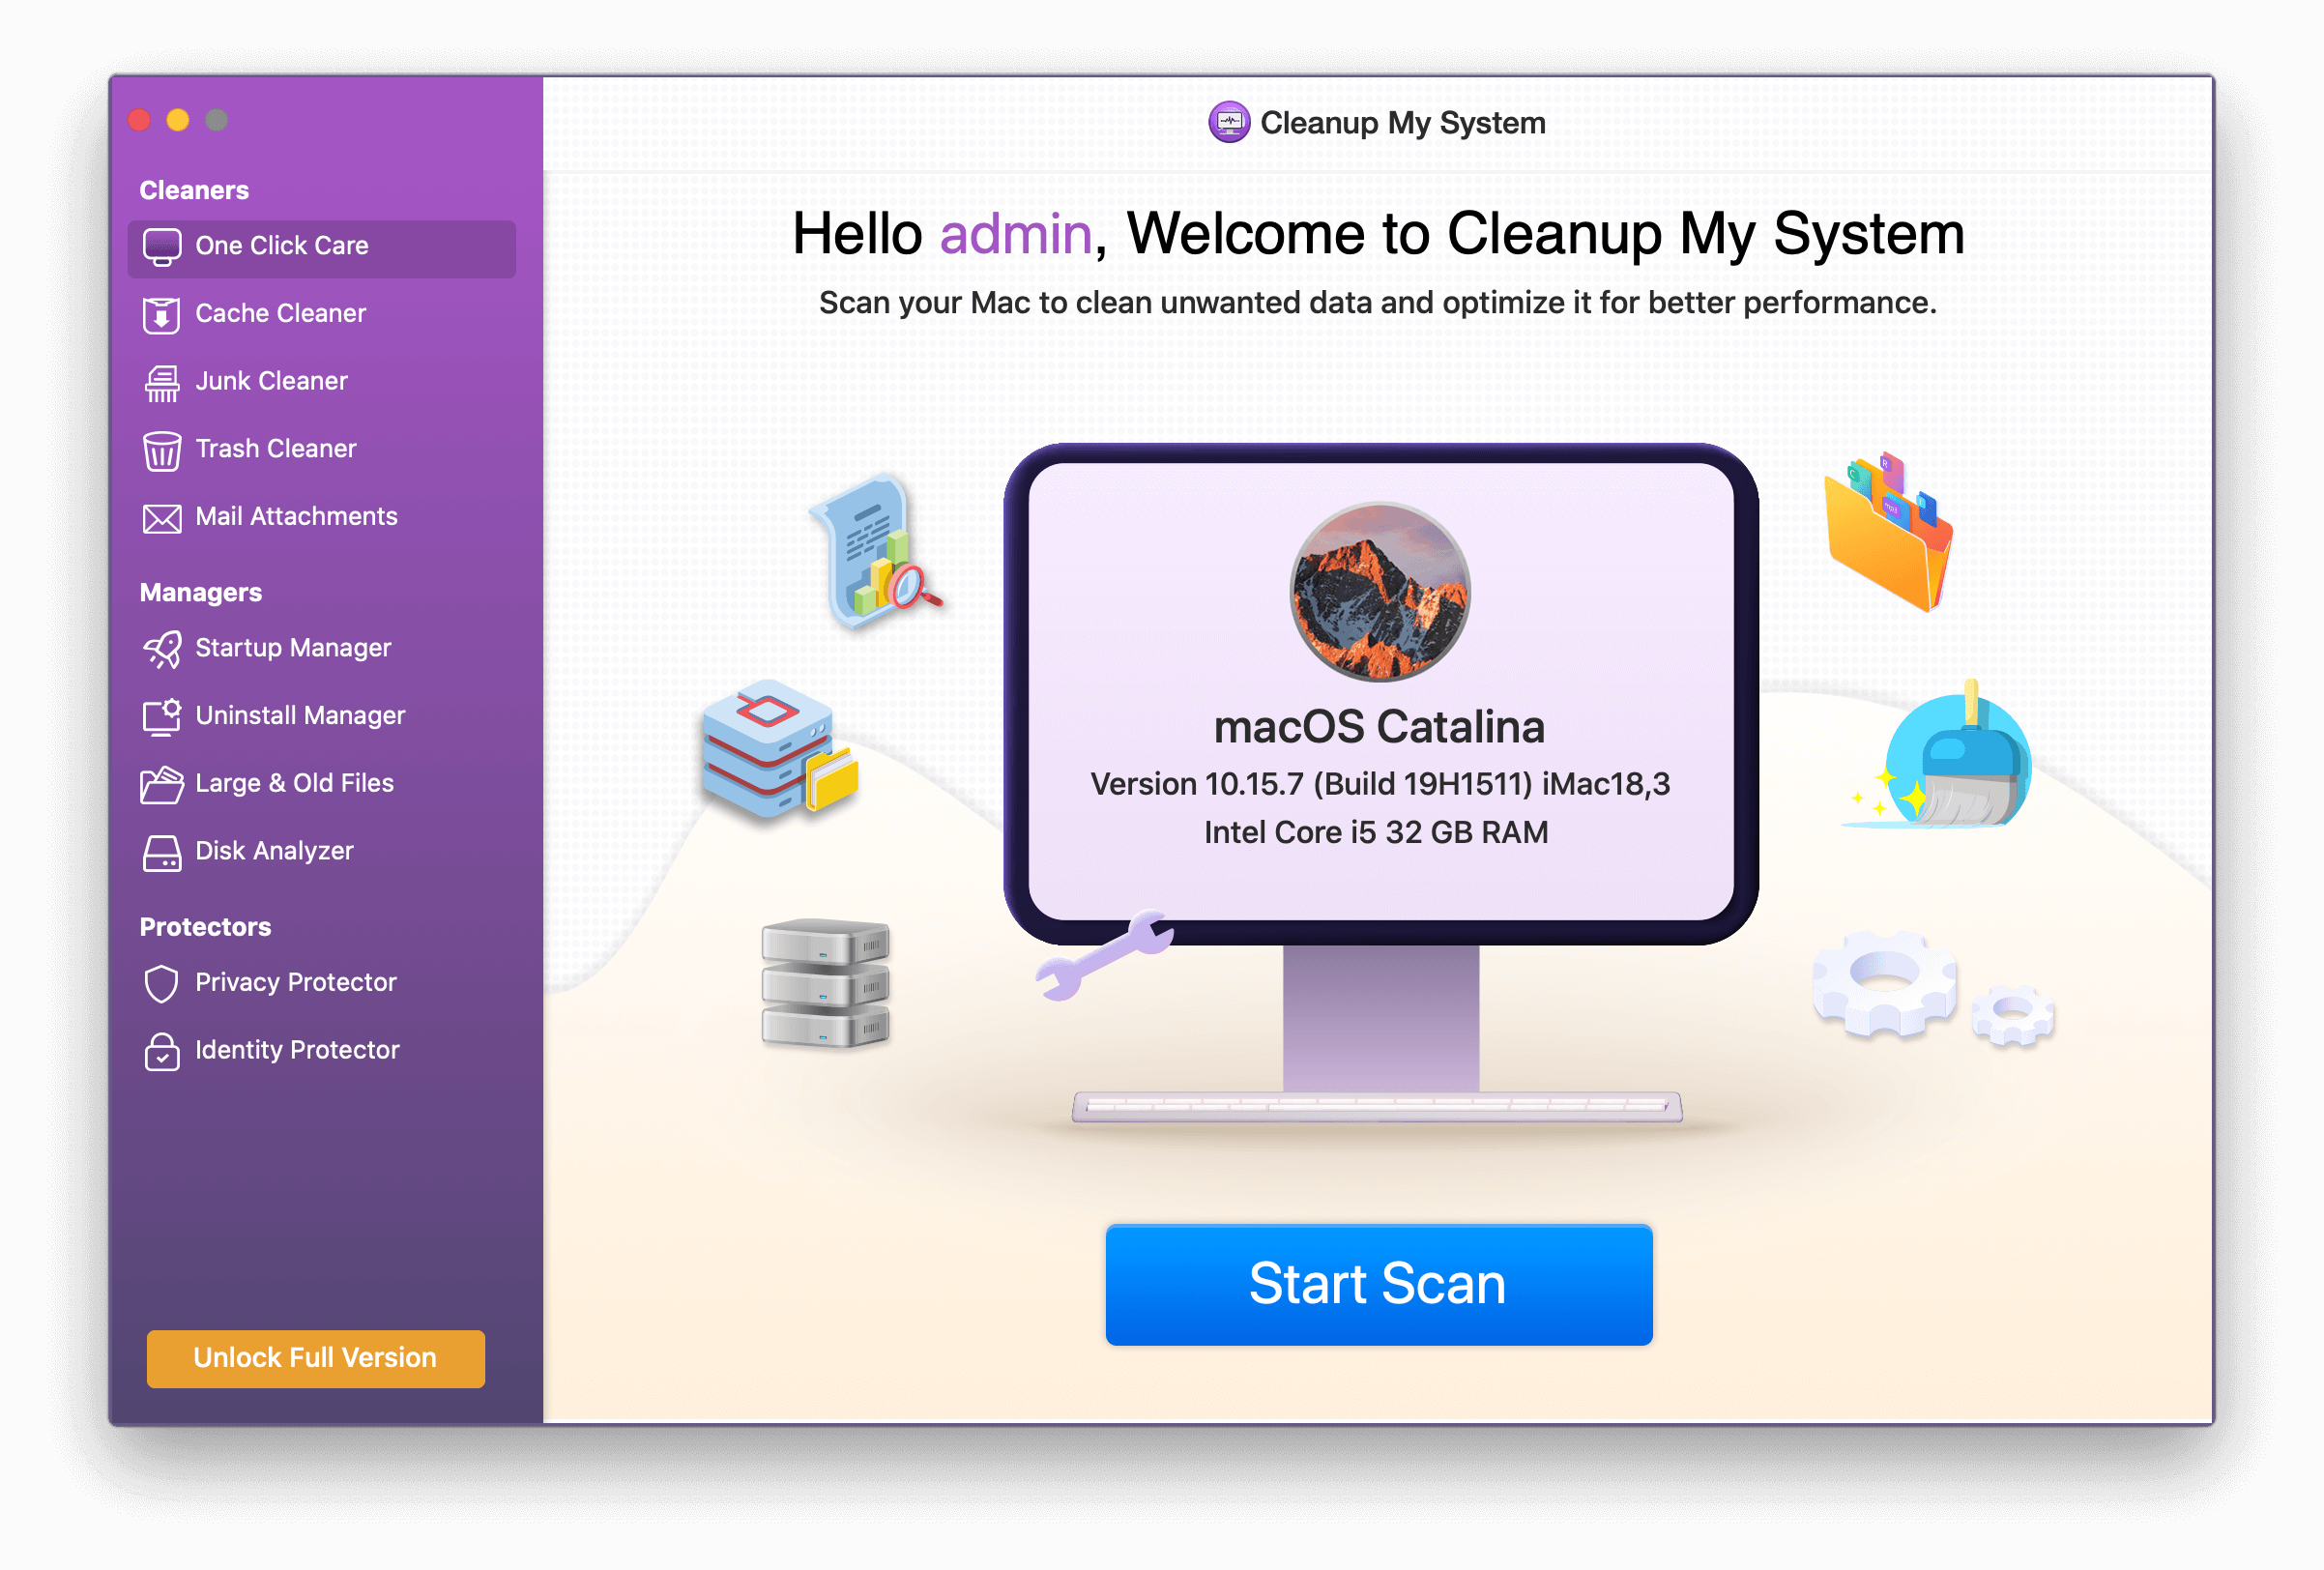
1. Download and install Cleanup My System on your Mac. It works perfectly on macOS 10.11 or later.
Click Here to Download Cleanup My System

Read The Complete Review Of Cleanup My System!
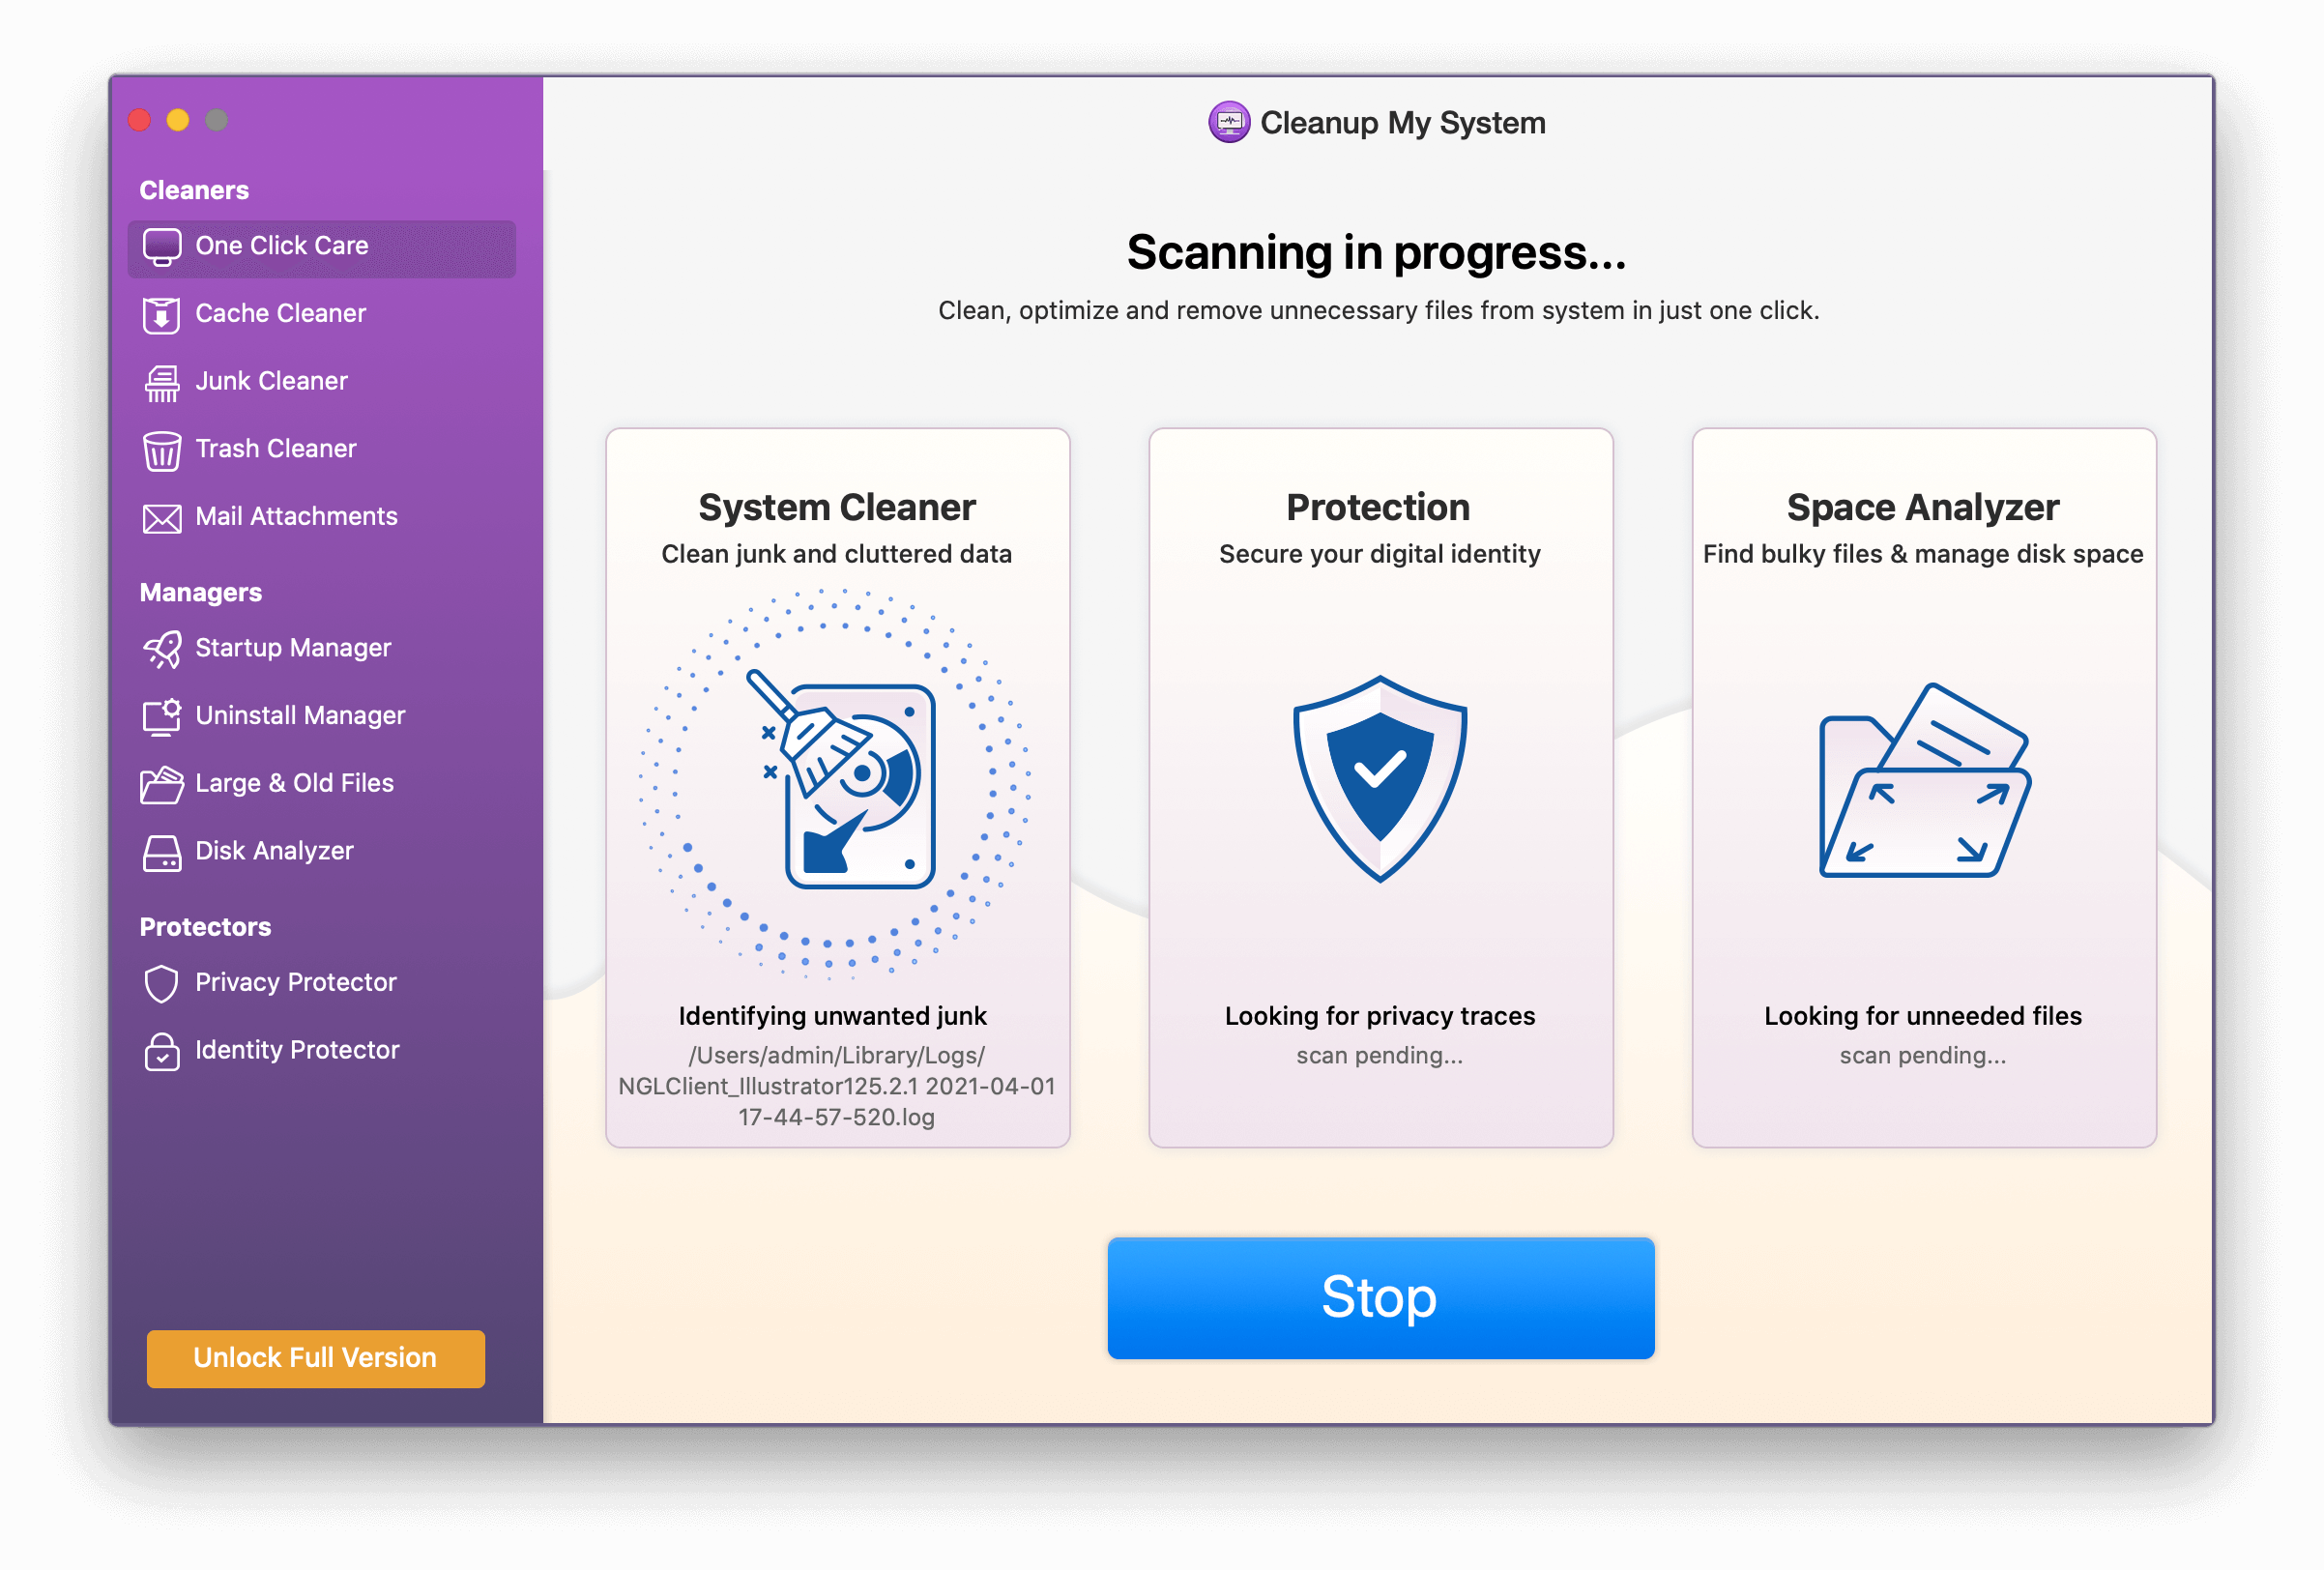
2. Launch the cleaning & optimization tool to detect junk files, caches, cookies, trash items, local mail attachments & other redundant data.
3. Under the One-Click Care module, find and hit the Start Scan button and wait for the process to get finished.
4. Once completed, you’ll see a list of all the temporary files, caches, log files, and other redundant data that can be cleaned in a single click. Hit the Clean Now button to proceed!
5. This will not only clean & tune up performance on Mac but will also help free up unnecessary occupied storage space.
Best Way to Boost Mac Speed & Overall Performance On Mac (2021)
For users with old Mac devices using Terminal to update macOS is great. This will help save time and stop encountering annoying errors and low disk space issues. Moreover, using Cleanup My System, users can clean cookies, browsing history, manage startup items (all of which are responsible for slowing down Mac) and uninstall applications you no longer use. We hope you will give this tool a try and use it for smoother performance than ever!
Do let us know how things went and did you like using Cleanup My System or not. Your feedback is valuable, and we love hearing from you. If you find this post helpful, share it with others!
Recommended Readings:
Common MacBook Problems and How To Fix Them
Best Mac Cleaner Software To Optimize Your Mac in 2021
How To Clean Up Cache Or Junk Files On Mac?


Leave a Reply