The Facebook Conversions APIConversions API provides a direct connection between your conversion results and Meta to be used for ad set optimization and reporting. Examples include both web and offline events. By using a Conversions API, you can send Meta a more complete picture of conversion activity to help improve your results. More allows marketers to send a direct connection of conversion data from their business (website and offline conversion events) to Facebook. This data combines with Facebook pixelThe Facebook pixel helps advertisers track events that occur on their website and reach people who performed those events with ads. More data to improve conversion tracking, optimizationThe Performance Goal is chosen within the ad set and determines optimization and delivery. How you optimize impacts who sees your ad. Meta will show your ad to people most likely to perform your desired action. More, and targeting capabilities. You can set this up using the ConversionsA conversion is counted whenever a website visitor performs an action that fires a standard event, custom event, or custom conversion. Examples of conversions include purchases, leads, content views, add to cart, and registrations. More API Gateway.
The truth is that every online business is set up differently. If you want to select from current Facebook Conversion API partners, you get 11 options.
And if you use a third-party tool to manage your Facebook pixel, they may also provide a Conversions API solution.
But considering the limitless options that make the set-up process so confusing for businesses everywhere, there’s one solution that should work for most businesses: The Conversions API Gateway.
Facebook says the Conversions API Gateway may be for you if:
- You’re already using the Facebook pixel.
- You’re not sending the web events using the Conversions API yet.
- Your monthly expense to optimize for web events is more than $2K.
- You’re not working with an eCommerce partner such as Shopify, WooCommerce, BigCommerce and others.
I can tell you it is for me. I spent months trying to find a reliable solution without success. The Conversions API Gateway is relatively easy is straightforward won’t make you want to break things. It’s not an easy, out-of-the-box, low-tech option. But, you can do it.
I’m going to show you how…
My Situation
I use Google Tag Manager to manage my Facebook pixel. There is now a GTM-specific solution for the Conversions API, but we actually found that more confusing. And I wanted to use a solution that would help more people, not just those using GTM.
The nice thing about the API Gateway is that you don’t need to create new events specifically for it. The Gateway automatically detects the events that you are already using for your pixel. Other solutions I tried wouldn’t recognize the events I created from a different tool, and I had to recreate them as a result (often leading to duplication issues).
Let’s get to it…
Create an AWS Account
My mistake when setting this up for the first time was that I followed instructions that assumed I already had an AWS account. I did not.
If you already have an AWS account, you’re golden. If you don’t, go here.
You set up an account for free. Monthly costs will apply based on usage levels. If you really want to crunch the expected costs, you can use the AWS calculator.
It’s not going to cost much for most businesses. If it does, you can probably afford the added costs.
Get Started
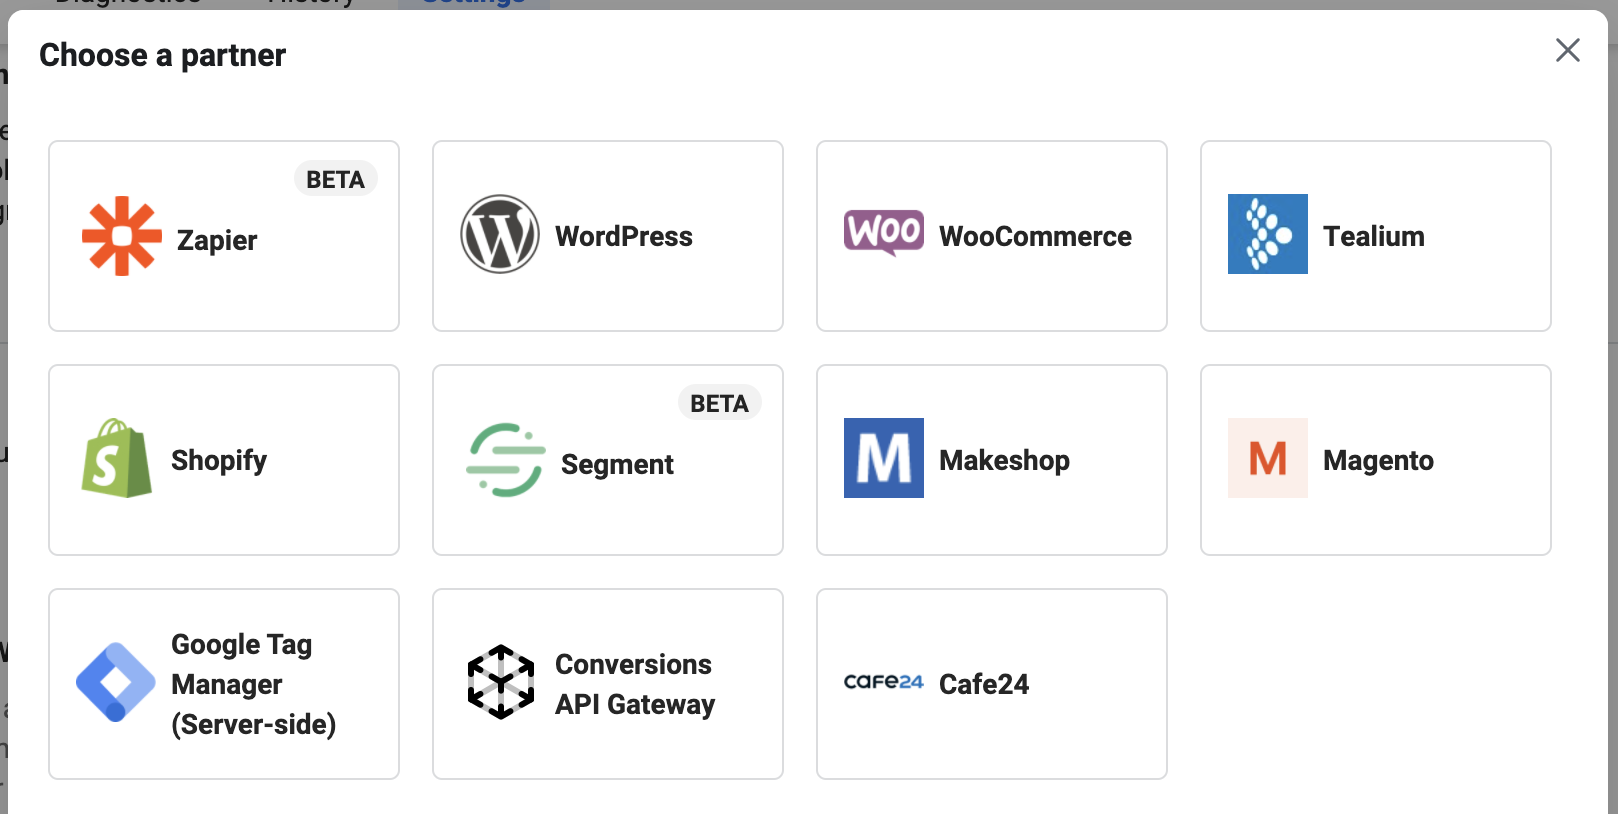
From your Events Manager, select the pixel that is associated with the business you want to connect to the Conversions API. Then go to the Settings tab and click “Choose a Partner” under Conversions API.
Select Conversions API Gateway.
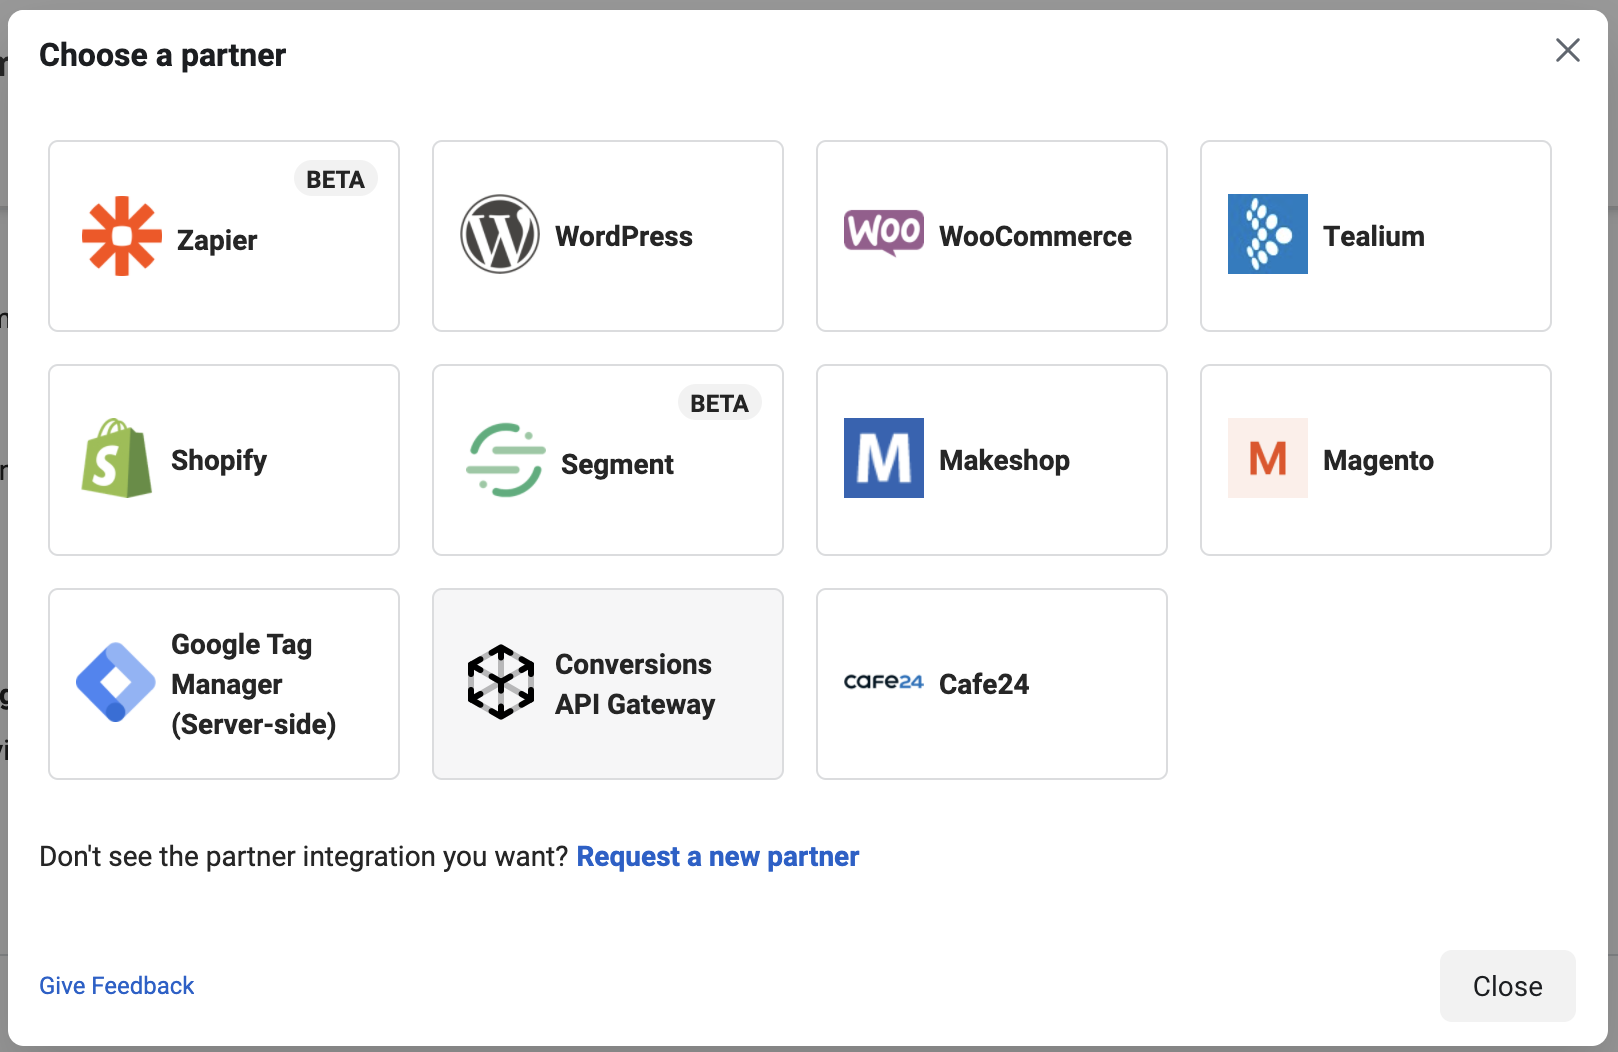
Next, you’ll get a screen that looks like this…
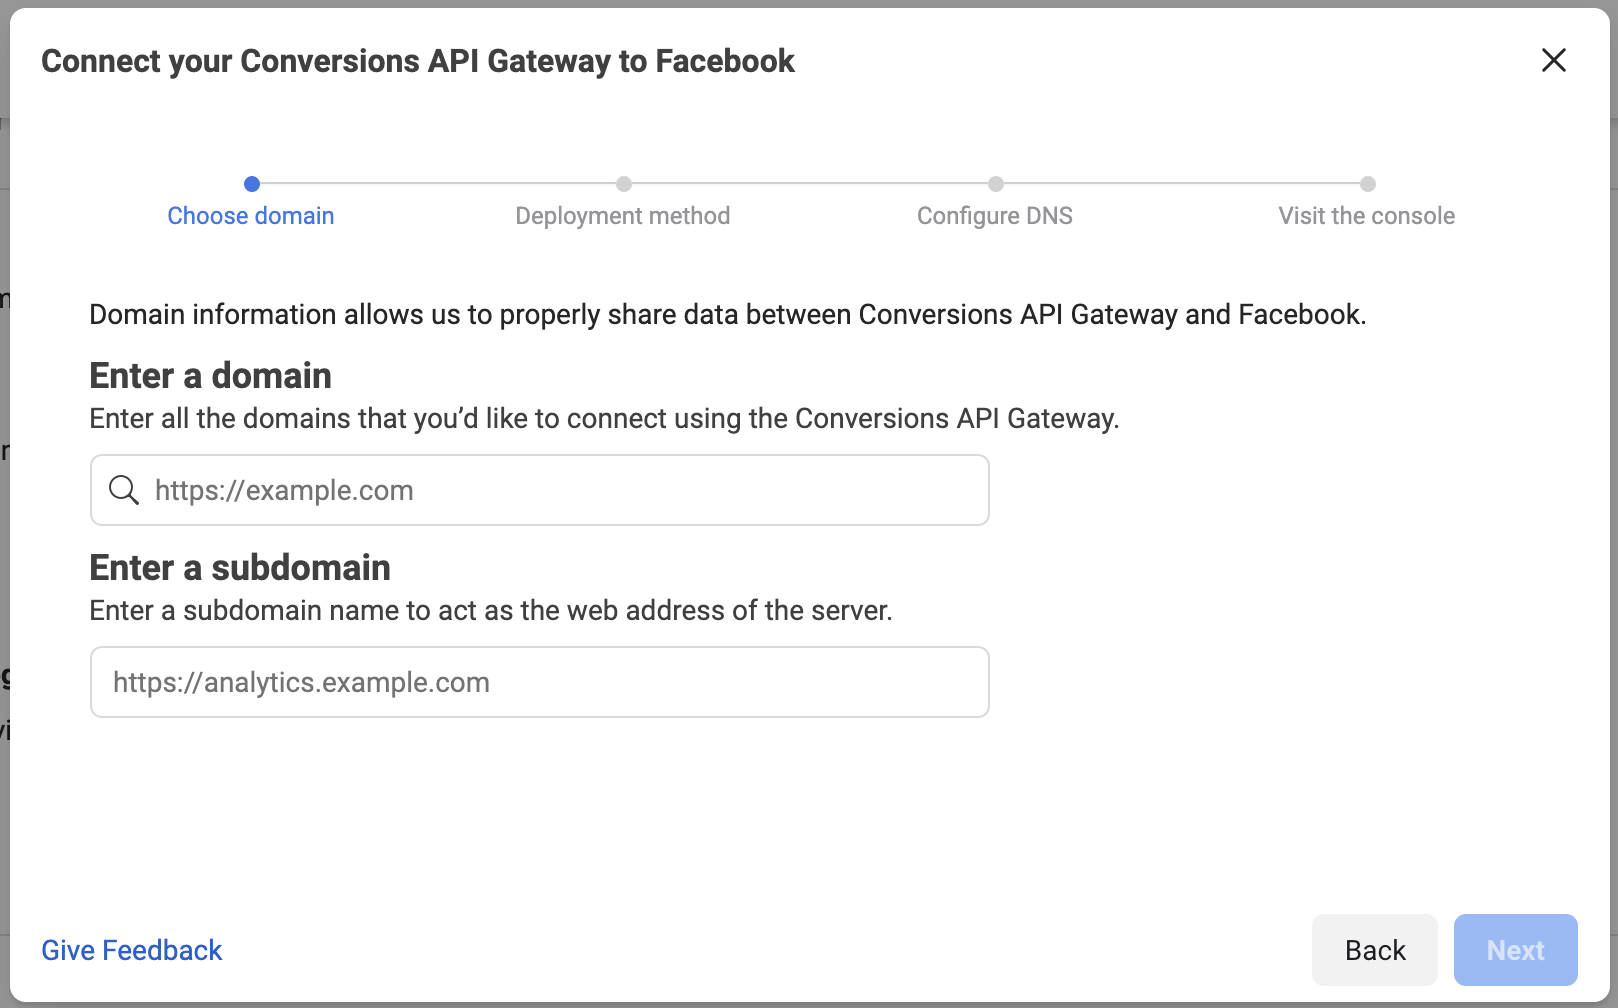
Under “Enter a domain,” enter all of the domains of your business’s website. This should include all variations and subdomains. Whether or not you use “www” matters here. Go to your homepage and copy the URL to confirm.
Next, you’ll need to provide a subdomain to act as the web address of the server.
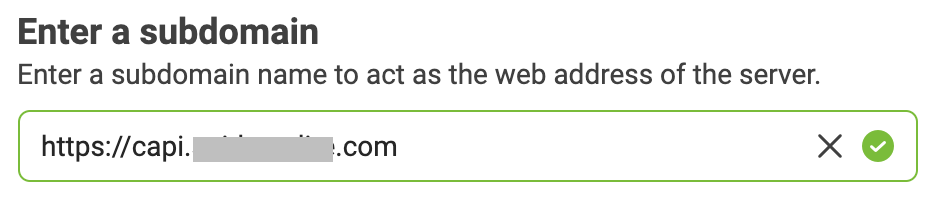
If you aren’t technical, this isn’t as scary as it sounds. This page doesn’t exist yet. We’ll get to that. It could be something like capi.mydomain.com.
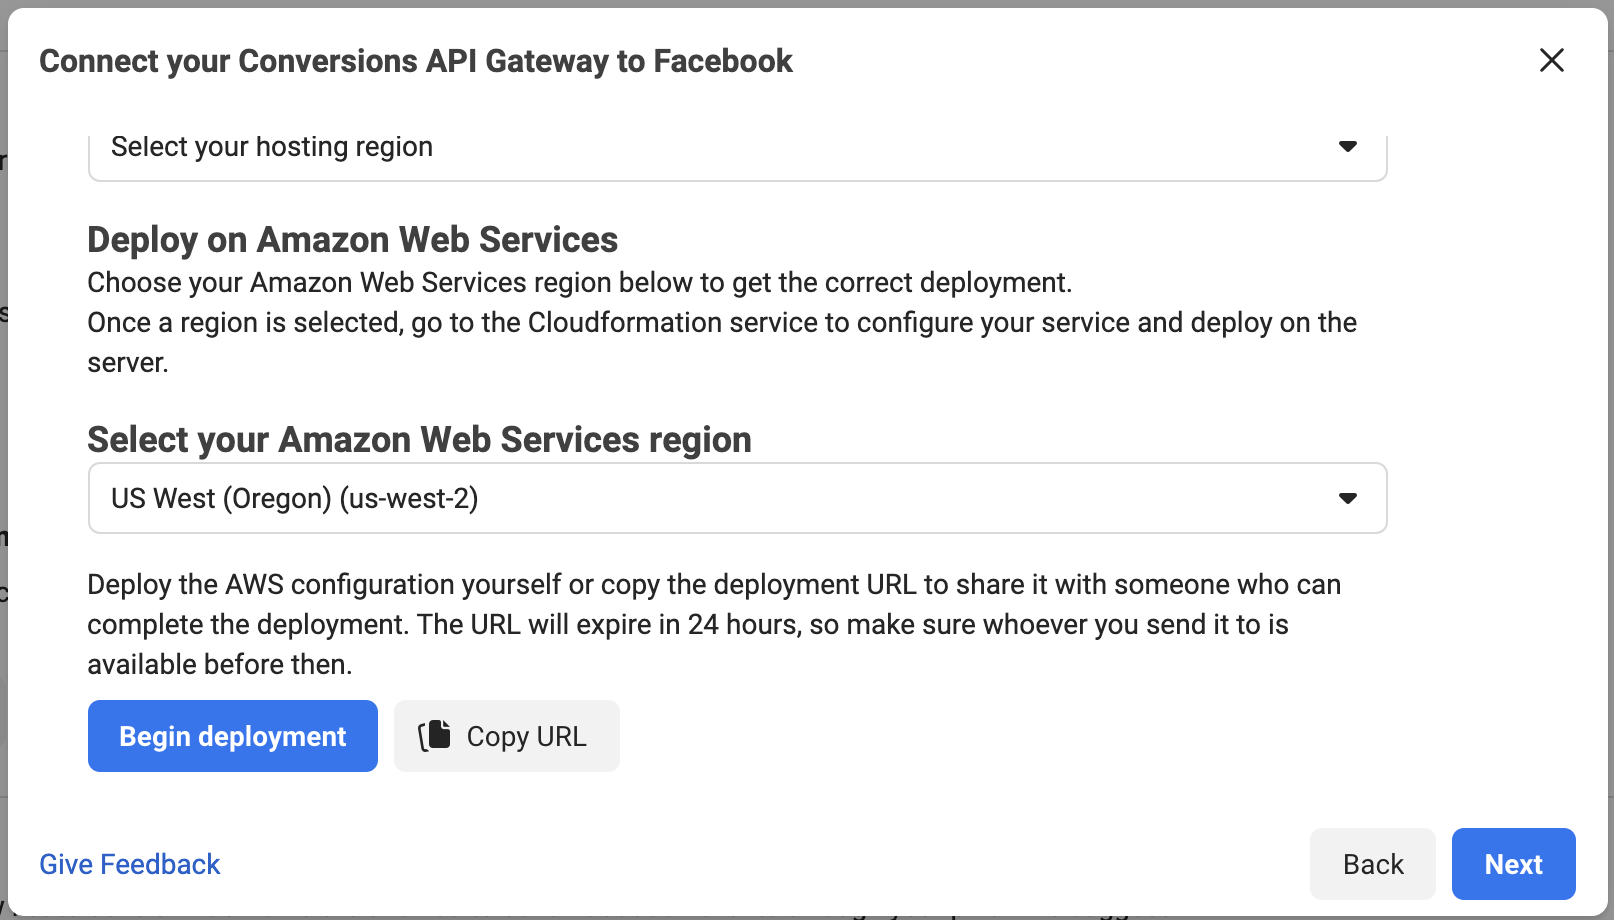
Now, you’ll need to choose a deployment method.
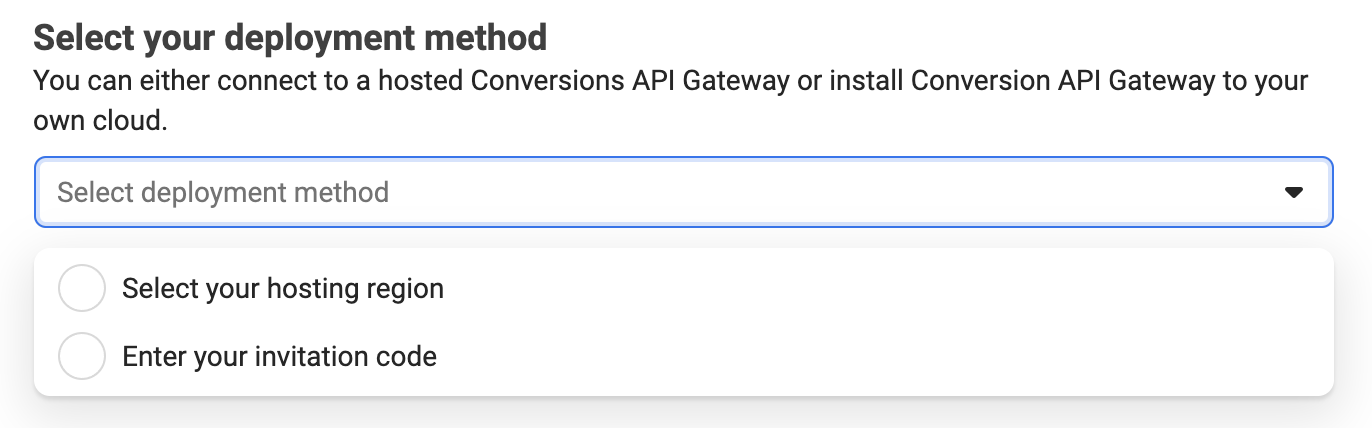
I’m not really sure what the invitation code is. So, if you have one, enter that. If you’re like the rest of us, choose the option for selecting a hosting region.
The region you select should be whatever is closest to you. It’s not as complicated as it may seem.
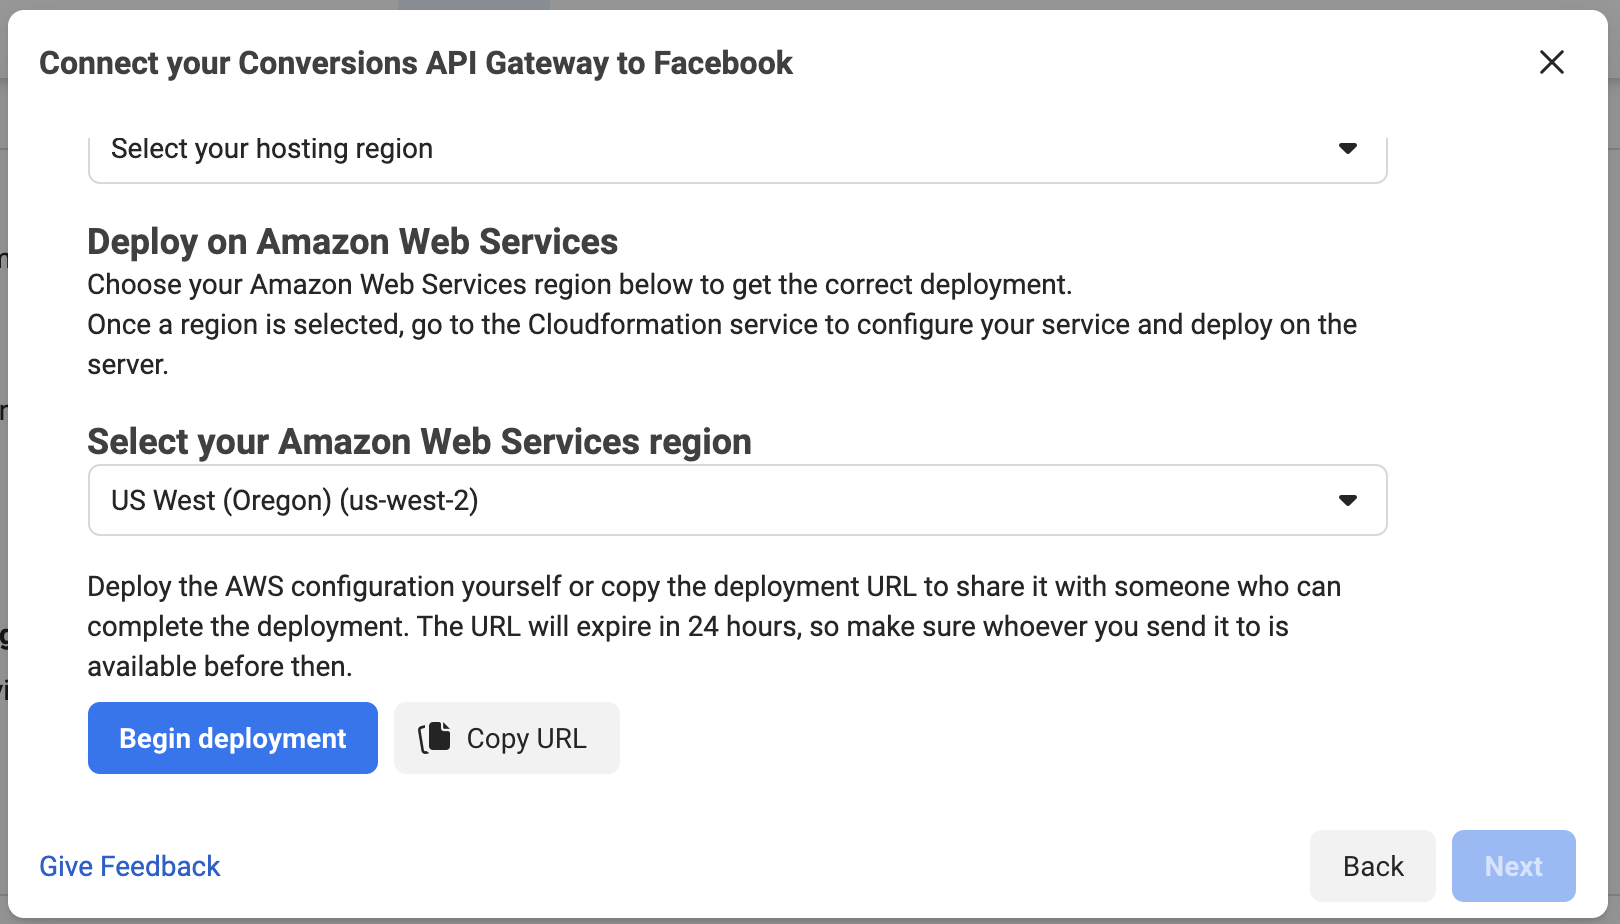
Click “Begin deployment.”
AWS Stack Configuration
You should now be redirected to AWS. This is why it’s important to create your AWS account first. It assumes you have one.
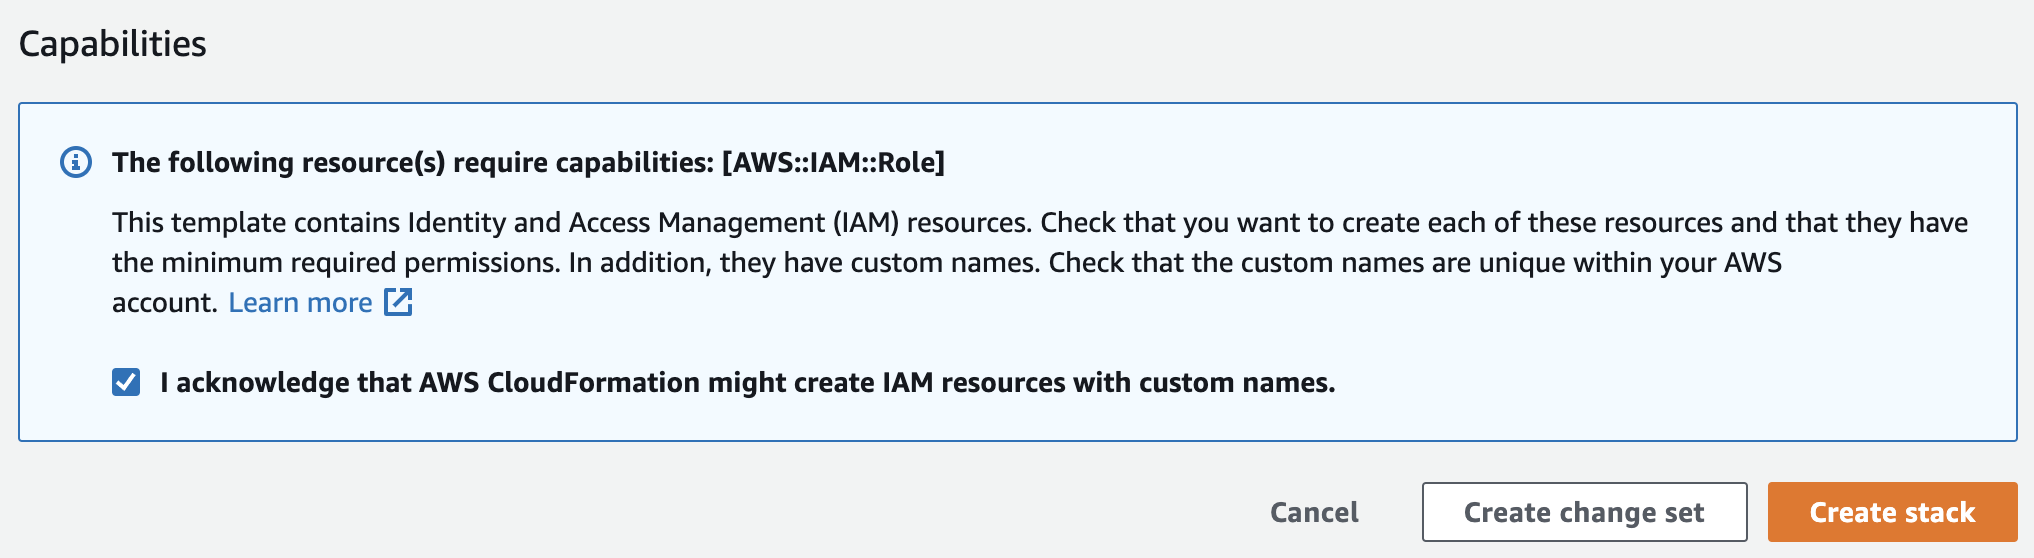
After you log in, set an API admin email and password. You can change the Stack Name if you want, but don’t mess with anything else. You should be fine with the t3.large Instance Type.
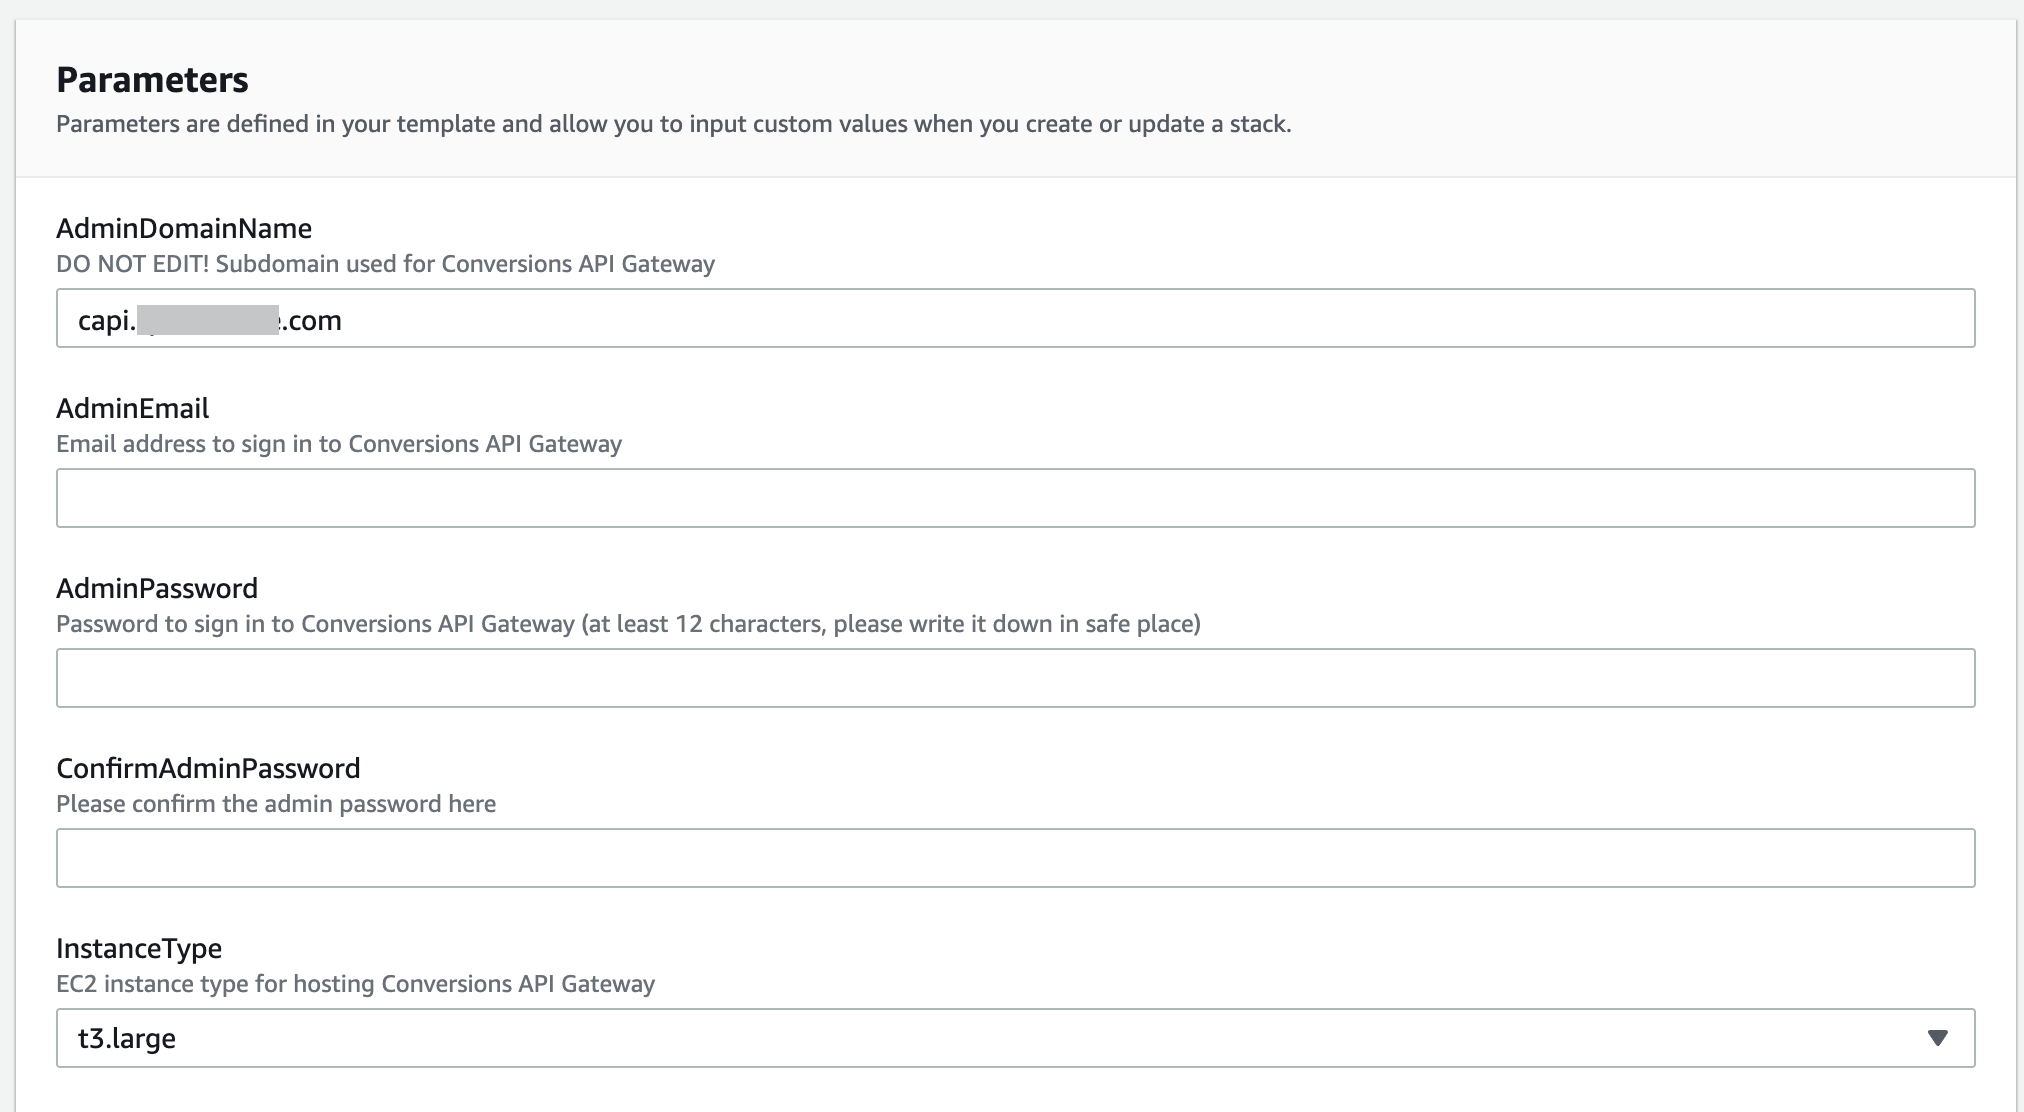
Click “Create Stack” to start the good stuff.
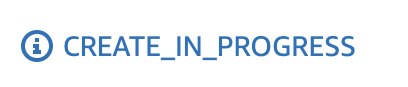
Stack creation might take five minutes or so.
The Outputs tab will be blank before it’s done.
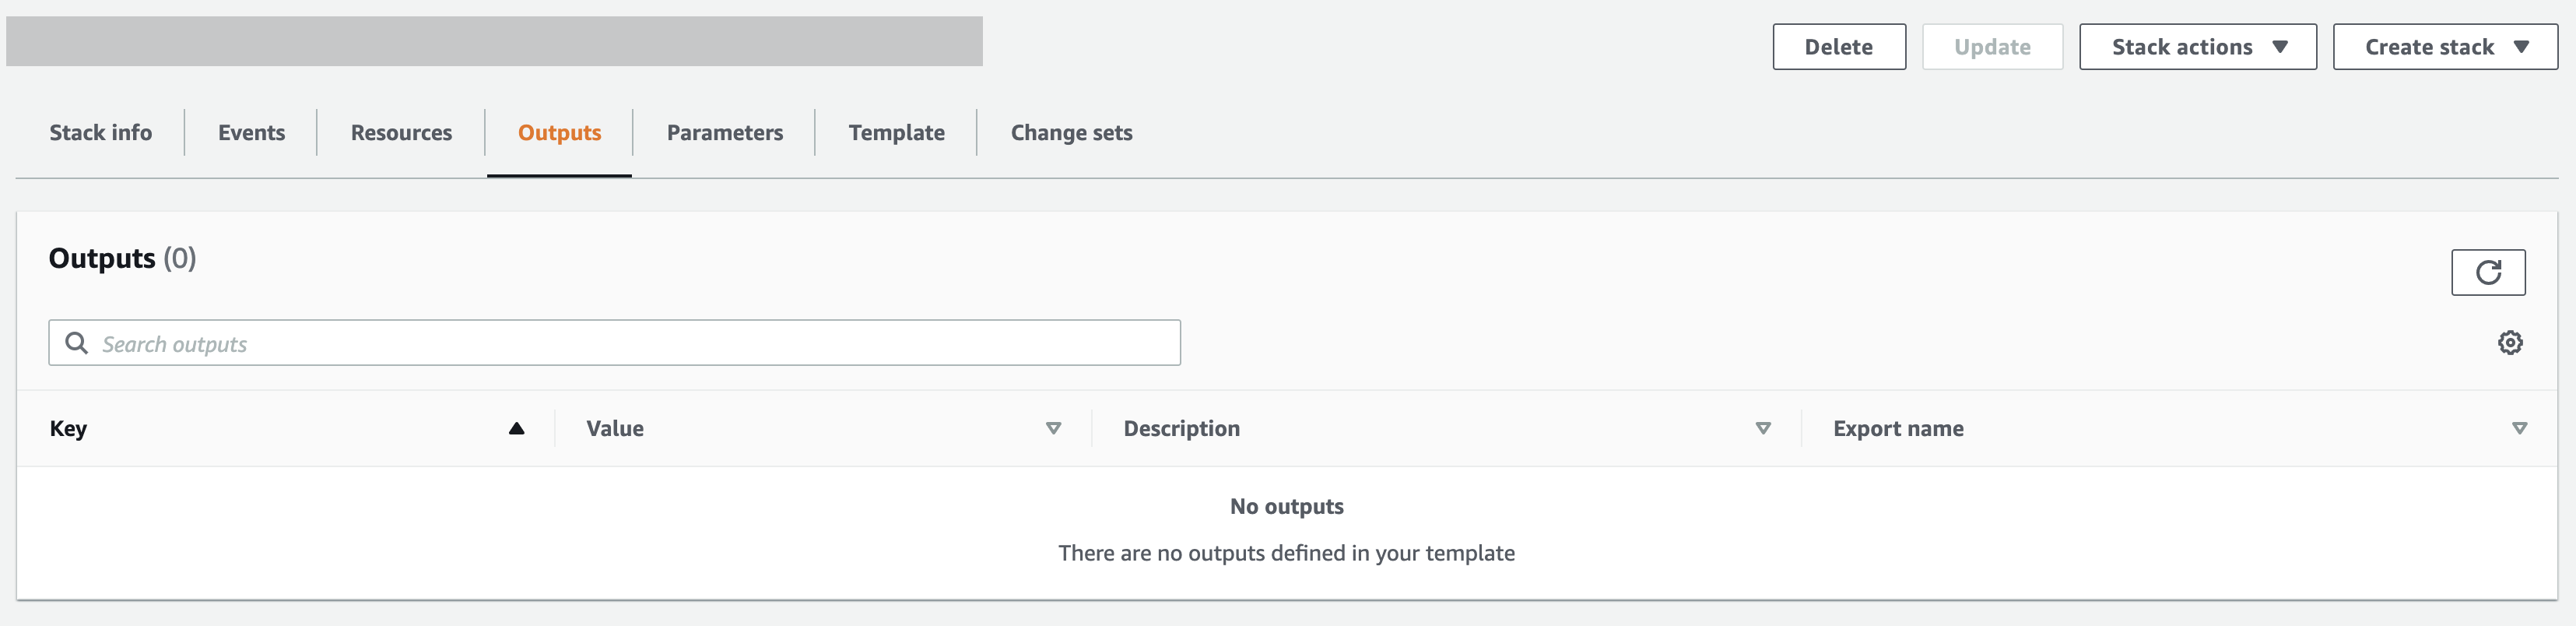
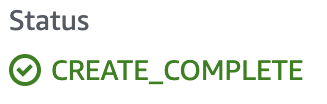
Once complete, you’ll get CallToAction and ConversionsAPIGatewayInstanceURL keys on the Outputs tab (we’ll use these soon). You’ll also get a Create Complete status on the Stack Info tab.
Set Up your DNS
What this step looks like will depend upon your DNS provider.
Back on the Outputs tab of your AWS stack, refer to the CallToAction line. Under the “Value” column, there should be the following instructions:
“On your DNS provider, create an A record to associate [your subdomain] with XX.XX.XXX.XXX.”
You’ll need to grab that IP address and update the A record in your DNS. Also, add the subdomain you’ve defined as your Conversions API Gateway Endpoint.
There are lots of options for DNS management, so refer to your provider. Here are a few options:
Finish Up in Events Manager
Once you’re done updating the DNS, you’ll need to head back to Events Manager. You may recall that we were still in the middle of set-up within Events Manager when we began deployment at the end of the “Get Started” step. Head back there and click “Next.”
If the DNS was set up correctly, you’ll see that on the next screen.
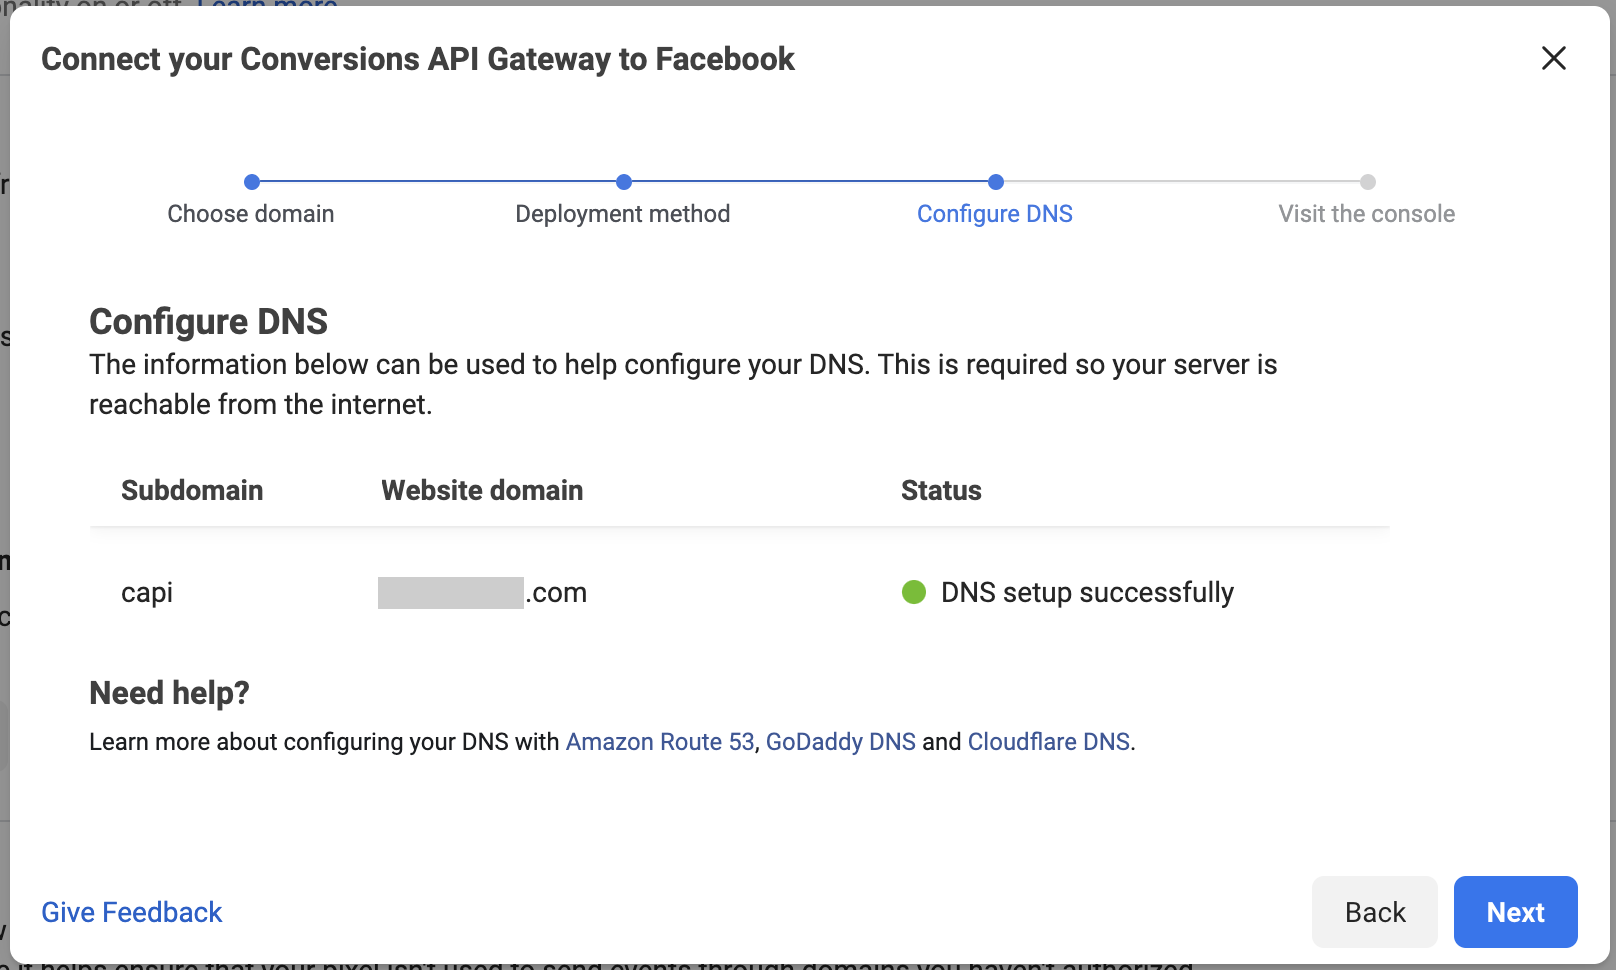
If not, you may just need to wait a bit longer. If necessary, check with your DNS provider.
Once Facebook confirms it’s been set up successfully, click “Next.”
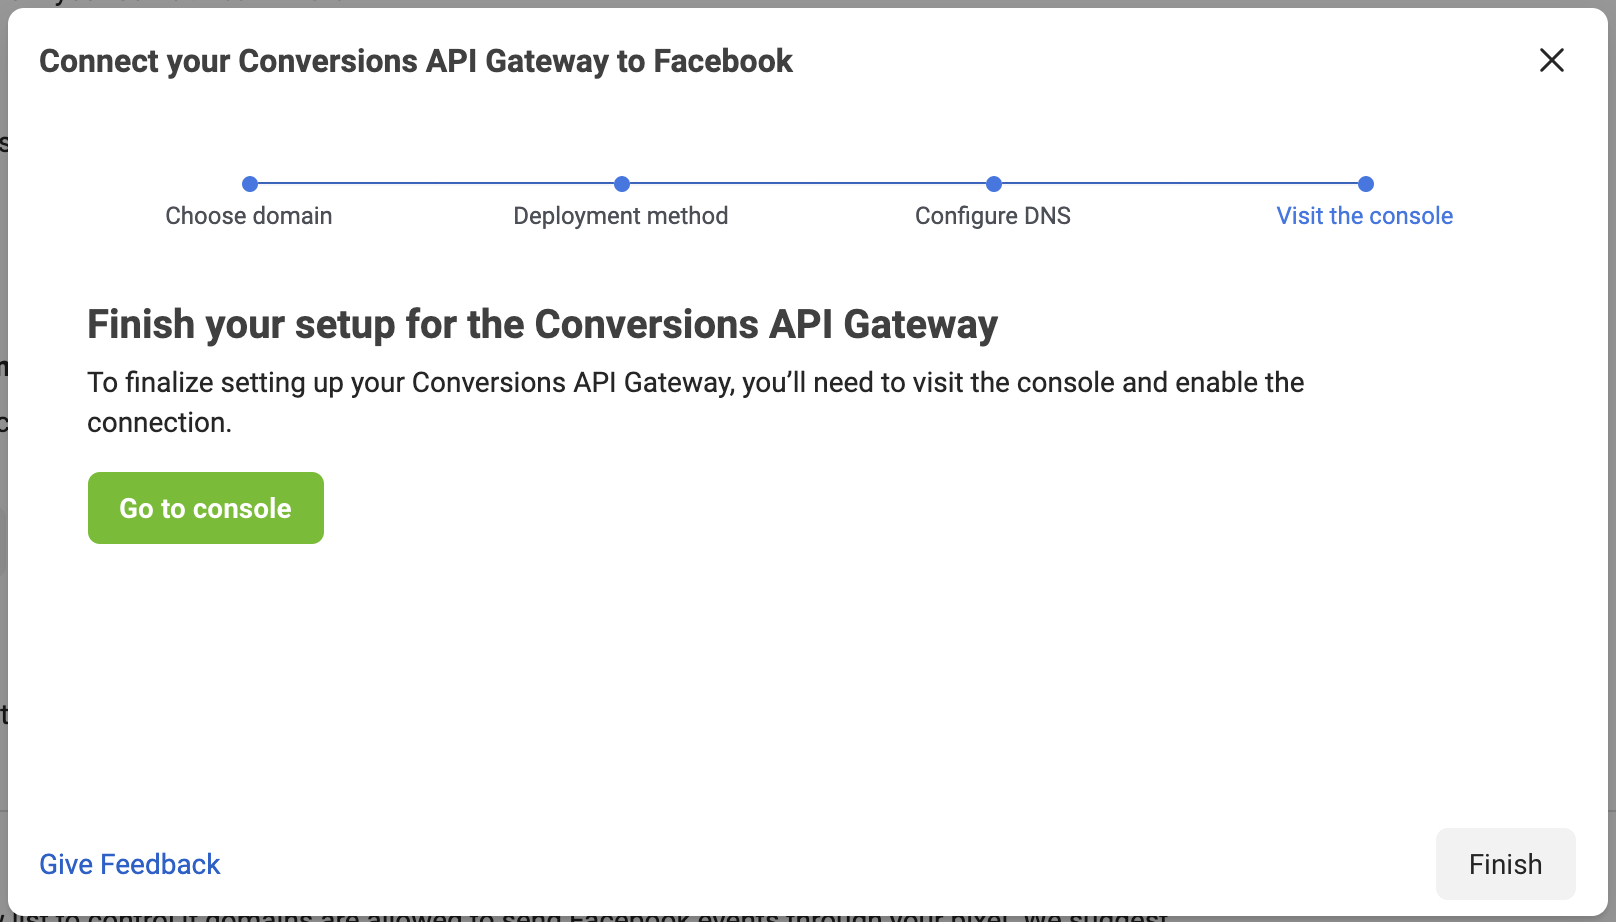
To finish your setup, click the green “Go to console” button.
Open the Conversions API Gateway Admin UI Site
Facebook should redirect you to your previously created subdomain (it may have been something like capi.mydomain.com).
If provisioning is finsihed, you should see a login screen like this…
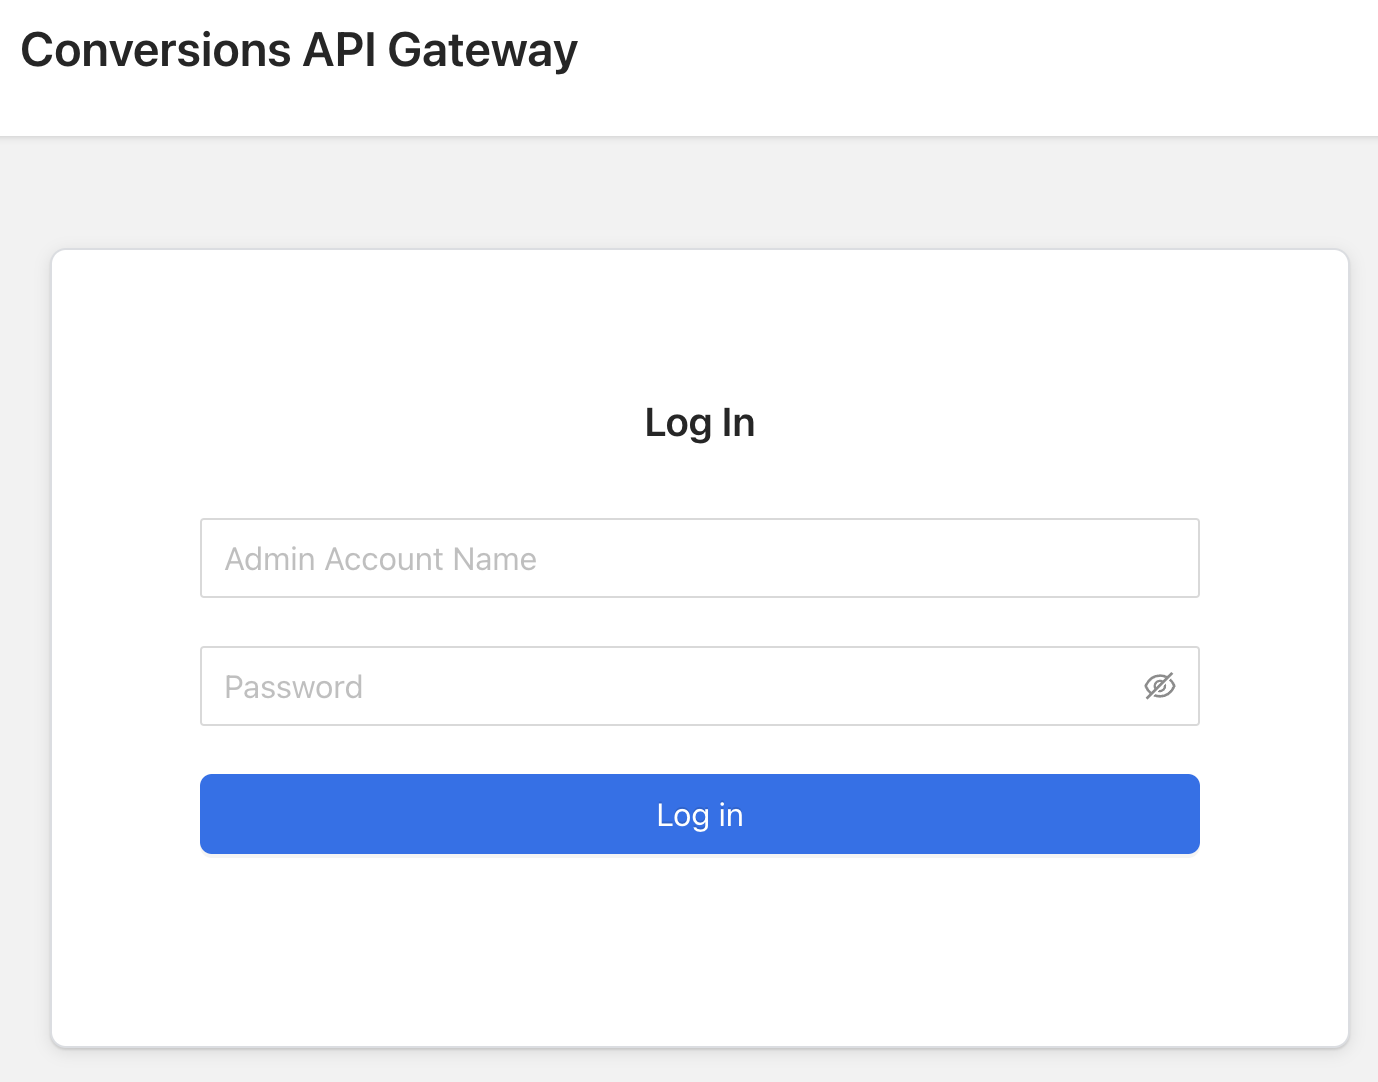
If this page doesn’t appear, the provisioning may not be completed (see the next step below). Otherwise, log in with the email and password you established in the AWS Stack Configuration step.
You probably won’t see any data when you access this site for the first time. It may take up to a couple of hours to build. Eventually, it should look something like this…
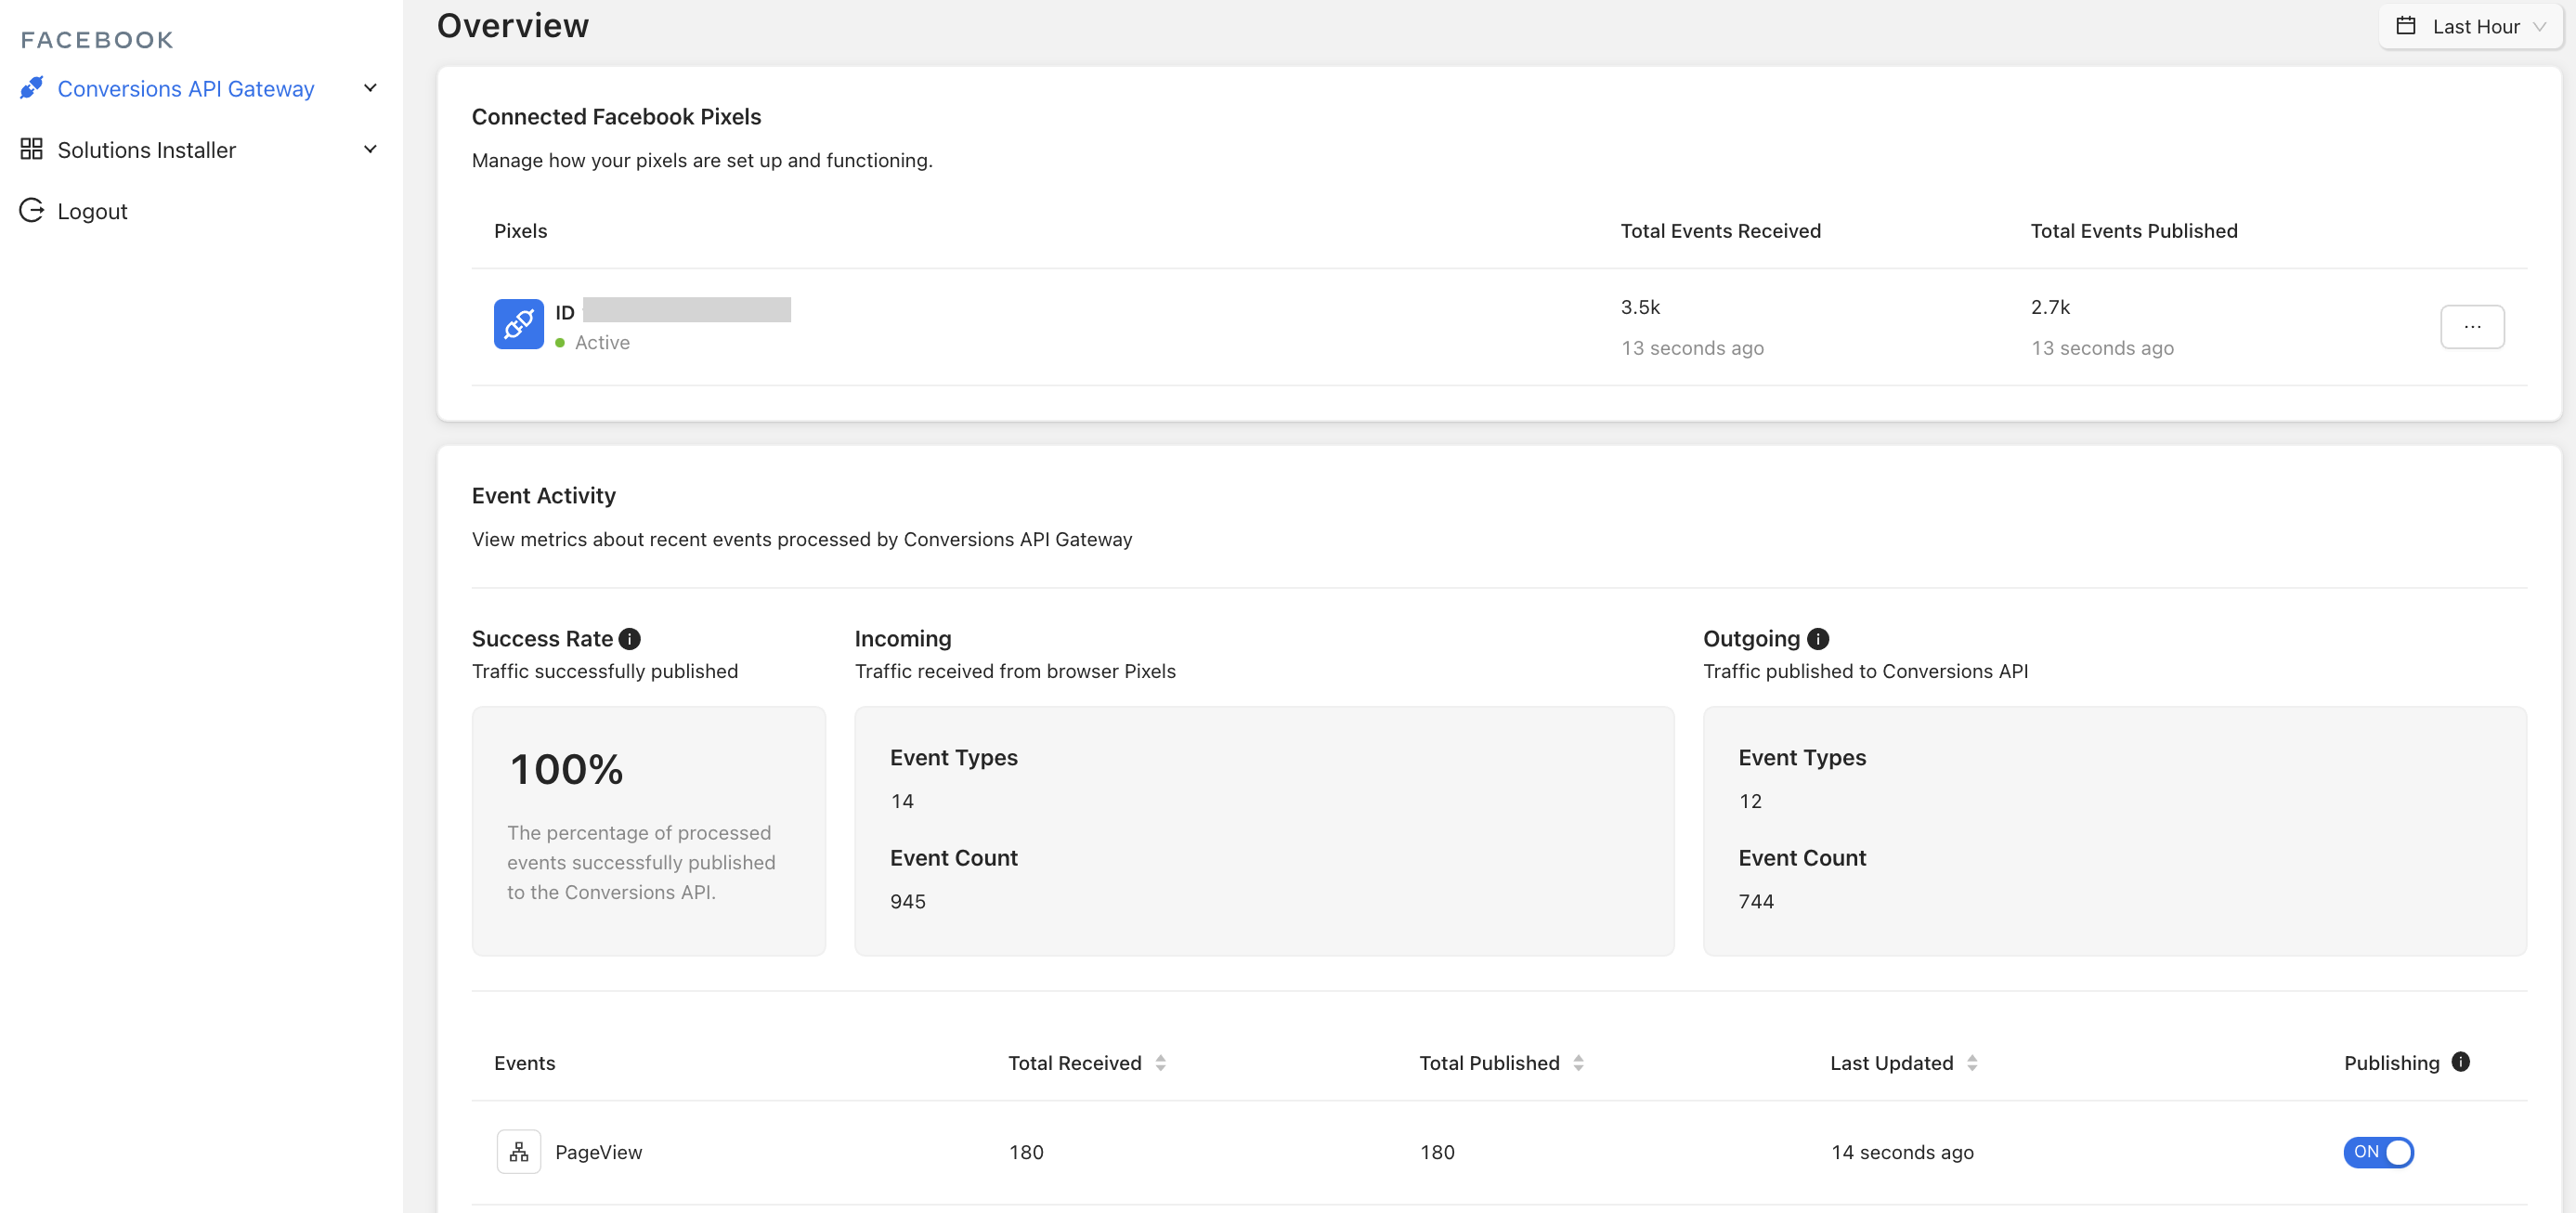
You should start seeing your API events populate. You’ll only see those events that have occurred since the connection was provisioned.
Complete Provisioning
You can check on the progress of provisioning by heading back to the Output tab in your AWS stack. In the ConversionsApiGatewayInstanceURL row, there is a URL within the Value column. Click that (you may want to open a new tab/window so you aren’t redirected from AWS).
It will look like this…

Facebook says it should take about 15 minutes for the provisioning to complete. However, I’ve seen it take hours. In my experience, Facebook will detect the DNS update, but the provisioning remains ongoing and unfished for a while longer. This may be because I am located on the other side of the ocean from where the people are who update the DNS (I’m no expert on this).
When it’s done, you’ll get a “provisioning finished” message.
Events Manager Reporting
Once data has come in for a while from the API, you should start to see it reflected in Events Manager.
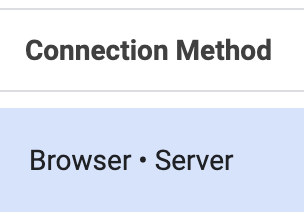
The Connection Method should include Browser • Server instead of Browser only.
If that info is coming in, you’re good to go!
Your Turn
Have you set up your Facebook Conversions API yet? What method did you use?
Let me know in the comments below!