Want to create Instagram Stories filters for your brand? Now you can with Spark AR Studio!
Previously, only approved creators could design and publish their Instagram Stories effects (or AR filters) to Instagram, making it an exclusive growth hack.
But now, anyone and everyone can design and create Instagram Stories filters for their brand using Spark AR Studio!
To help you get started, we’re sharing our guide to Spark AR Studio and top tips for designing your first filter.
Note: In response to COVID-19, Facebook and Instagram are no longer accepting new AR filters for the foreseeable future. Creators can continue to use Spark AR Hub and submit their effects and updates to be reviewed at a later date.

What is Spark AR Studio?
You’ve probably spotted Instagram’s cool stories filters already — from floating golden orbs, neon frames, and the classic puppy ears, Instagram Stories AR (augmented reality) effects are taking over our feeds!
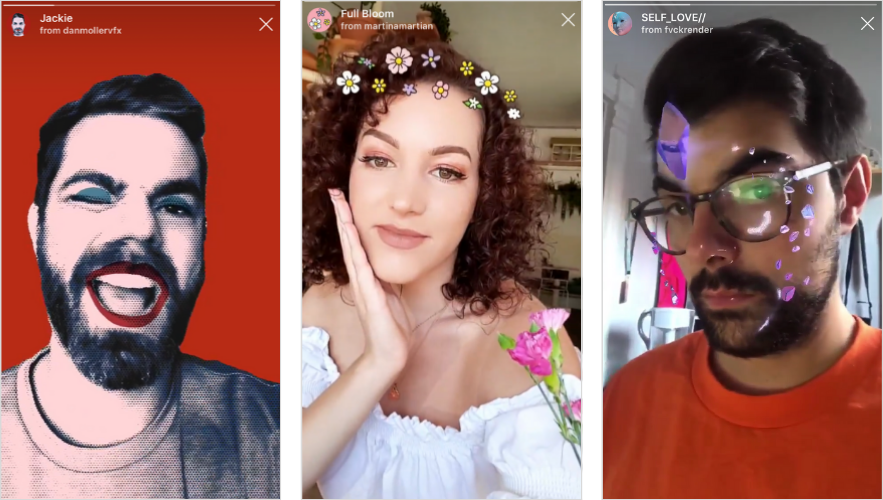
Previously, these filters could only be created and shared on Instagram by approved brands and creators, making it a really cool but exclusive trend to get involved with.
Spark AR Studio is Facebook’s tool for building augmented reality effects, and it was announced earlier this year that it would be moved out of it’s closed beta on Instagram by the end of the summer.
And that time has finally come — now anyone, and everyone can create Instagram Stories filters and effects!
That means that AR filters are now another powerful marketing asset on Instagram, with more than 1 billion people using an AR effect that was created on the Spark AR platform!
Spark AR Studio is a complex tool — if you’re just starting out in the world of visual design and 3D modeling, the platform can look and feel overwhelming. But don’t let that discourage you!
Some of the simplest designs are often the most popular, and there are tons of great online resources and tutorials to help you through.
Plus, there are plenty of talented AR designers you can work with to create Instagram Stories filters or effects for your brand.
The Spark AR Studio website has a partners page with a big list of augmented reality producers, creators, and agencies that you can reach out to and commission a project.
Or you can also check out Lenlist — a website that compiles the top camera effects (and effects creators) for Facebook, Instagram, and Snapchat.
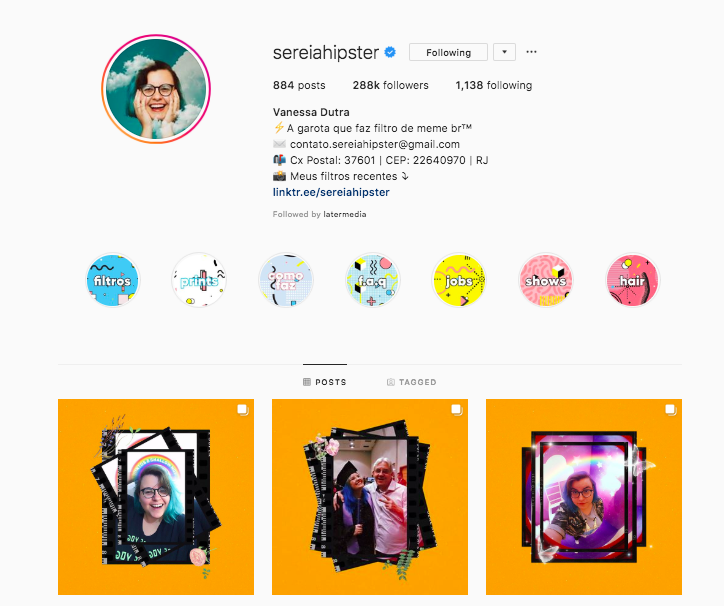
Even some popular creators like Allan Berger, Tomas Posse, and Vanessa Dutra offer services to create AR effects for brands and influencers!
In this blog post, we’re going to help you get started if you want to go solo with Spark AR Studio.
Or if you’re calling on the help of a designer, we have some top tips for creating the best Instagram Stories filters out there!
How to Create Instagram Stories Effects: Top Tips & Best Practices
We don’t want to cherry coat this — Spark AR is an advanced tool.
If you have some technical and visual design know-how, you’ll find navigating the platform easier than most.
However, if you’re totally new to visual design, you can still get involved — it will just take a little added time and dedication to learn the skills you need to understand Spark AR and all it’s great tools and features!
And who doesn’t love learning a new skill, right?
We’re going to point you in the right direction of some of the best tutorials and guides online in this blog post, but before you jump into Spark AR, here are some top tips to keep in mind!
Create Instagram Stories Effects Tip #1: Think About Your Audience
The first step to creating an Instagram Stories filter or effect is to consider your target audience and how they’ll use your filter.
Most filters are made for selfies, but some have special effects or graphics that are better suited to a landscape or city shots.
So you need to think about who, how, and why someone would use your filter.
For example, the Kylie Cosmetics Instagram Stories filter — the brand was one of the first to create AR filters for Instagram and they created it so followers could take a selfie and “try on” the lipstick colors from the collection.
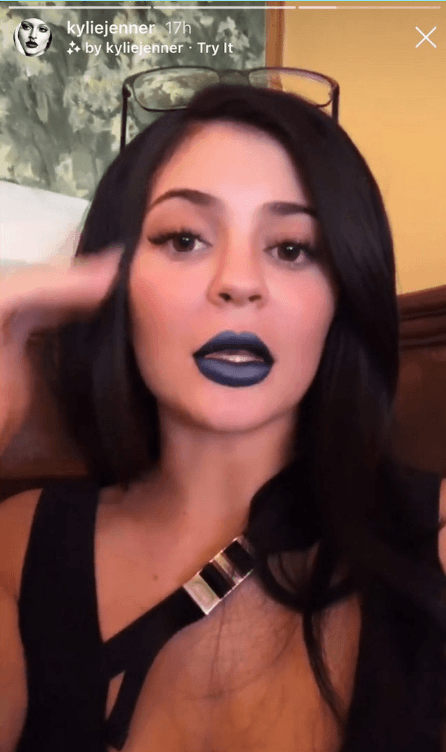
The filter had a clear purpose, while still being fun, creative and a subtle promotion for the product range.
However, some other designers and brands are creating filters to share a message or raise awareness — like a Pride filter or a special environmental message:

Later’s Communications Designer, Martina Freyer adds that your creative direction is just as important as your design skills when it comes to navigating Spark AR!
“Creators should ask themselves how their filter is going to set them apart from other brands — what do you want to communicate with an AR experience?”
It’s worth spending time thinking about how, what, and why you want to create an AR filter in the first place.
“There are no strict rules on the creative path,” says Martina, but it’s easy to feel lost or overwhelmed with the features, tools, and endless design possibilities within Spark AR.
“But with a clear concept and idea in mind, you can start to visually materialize it!”
Or if you plan to work with a designer, your brief and concept idea will be clear from the get-go — that means less time designing and more time perfecting your Instagram Stories filter.
Want some more inspiration for creating your first AR filter? Check out these 13 fun AR filters that are trending right now on Instagram Stories!
Create Instagram Stories Effects Tip #2: Consider Your Branding
The perfect Instagram Stories filter for your brand needs to be balanced between your branding and creativity.
“The purpose of the filter is to be a ‘gift’ to your followers,” says designer and AR effects creator Vanessa Dutra (@sereiahipster).
“Some brands make the mistake of placing their logo on various areas of the filter, and this can make people a little cautious about using it as they’re inadvertently promoting the brand.”
A good way to work around this is to only include the logo on the filter thumbnail or create a variation of the filter where the logo is just a small element to the overall design.
Take a look at how Disney has created a playful filter that nods to their branding with their iconic Mickey Mouse ears:

When selected, the AR filter lets you add Mickey Mouse and Minnie Mouse ears to your photo or video. Tapping the screen lets you switch between several different styles, including shiny sequin-studded ears!
While Disney’s AR filter is more playful than promotional, it’s still super shareable, aligned with their brand, and great for spreading brand awareness!
Tip: If you are going to create a series of filters it is good to try to include a unifying element between all of them so that they can easily be associated with your profile and brand, says @sereiahipser.
Think about using the same color palette, typography, or similarly styled icons to create theme across all your designs.
Looking for some more ideas on how to brand your filter? Check out these 8 brands creating cool AR filters for Instagram Stories!
Create Instagram Stories Effects Tip #3: Make it Dynamic
Some of the best AR filters are simple but dynamic.
When you’re thinking about designing your filter, try to conceptualize if it’s going to move, change, track a motion, or if there are other variations of your filter that a user can choose between.
Check out how visual artist and motion designer Philipp Basler brings together his love of line drawings and AR to create some seriously cool Instagram filters.
Whilst they’re simple (and recognizable!), they also stand out from the crowd thanks to their fast-paced design and effect.
Create Instagram Stories Effects Tip #4: Make it All About the User, Not the Filter
Some of the most popular effects on Instagram are re-usable — as in people can (and want to) use them over and over again.
For this to happen, an AR effect needs to “get out of the way” and make people’s content the hero as opposed to making the effect the center of attention.
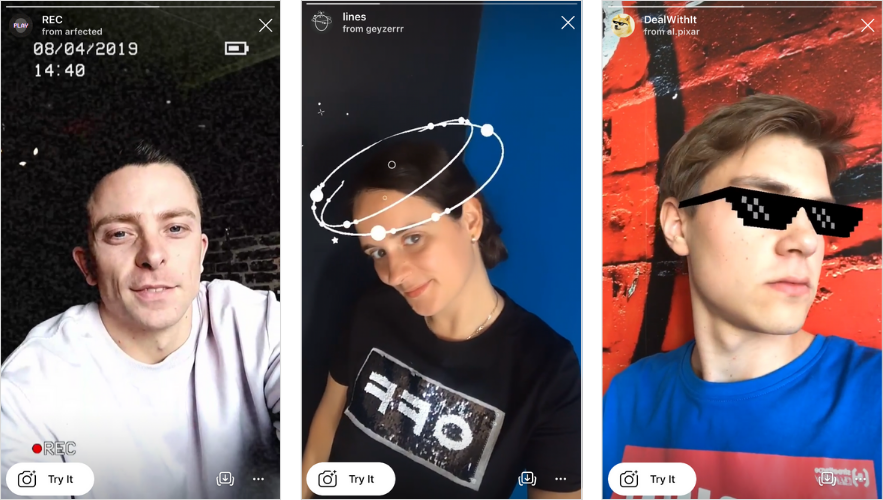
When you do this well, people can create something entirely new every time they use your effect!
Tip: Make sure your design allows for your users’ expressions to be seen and recognized. Not only does this align with Instagram’s guidelines for AR filters, but it also means that the user is easily recognizable, along with your branded filter.
For more tips on how to create Instagram Stories filters that work for your brand, check out our Ultimate Guide to Spark AR Studio!
How to Create Instagram Stories Filters Step #1: Download Spark AR
Ready to get started? The first step is to download Spark AR!
Visit this website to download Spark AR to your desktop �— you’ll need to sign in to your Facebook account to get access, so begin by logging in with your personal account.
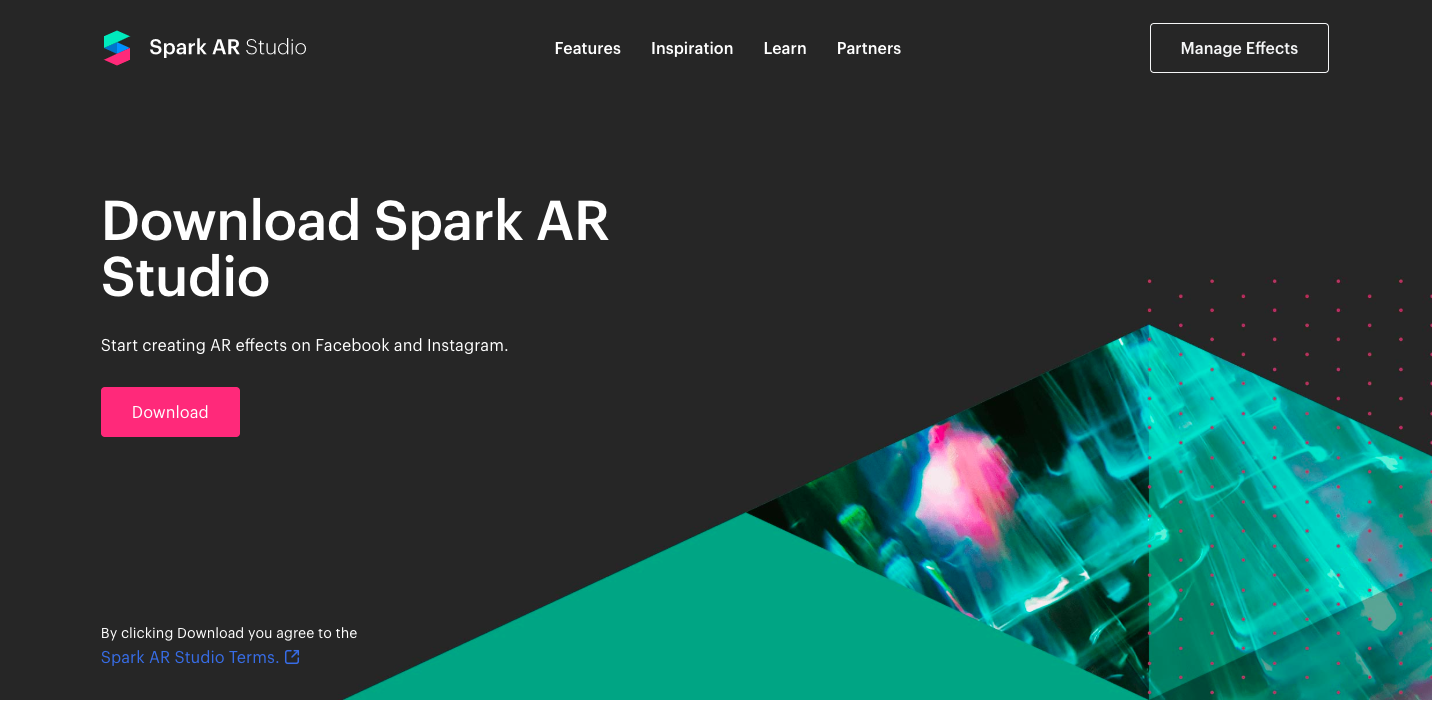
Once Spark AR has downloaded, you can jump right in. But it’s worth taking some time on the welcome screen!
First up — join the super-insightful Spark AR Facebook Community!

While you’re learning the ropes, it’s a great place to ask questions, find inspiration, or even reach out to designers for advice or commissioned projects!
Tap the “Go to Community” button on the bottom right corner from the Welcome page to be brought straight to the group.

Next up, you can look through some of the sample designs on Spark AR — these are completed and live Instagram stories filters and effects, but you can access how they’re made in Spark AR to get a better understanding of the tool.
“Spark AR is all about space, interactions, and creativity!” says Martina.
“It might be scary if you’ve never worked with a program like Cinema 3D or After Effects, but I recommend to start playing around with the tools — there are so many easy ways to getting great results!”
Let these sample filters and affects act as a sounding board and inspiration for your design, and well as the very basic blueprints to how Spark AR works!

How to Create Instagram Stories Filters Step #2: Brush up on (or Start Learning!) AR Skills
We did say this was going to be a learning experience!
Augmented reality is growing in popularity, and the good news is that there are so many great online resources that you can use to help you understand AR, learn about Spark AR’s tools and features, and help you create your first Instagram Stories filters.
Here are some of our favorite resources for getting to know Spark AR:
#1: Facebook’s Spark AR Resources
Facebook has tons of educational videos, materials, and guides to Spark AR on the Facebook for Developers site!
Make sure you spend some time reading up on some of Facebook’s great guides before you jump into your first project — there’s a lot of new terms to get to know, like the face mesh, hand tracker, and Patch Editor.
TIP: Head to the Spark AR resources page and use the search bar to search for any tool, topic or feature you want to learn more about:

More than likely, Facebook will have a complete and detailed guide on how to use it in Spark AR for you to consult!
Here are three guides to start off your Spark AR education:
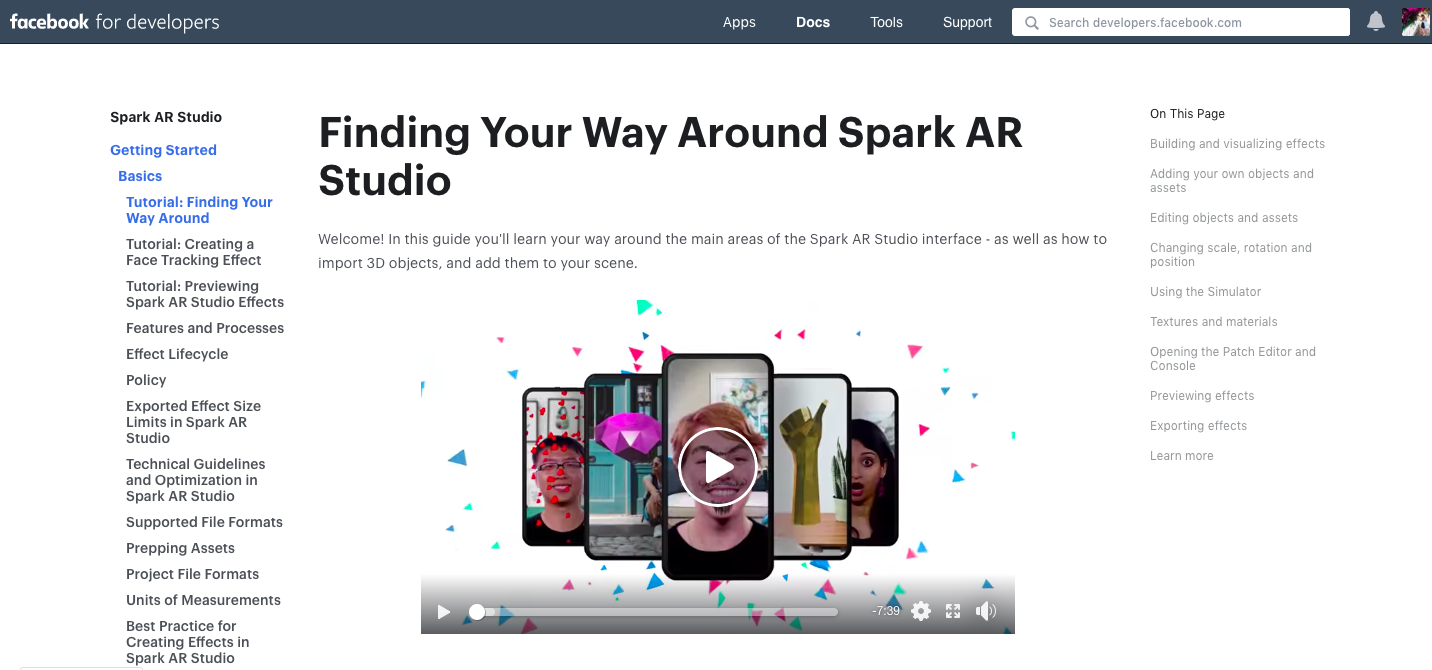
#1: Finding Your Way Around Spark AR Studio: This 7-minute video and basic Spark AR tools guide is the best for understanding the basics.
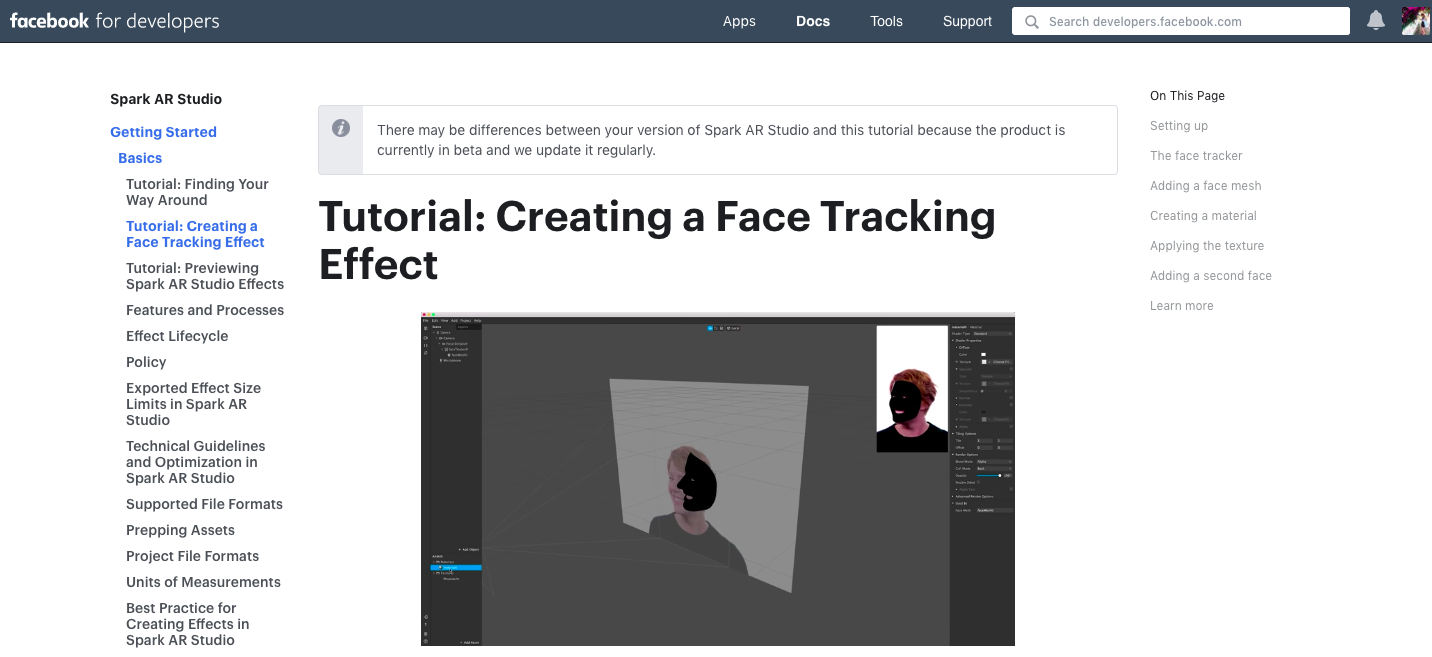
#2: Creating a Face Tracking Effect Tutorial: With this video and guide, you’ll learn how to make an effect that responds to someone’s face — using a face tracker, face mesh, material, and texture.
#3: Creating World Effects Tutorial: Want to create a filter that fills the screen with a background, sparkles, or floating orbs?
Facebook has you covered in this guide — you’ll learn to create a simple world effect that places objects in a fixed position in someone’s environment, instead of relative to the camera’s view and movement.

#4: Sample Effects: Facebook knows that most people won’t know how to use Spark AR right off the bat, so they’ve provided these sample AR filters (accessible from Spark AR’s Homepage) so you open up the project and take a closer look at how it’s built!
Looking for more Samples and Spark AR basic guides? Check out this resources page for everything you need to get started.
#2: Watch YouTube Tutorials and Video Guides
If you’re anything like the Later team, visual learning is the only way to go!
So getting to grips with Spark AR can be tons easier when you’ve watched and followed along with some beginner’s guides to Spark AR on YouTube.
Start off with the Facebook for Developer’s playlist on Spark AR:
While there are only a few videos in the playlist, they’re in-depth, but great for those who have gotten the basics from the online guides and resources:
The Later team also found these two videos to be helpful when getting to grips with different types of Instagram Stories filters and effects:
First up, the 3D effect face mask, like the these mirrored face-detecting masks:

Using Spark AR’s Face Tracker to identify faces in the tool, you can use a Face Mesh to customize masks — like adding in colors, vibrancy, angles, and intensity!
Plus, you can work with skin retouching and add light effects to your filters!
Check out this video for a quick step-by-step guide on how to create this kind of filter:
Secondly, there are 2D filters that react (or track) motion filter — like our favorite puppy ears!
You might have seen filters where you can tap to change the 2D filter option or maybe it moves or loops based on a person’s movements on screen:

If you want to learn more about these types of filters, check out this video!
It’s a basic overview of how to create a 2D filter effect that has 2-3 design options when a user taps on the screen:
#3: Spark AR’s Facebook Community
Remember when we suggested joining the Spark AR Facebook community?
Well, now it’s going to come in handy!
No matter how big or how small the question, the Spark AR’s creative community is buzzing with designers that are eager to help — so if you run into any problems, you can definitely submit a question in the Facebook Group.
Plus, if you’re feeling completely overwhelmed at this stage, this could be a good space to reach out to the pros and get some design help!
How to Create Instagram Stories Filters Step #3: Jump Right into the Deep End
So you’ve read up on the Spark AR guides and resources, watched video tutorials, thought about your creative concept, and are now ready to jump right into Spark AR!
Let’s go!
When you click to “Create a New Project” from the Spark AR homepage, you’ll be brought to this dashboard:

To help you get used to the dashboard — here are a few of the features to know about:
#1: The Simulator

The Simulator acts as a representation of your device — like a phone or tablet. It helps you see in real-time how your AR filter will work and will react on a user.
Spark AR also provides you with some dummy user videos to test our your filter.
#2: The Viewport

Think of this as your main stage — this is where you can see and work with the effect you’re building.
From the menu on the left of the screen, the Camera can be selected — this will bring up blue lines in your Viewport. These lines show where the camera is pointing, and what the camera can see.
At the top of the Viewport are the Manipulators — these can change your object’s Position, Scale, and Rotation
#3: The Scene Panel
Scene Panel is on the left side of the interface, and from here you can add Objects into your filter or effect.

If you’ve created your own 3D objects you can insert them here. Note: creating your own 3D objects is quite technical so you will probably need a designer to help you with this.
Or you can choose from a huge range of ready-made 3D objects in the AR Library.
To learn more about 3D objects, click here.
#4: The Assets Panel
This is where you can add your own assets to a project, or create assets in Spark AR Studio.

Click Add Assets to create assets or add your own. You can add textures, materials, 3D models, animations and audio files here.
#5 The Inspector
On the right-hand side of the Spark AR dashboard, you’ll find the Inspector.
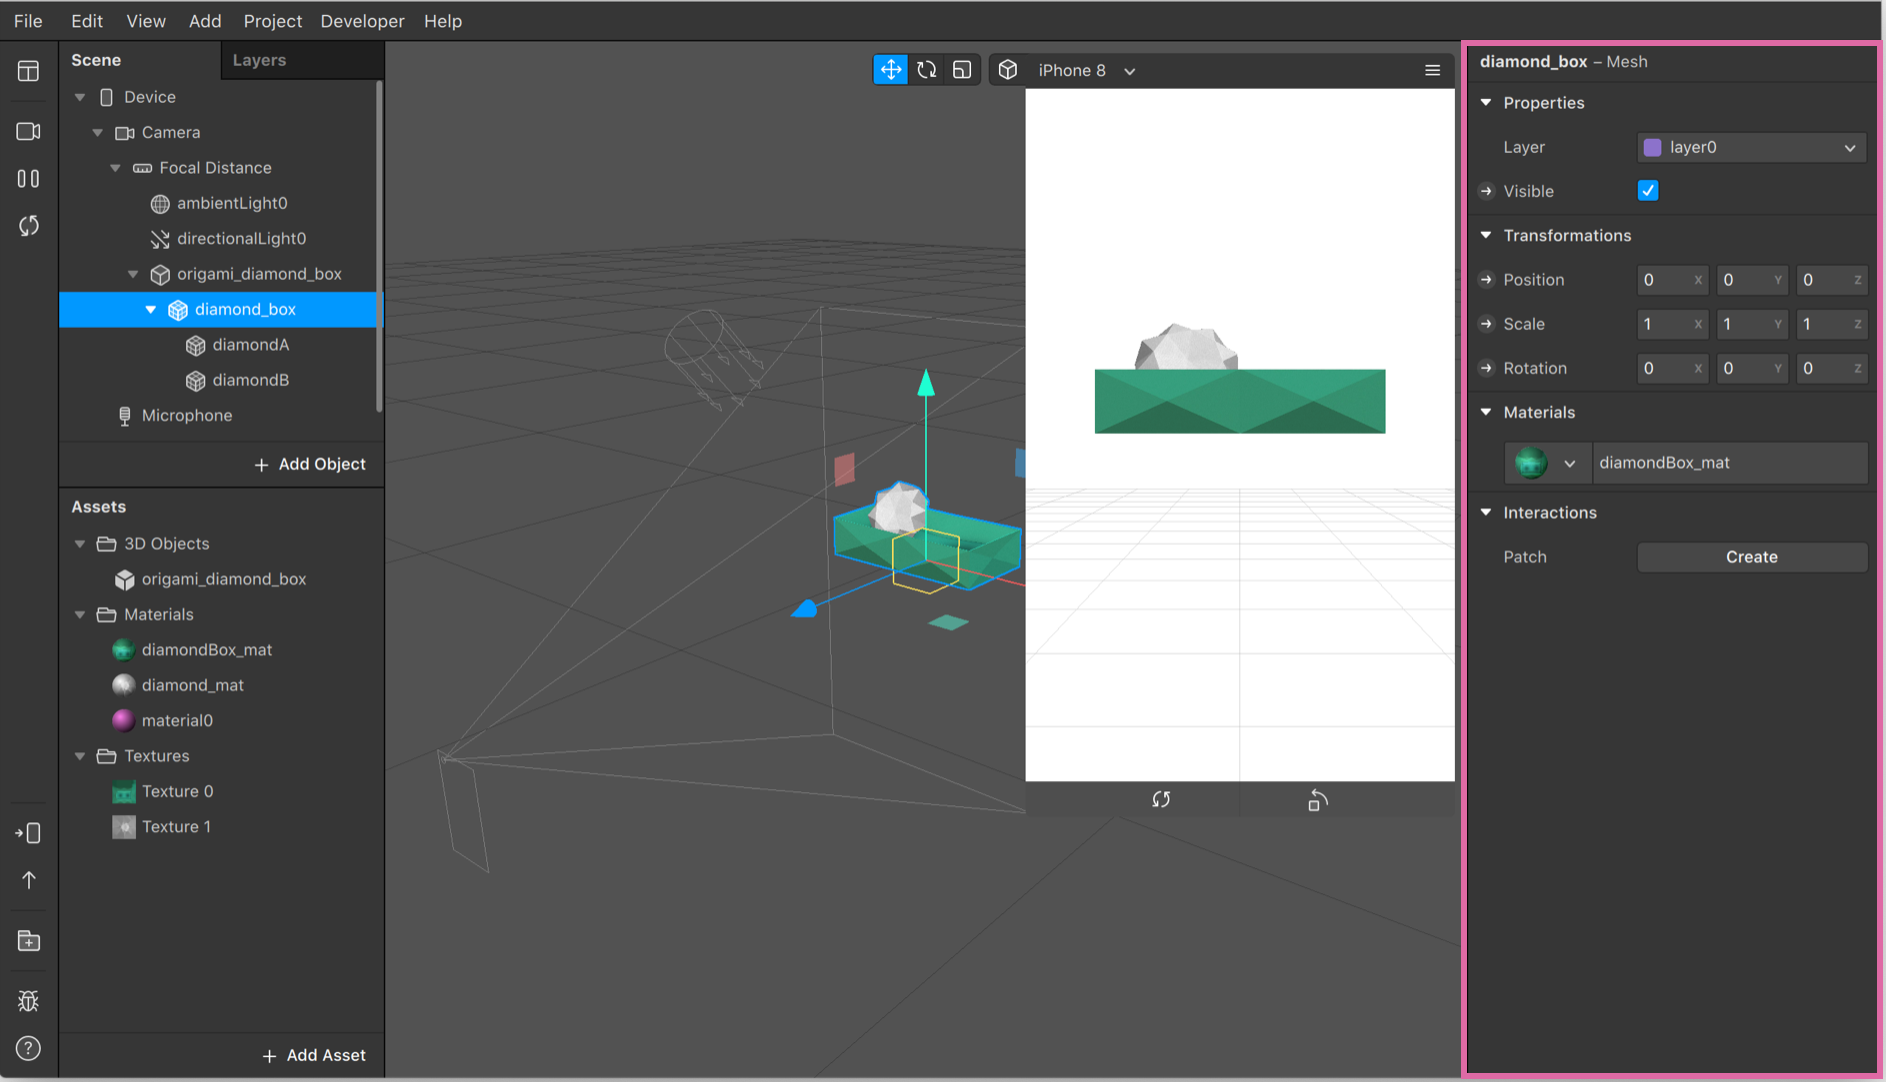
This is where you can make changes to your filter’s assets or objects. You’ll need to select the asset or object in the Scene Panel or Assets Panel first.
#6 The Patch Editor and Console
The Patch Editor is used to create effects with logic, animation, and interactivity, without using scripting — so you don’t need to learn to code!
And the Console is used to add JavaScript to your project.
To open or close the Patch Editor or console, click to View in the menu bar and select either:
Show/Hide Patch Editor.
Show/Hide Console.
Both the Patch Editor and Console will open at the bottom of the screen:

To learn more about navigating Spark AR’s interface, the main tools and features here!
If you’re feeling overwhelmed by Spark AR, we’d recommend opening our favorite video tutorial and following the steps to create your own version.
It’s one of the easiest ways to get a handle on the basics through trial and error (which is all part of the fun of it!).
How to Create Instagram Stories Filters Step #4: Export Your Effect and Upload to Instagram for Approval
Congratulations! You’ve created your first Instagram Stories effect!
But before it can be shared on Instagram, it needs to go through a review process to make sure it meets the Camera Effects Platform Policies and Terms, as well as Instagram’s Community Guidelines.
First, export your effect by tapping the Export button on the bottom right-hand side of the Spark AR dashboard:

An .arexport file will be saved to your computer. This file contains everything your effect needs to work in the camera.
Note: It’s important to check the file sizes when you’re exporting an effect. Effects that are too big won’t be approved by Instagram — file sizes must be 20MB or smaller.
Once you’re happy with your effect, submit it to Spark AR Hub to be published:

But there’s a couple of things you need before you can finally send off your Instagram Stories effect or filter to be approved:
You’ll need:
To have created an effect icon and chose a name for your effect.
The .arexport file created when you exported your project.
To have checked your effect meets Facebook’s policies and guidelines.
You’ll also need these things specifically for publishing to Instagram:
A video of your effect being used – find out more about Instagram’s standards for this video.
To check these extra guidelines and best practices, to make sure your effect is approved.
Once you have all those things ready, go to Spark AR Hub and click Upload Effect in the top right.
Follow the on-screen instructions to complete your submission and that’s it! Your Instagram Stories filter will be reviewed.
This usually takes a couple of days, but can take up to a week — excluding weekends.
Later co-founder Cindy Chen jumped straight into Spark AR to create an Instagram Stories face filter in honor of Later’s resident office pup Stella:
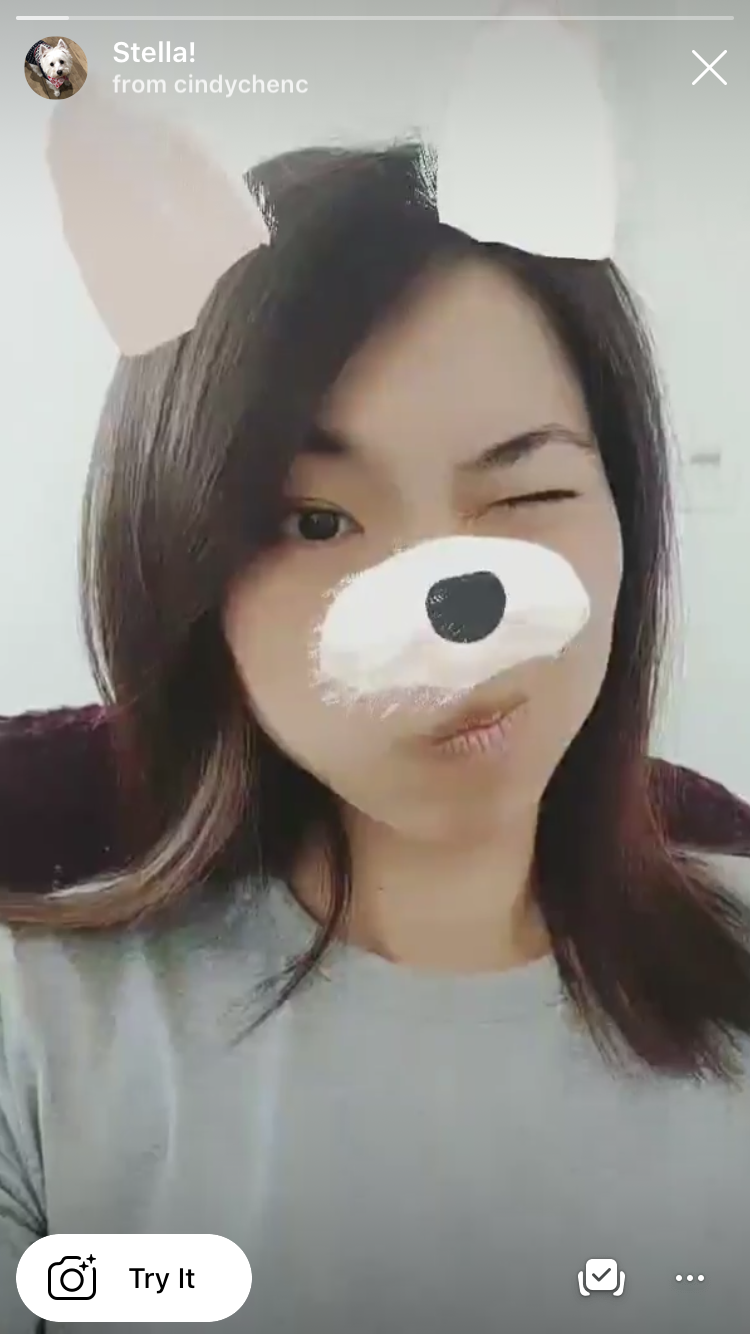
Once the Stella filter was approved, Cindy��’s Instagram page had a dedicated tab just for the feed filters she created.
Anyone who visits your profile will be able to see this tab too and can then “try on” your filter from here:

Also within the Spark AR Studio Hub, creators can find more details on their filters — including the shareable link to their filter and detailed analytics about how widely it’s been used!

How to Create Instagram Stories Filters Step #5: Use, Share, and Promote Your Filter
Previously, you had to follow an account to unlock the filter they created to use it yourself — which was a great growth hack for brands!
But now that all filters are open to everyone to use, you need to work extra hard to make your filter stand out from the crowd.
Here are a few tips to promoting and sharing your Instagram Stories filters with your followers:
#1: Add a Swipe Up Link to Your Effect with Instagram Stories
One of the best things about creating your own Instagram Stories filter is that you can add a swipe up link to the filter with Instagram Stories.
And you don’t need over 10k followers to do it either:

When you do this, anyone viewing your story will be taken directly to the filter where they can try it on themselves!
#2: Work with Influencers to Showcase Your Instagram Stories Effect
If you already have a strong community of influencers or ambassadors for your brand, you can ask them to use your filter and share it with their audience.
The name of your filter and your Instagram handle will appear in the top left-hand corner of a stories post — making it super easy for people to find your filter and your brand!
#3: Post a Video of Your Instagram Stories Effect to Your Feed
Don’t leave promotion alone to Instagram Stories — showcase your filter in your feed!
You can record an Instagram story using your filter, and then use an app like InShot to resize it for your feed.
Think about scheduling an announcement post to your feed when your new filter has gone live in the app too to really create some positive noise around your new effect!
With Later, you can plan and schedule video posts to Instagram! Sign up today:
#4: Add the Sharing Link for Your Instagram Stories Effect to Your Bio
When your filter has been approved and uploaded to Instagram, you’ll find a share link specifically for that filter in your Spark AR Hub!
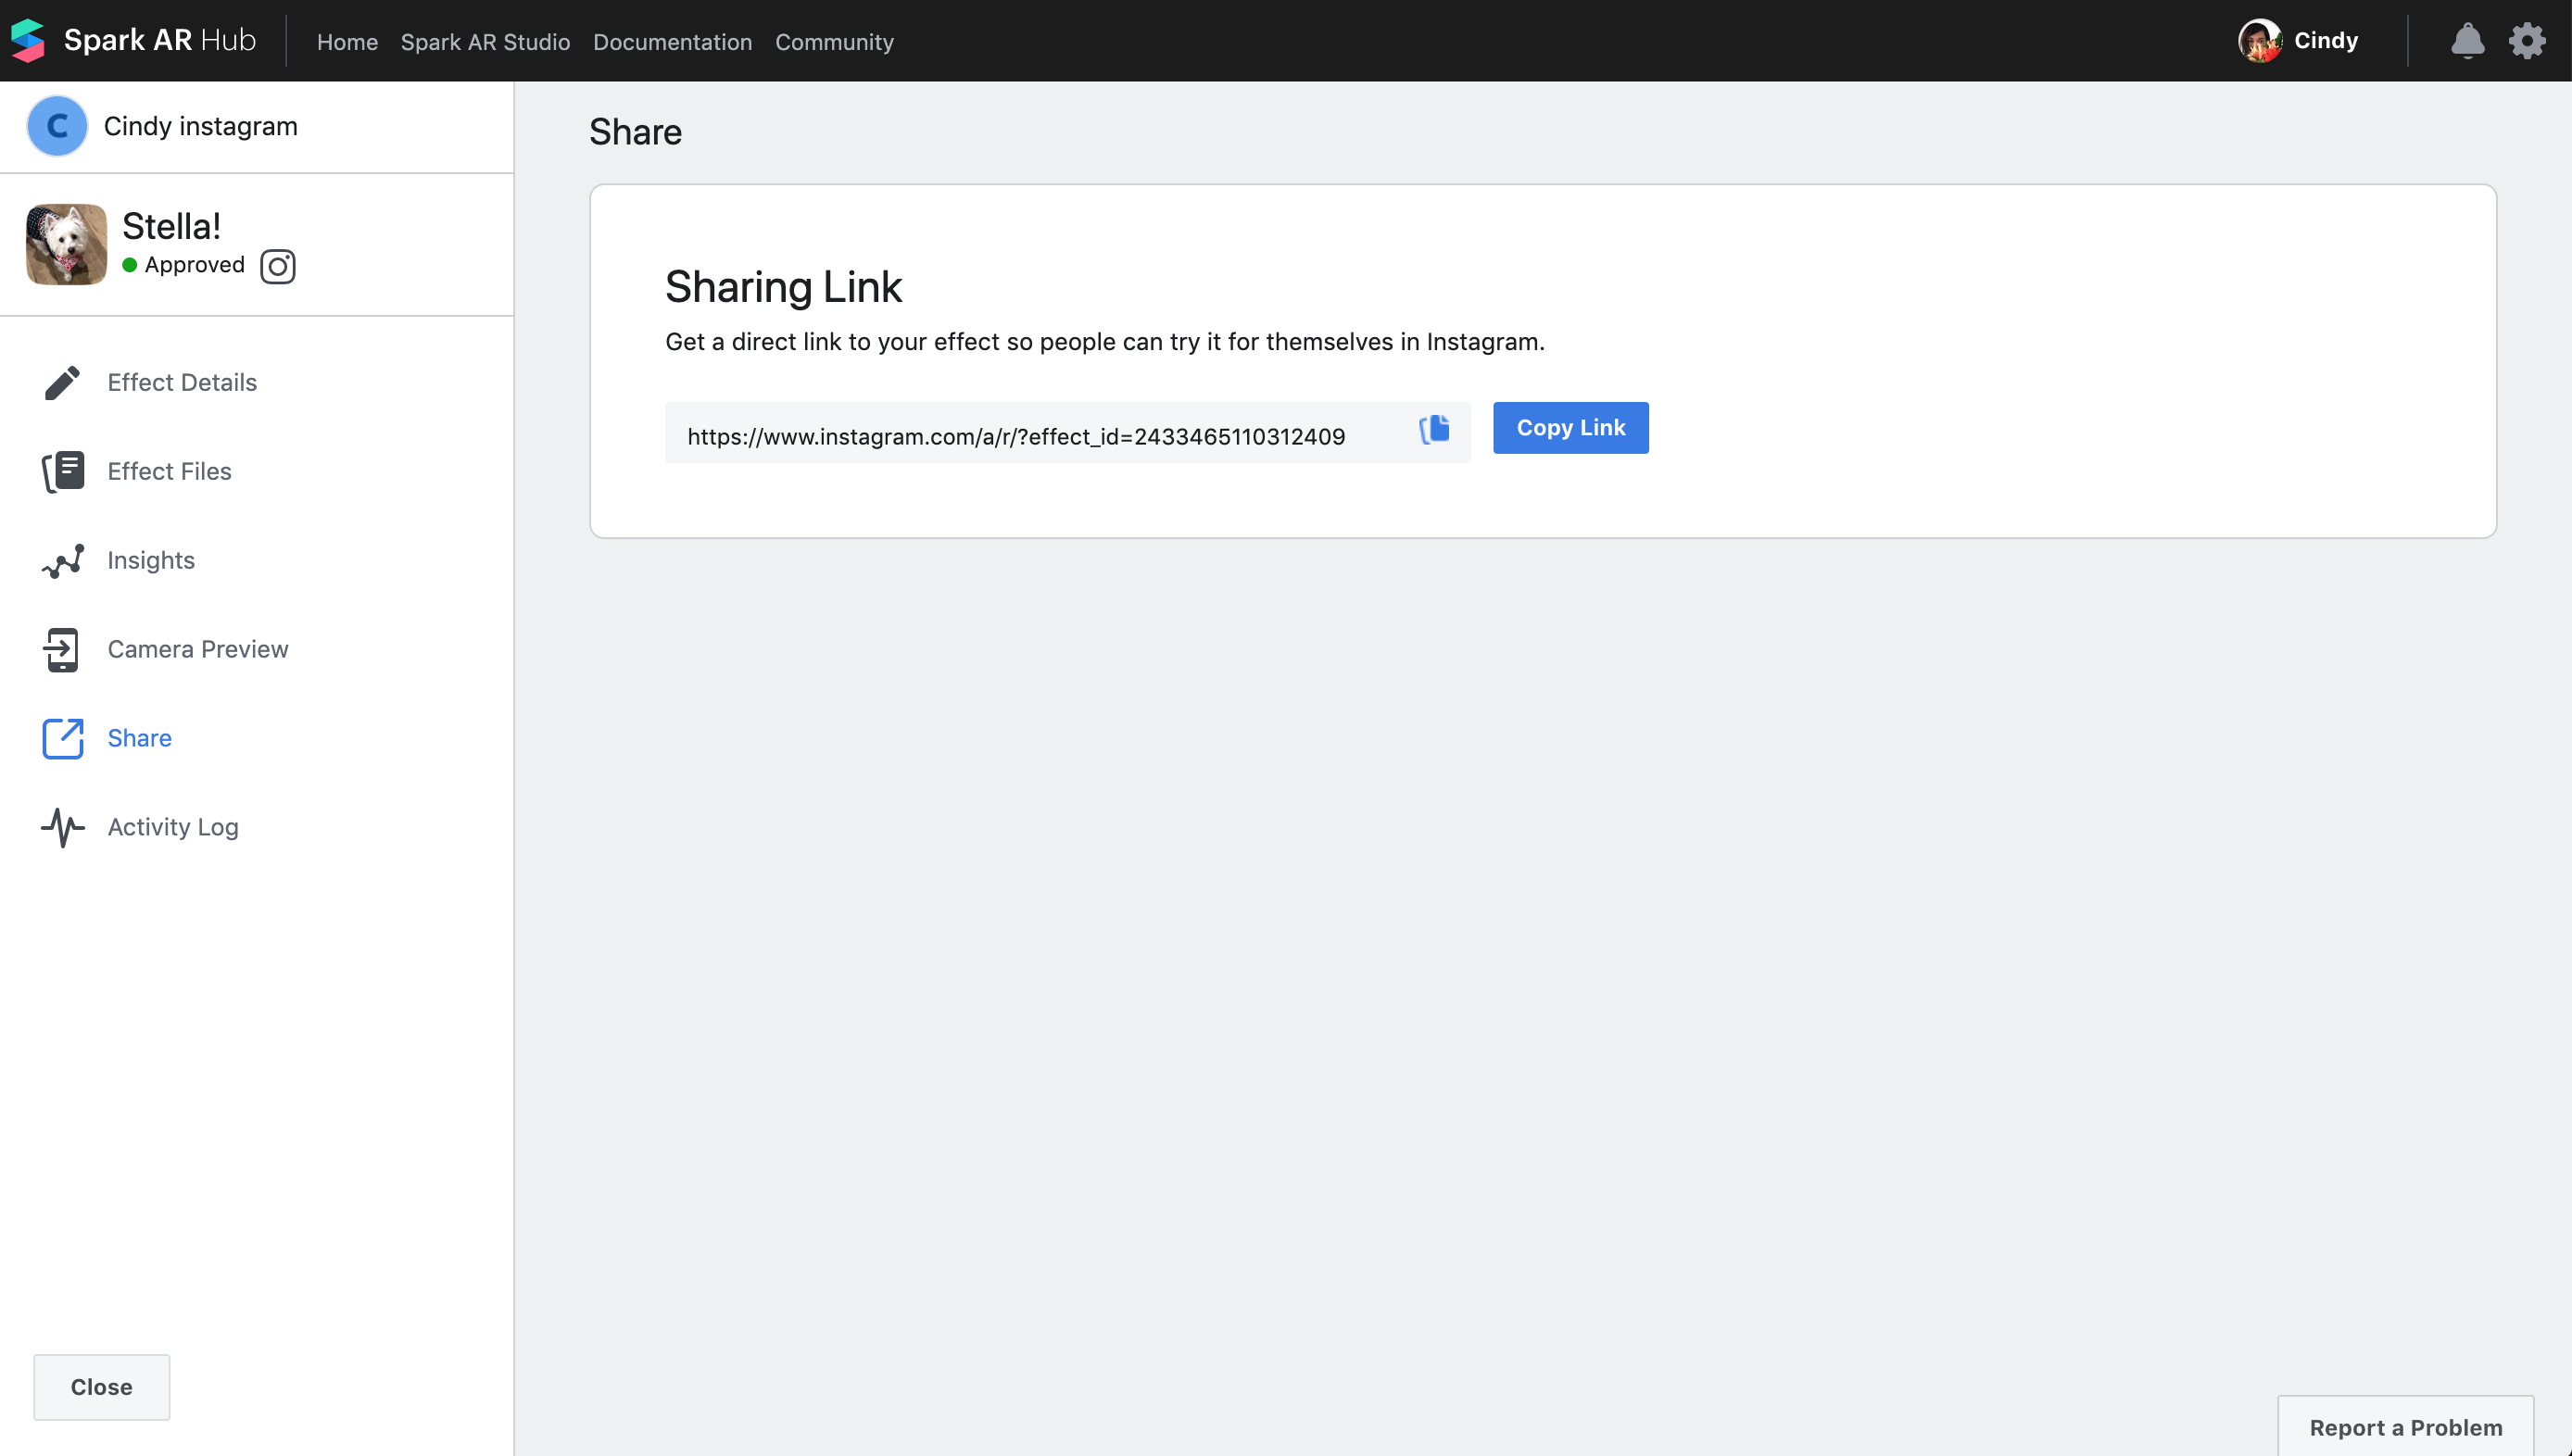
You can add this link to the link in your bio, and then direct your followers to check it out through your Instagram post captions!
#5: Mix Up How You Use Your Instagram Stories Effect
Try showcasing your filters in lots of different mediums, like video and boomerangs, as well as photos!
It’s a great way to showcase how versatile your Instagram Stories filter is!
#6: Create an Instagram Stories Highlight for Your Instagram Stories Effect
Use Instagram Highlights to curate a collection of all your AR effects in action.
It can be a tutorial on how your filter works (this is particularly useful if you have lots of different graphic options within the one filter) or you could save all your UGC content of your followers using your filter to the Highlight.
And that’s it — you’ve jumped into the deep end and started to work with Spark AR and created an Instagram Stories filter!
While it is a technical tool that does require some study time (or a pair of professional hands) having an AR filter for your brand on Instagram really does pay off when it comes to growing your account and building your brand.
Ready to level-up your Instagram Stories strategy and marketing? With Later you can plan, storyboard and schedule your Instagram Stories!


