
How to get verified on Facebook: Your step-by-step guide

Written by Chloe West
Published on October 17, 2022
Reading time 7 minutes

As a brand or business, building credibility with your online audience should be part of your overall social media marketing strategy. Learning how to get verified on Facebook (and other platforms) is one great way to do this.
Why? Well, getting verified on Facebook is a must for public figures, brands and companies that are well-known and susceptible to being replicated or parodied.
In this post, you’ll discover some essential steps on how to get verified on Facebook, as well as a few additional details to give you a thorough understanding of how Facebook verification works.
Let’s get started.
- What is Facebook verification
- Who can get verified on Facebook
- Why should you get verified on Facebook
- Steps for getting verified on Facebook
- What if Facebook rejects your application
- Tips for getting verified on Facebook
What is Facebook verification
Facebook verification provides credibility to official pages and puts a clear distinction between the real Pages and the Pages run by fans or imposters.
Before we get into the Facebook verification process, you’ll want to know what it means to get verified on Facebook in the first place and why it’s so important.
As we briefly touched on earlier, businesses and public figures may often see people creating Pages and profiles similar to theirs—whether it’s to imitate them or to build a fan community. Even if there’s no malicious intent behind those Pages and profiles, there’s still a huge risk of other Facebook users mistaking them for the real thing.
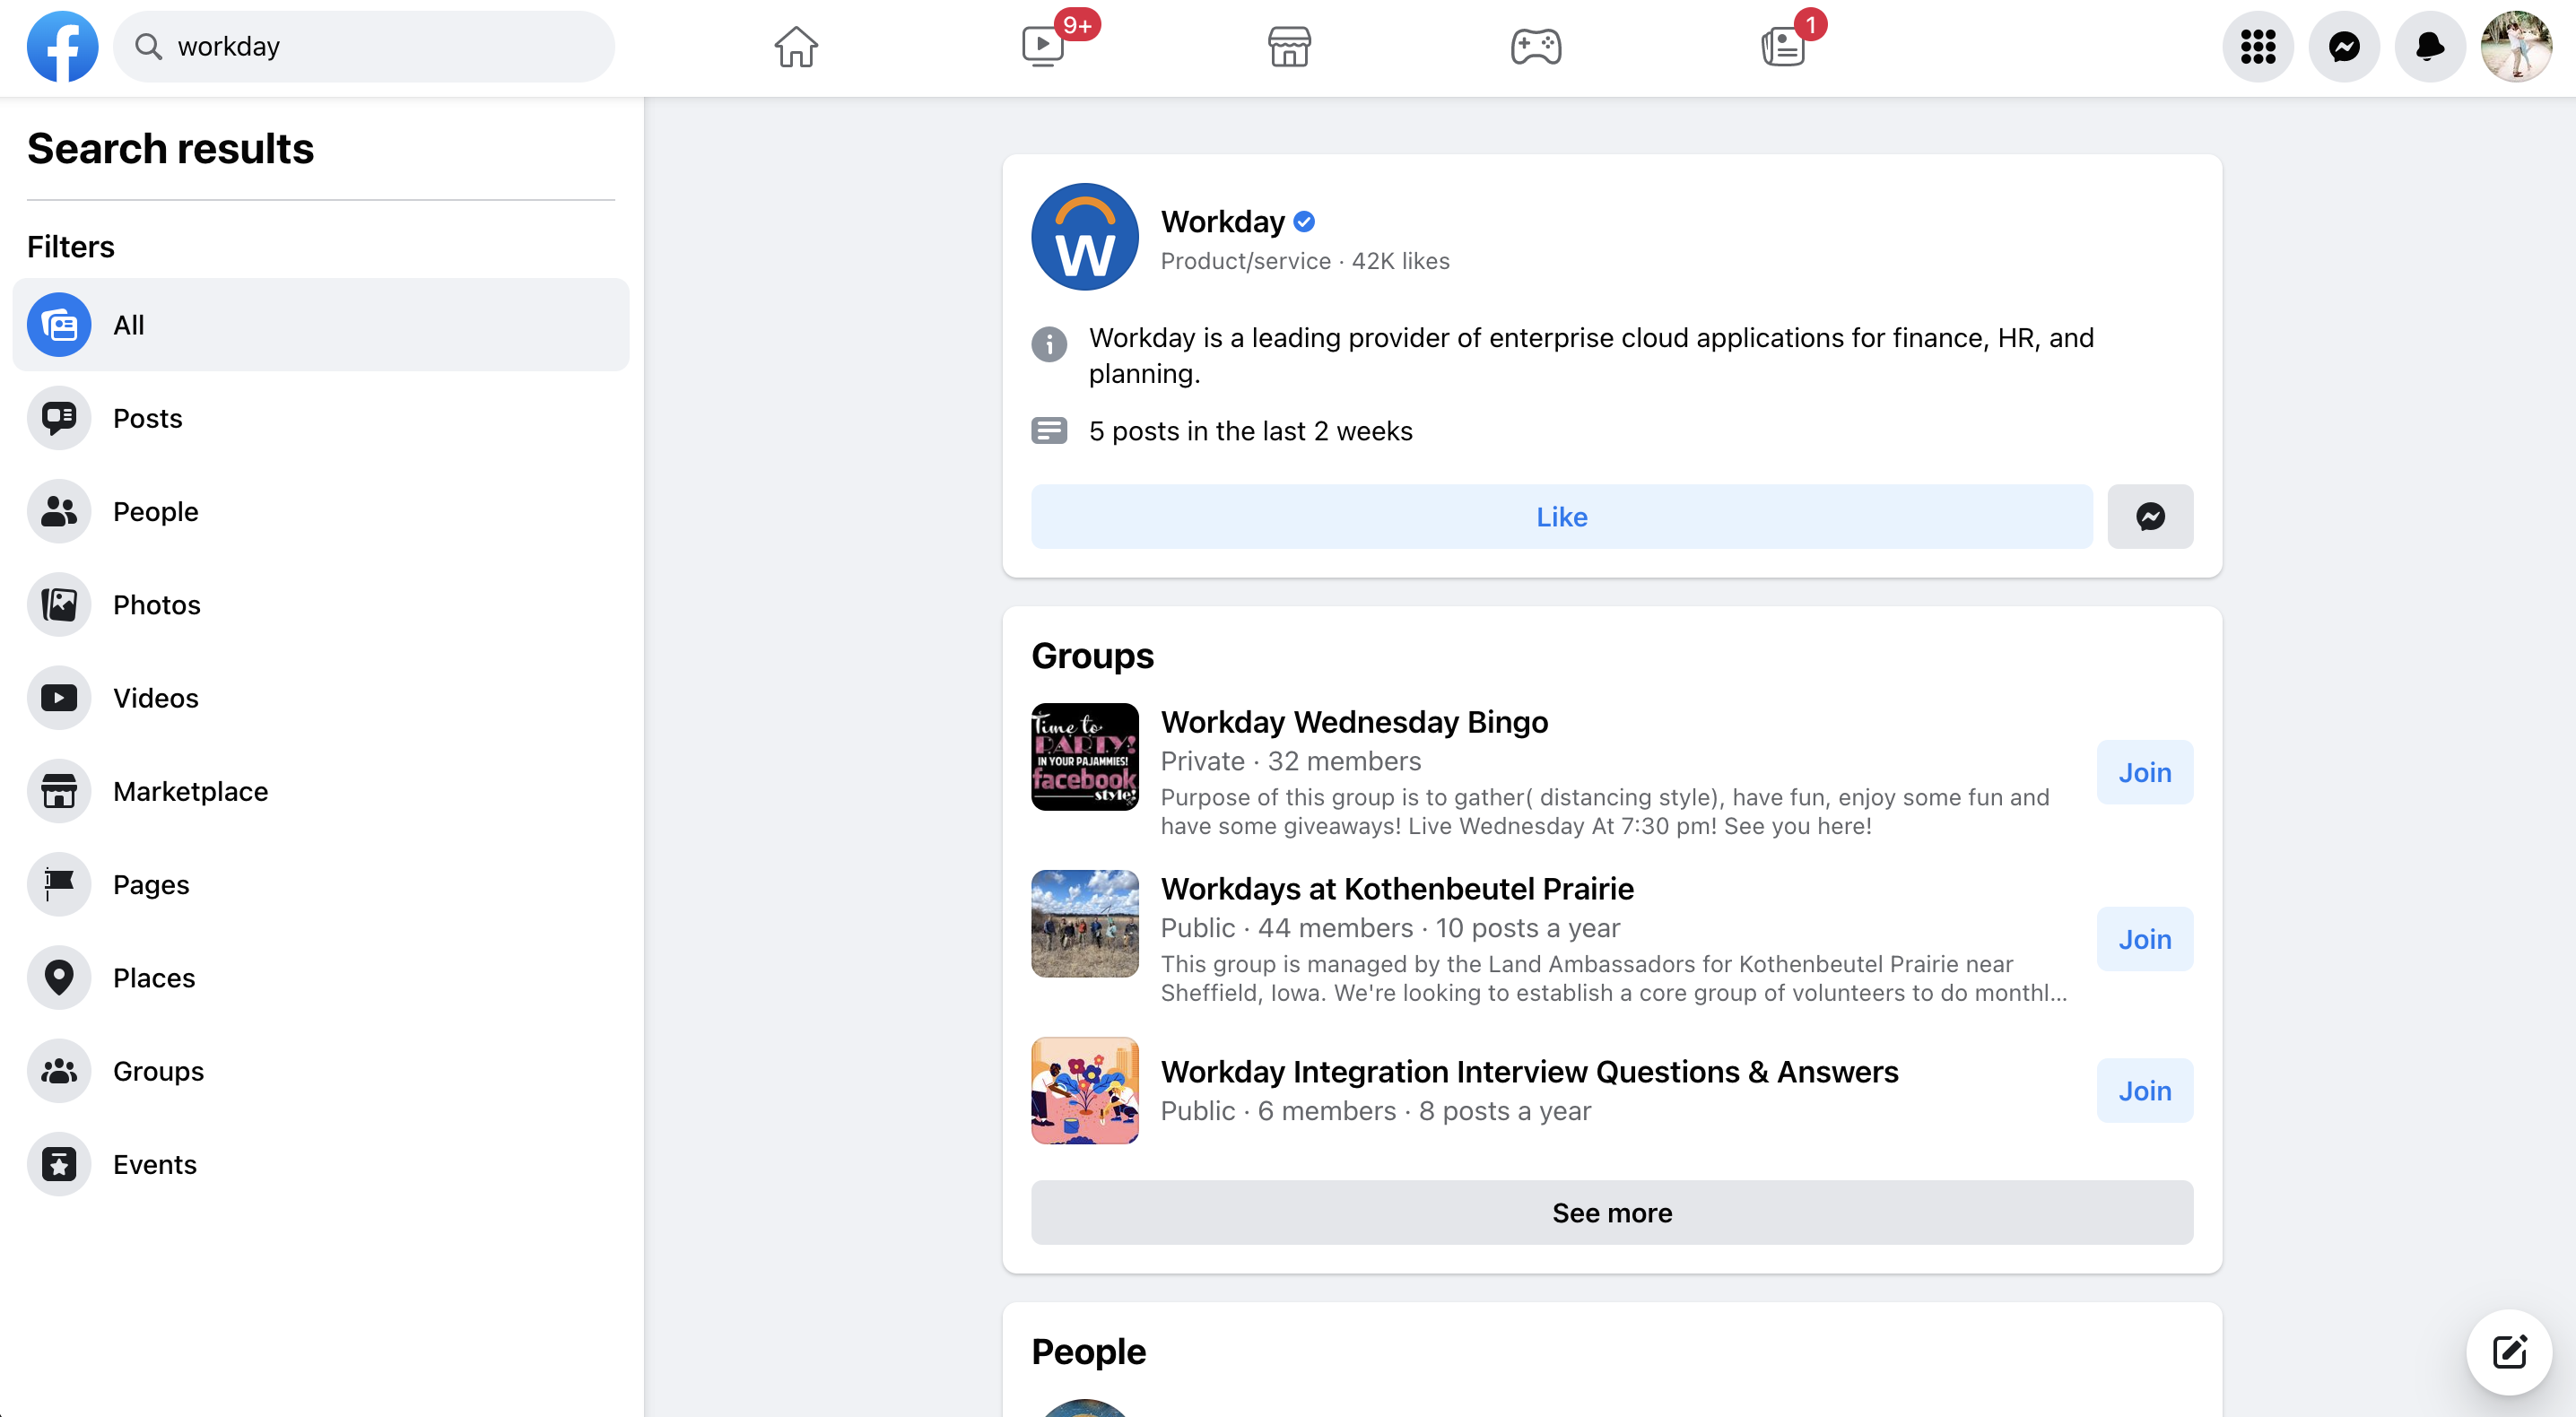
In addition, Facebook prioritizes verified profiles and Pages in its search results. So Facebook verification ensures that your Page prominently shows up at the top of relevant searches, which could further improve your reach. See how the official verified Page for Workday gets top priority when you search for the company name on Facebook.
Who can get verified on Facebook
Although in theory, anyone can get verified on Facebook, they have to meet strict verification criteria in order to get approved. Besides following the company’s terms of service, your account should be:
- Authentic: It should represent a real person, entity or business.
- Unique: It should be the unique presence of the person, entity or business it represents. Facebook only verifies one account per business or person, with the exception of language-specific accounts. And note that it doesn’t verify accounts for general interests. For example, it won’t verify a Page dedicated to healthy food but it will verify a page representing a registered publication that’s dedicated to healthy food.
- Complete: It should be active and have all the necessary details such as an “About” section and a profile photo. In addition, it should have at least one post.
- Notable: The person, entity or business it represents should be well-known and get plenty of searches. Facebook is more likely to approve your application if multiple news sources and publications feature the account.
The above requirements are only the bare minimum and don’t necessarily guarantee that you’ll get verified. To improve your chances of getting verified, make sure that your account looks highly credible. This means regularly publishing highly informative and engaging posts instead of sticking to the minimum requirement of one post, for instance.
Note that in addition to the above, Facebook may also have other requirements to verify Pages and profiles belonging to law enforcement agencies, politicians, elected officials and city governments. Be sure to be logged into your Facebook account to see all of Facebook’s verification criteria for these types of Pages as well as the contact.
Why should you get verified on Facebook
There are a number of reasons that getting verified is a good idea—let’s cover the bases.
Boosts credibility for your brand
Getting verified shows that you’re a legitimate, credible brand. The process isn’t easy (as you’ll see shortly) and many people/brands have tried to get verified and failed, so Facebook users know if they see that blue checkmark, it’s for real.
Protects against imposter accounts
Some people create fake accounts, others create fan accounts. Getting verified helps separate your Facebook Page from the rest, assuring customers that they’re following or reaching out to the real deal and not an imposter.
Facebook prioritizes verified profiles and pages
The Facebook algorithm gives priority to verified Pages and public figure profiles. Having that blue check means you’ll be shown first in search results, helping boost eyes on your brand’s Facebook Page.
8 steps for how to get verified on Facebook
While most of the process for getting verified is simple, some parts are more complicated than others.
However, if you follow these eight steps to a tee and have everything you need, you should be able to get that blue checkmark with little additional effort.
Step 1: Open the verification request form
Start the verification process by heading to Facebook’s verification request form. This is where you’ll complete all of the following steps.
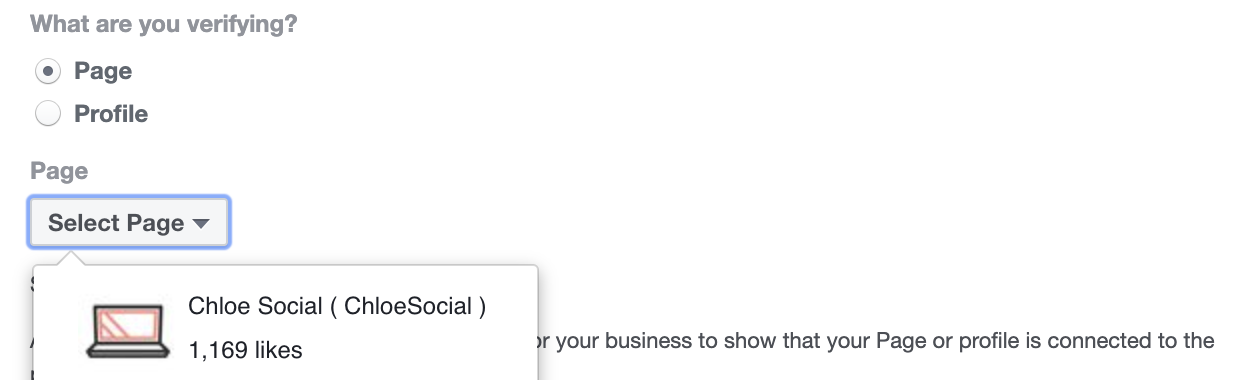
Step 2: Choose your verification type
You have the option to verify your personal profile if you are a public figure. Or, as long as you’re logged into your Facebook account, you can select from a dropdown menu which business page you’d like to verify. Each business page you manage will appear, making it easy to go through this process for each of your businesses or clients.
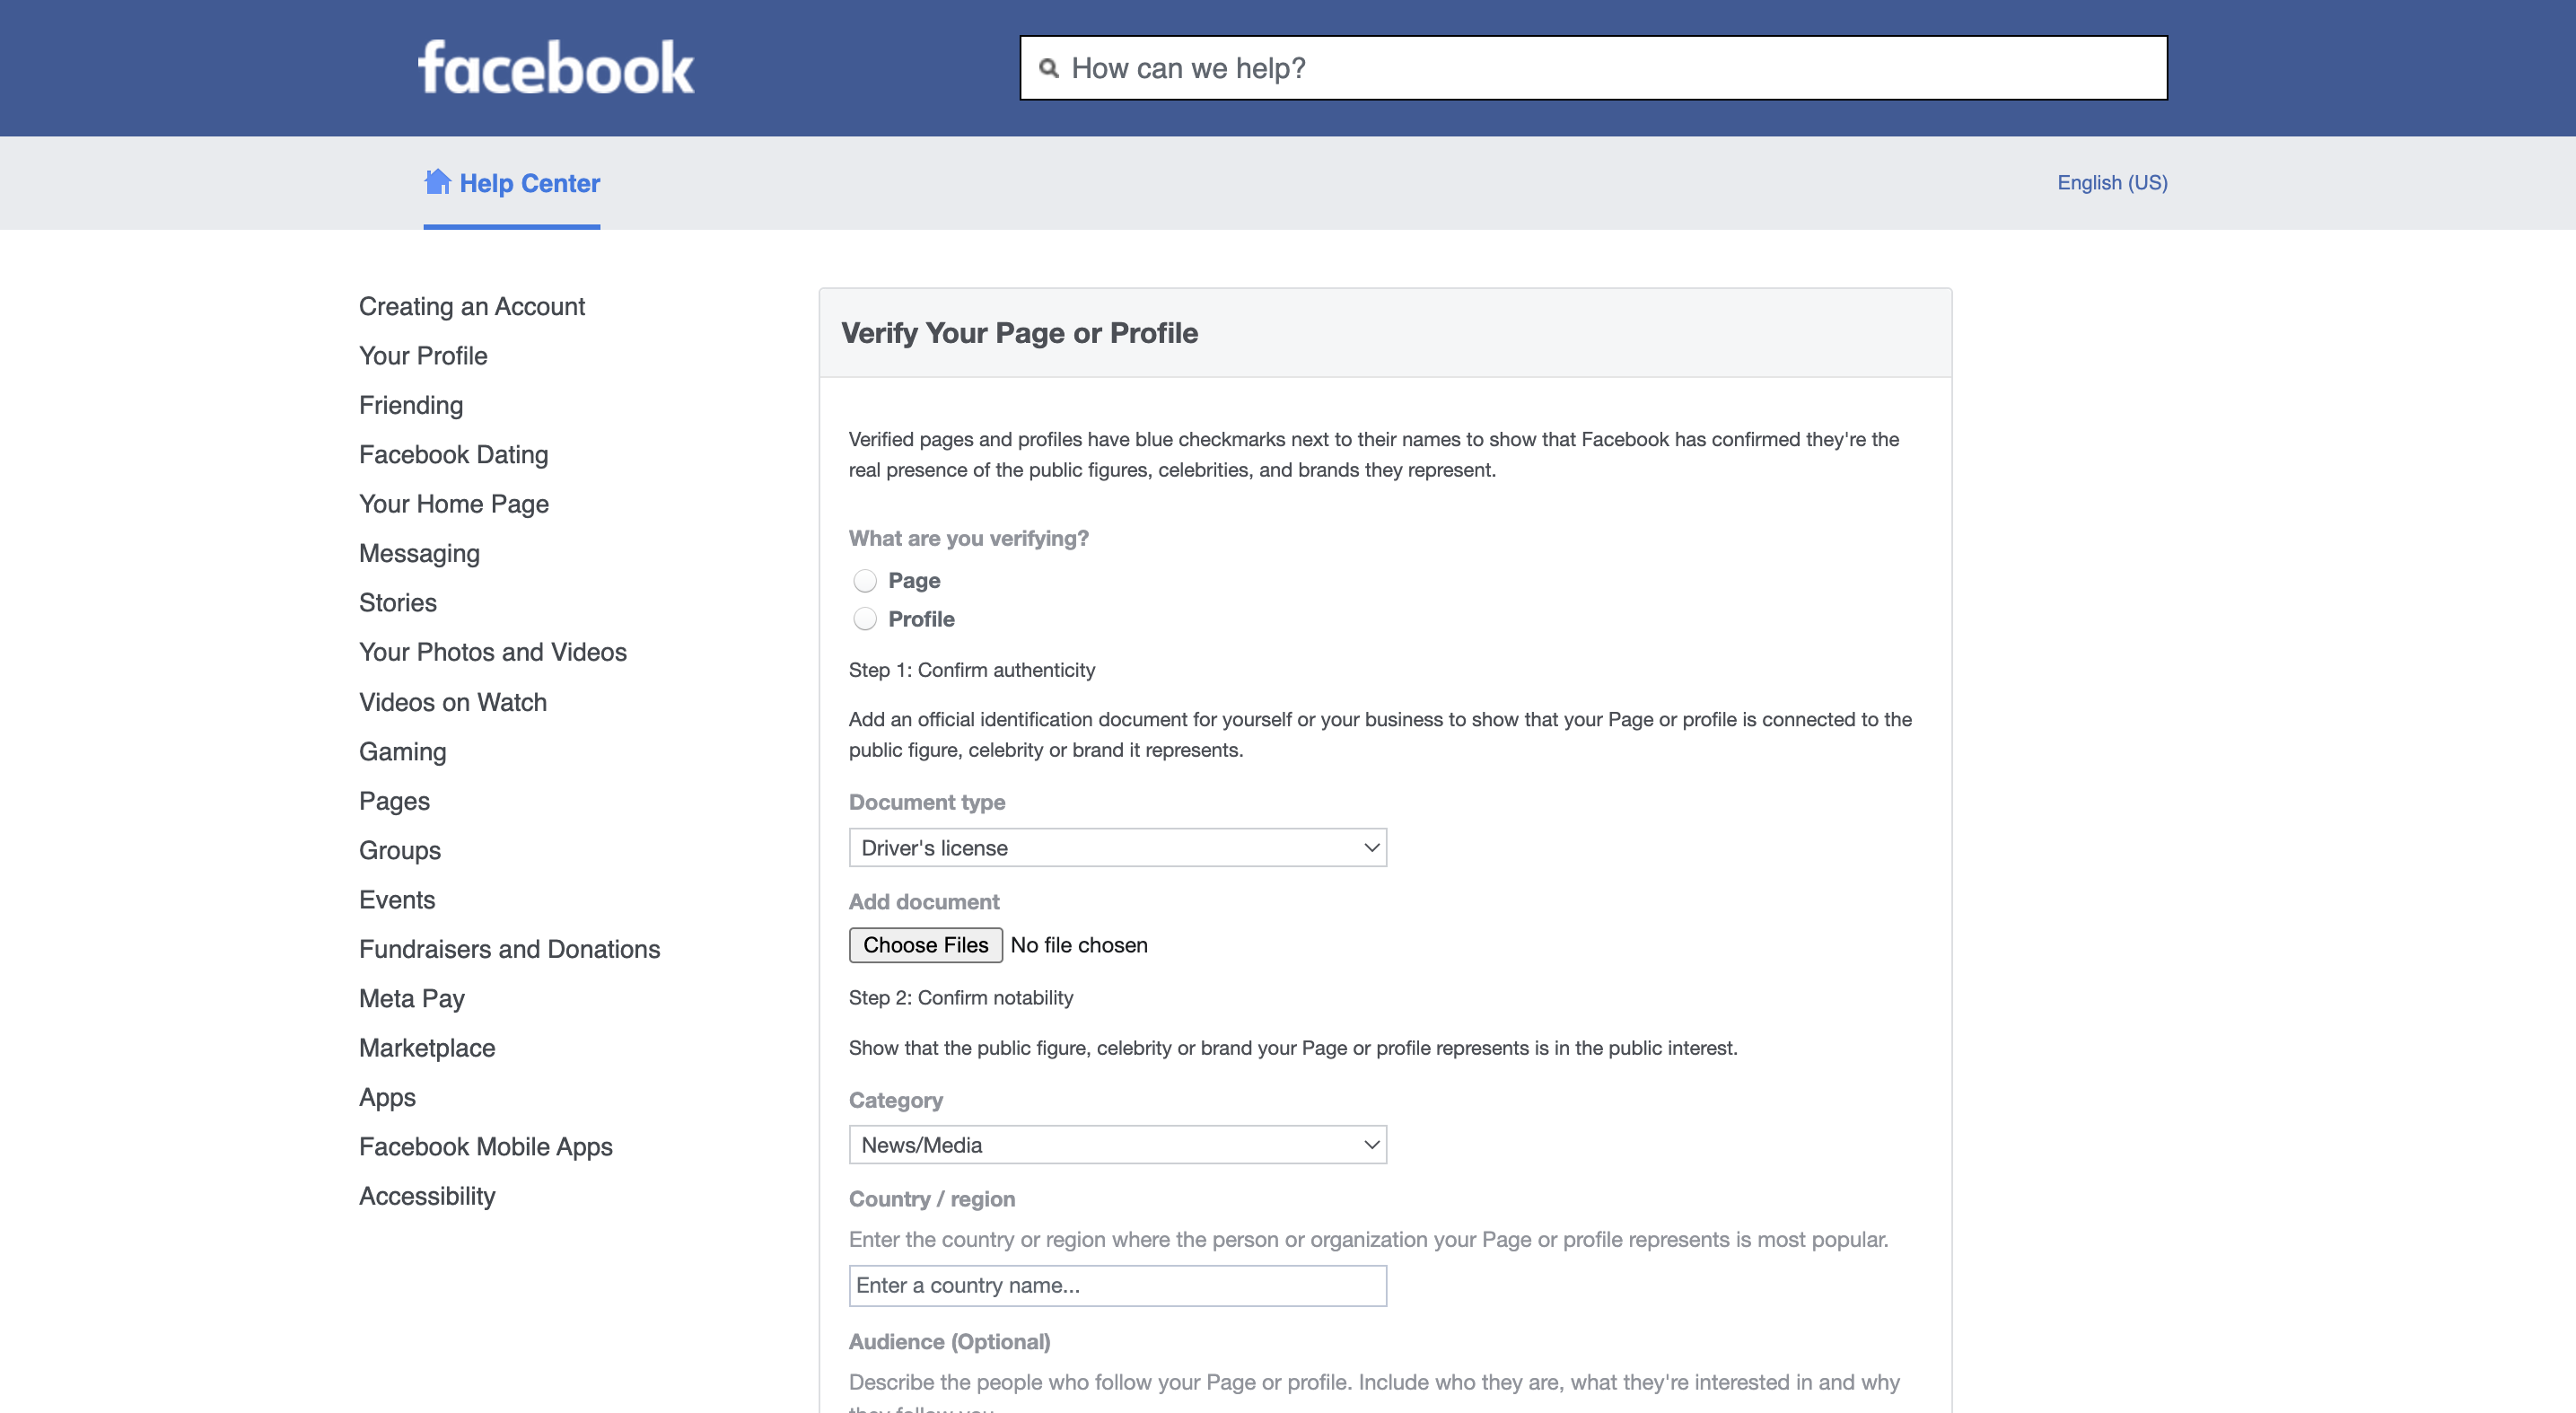
Step 3: Confirm authenticity
The next step is proving that your Facebook page is authentic. Remember, verification proves to your audience that it’s authentic. So it’s important that Facebook looks for credible documentation in order to approve verification.
The documentation options that you can upload a copy of include:
- Driver’s license
- Passport
- National identification card
- Tax filing
- Recent utility bill
- Articles of incorporation

You’ll click the Choose files button in order to upload your documents.
Step 4: Confirm notability
This next step is called “confirming notability,” but essentially, you’re selecting a category for your business page or profile. This is especially important when verifying profiles—Facebook wants to ensure that your profile or page is something that people are actually interested in or searching for before awarding verification.
Categories to choose from include:
- News/Media
- Sports
- Government & Politics
- Music
- Fashion
- Entertainment
- Digital Creator/Blogger/Influencer
- Gamer
- Business/Brand/Organization
- Other

Step 5: Add your country
The next step is to add the country where you or your business is most well-known. Even if you have a global company, you’ll want to choose the country or region where you have the largest audience. If you’re unsure, you can easily discover this by looking at your website’s Google Analytics or at your Facebook insights.

Step 6: Add your audience and also known as
This step is completely optional, however, the more information you provide, the easier it is for Facebook’s team to confirm your verification. We recommend inputting basic information about your audience demographics. However, if you have no other “AKA” names for your business, you can of course leave that section blank.

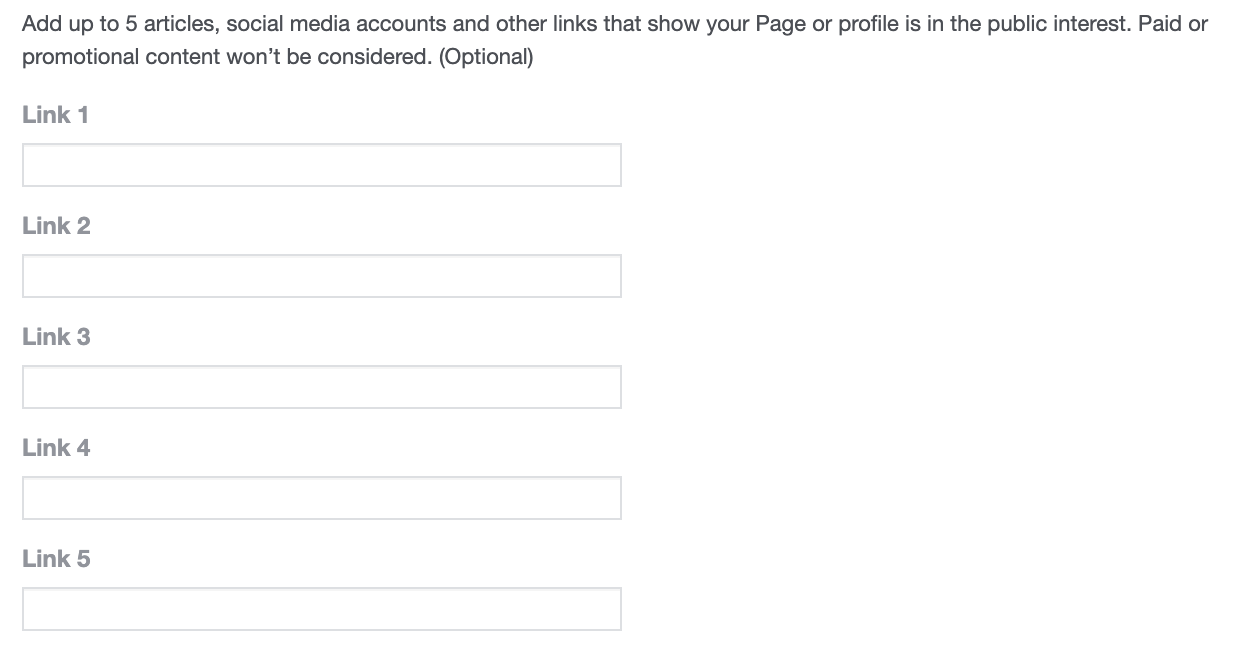
Step 7: Add 5 articles that show your page or profile is in the public interest
This step is also optional, but take our word for it: do not skip this step. This is one of the best ways to help prove your case. By including popular social media accounts, articles that talk about your business, Wikipedia profiles or anything else that proves people are interested in, following or talking about your brand, you’re making a much more compelling argument that your page should be verified.
Step 8: Submit the form
Voila! You’ve submitted your application for Facebook verification. The only thing left to do now is wait.
What happens if Facebook rejects my application
Keep in mind that meeting the basic verification criteria doesn’t guarantee that you’ll get verified. Facebook might still reject your application without specifying a reason. When this happens, you’ll have the option to reapply for verification after 30 days. But make sure you put in additional effort to improve your chances of getting verified this time around.
Here are the possible next steps in case Facebook rejects your application:
- Reach out to Facebook support and try to get more information about why your application was rejected. In case you can get this info, you’ll know exactly what you need to do to get verified the next time you apply.
- Create more high-quality content and maintain a regular posting schedule while ramping up your Facebook marketing efforts.
- If you have brand accounts on other social networks, make sure you boost your presence there as well. This will also help you improve your chances of getting verified on those platforms.
Top 4 tips for getting verified on Facebook (and staying verified)
Struggling to get verified? We’ve got four top tips to help you out. And, once you’re verified, you’ll want to continue these best practices to make sure you’re able to stay verified.
1. Keep your business information up-to-date
We mentioned that one of the factors for Facebook verification is having a complete Facebook profile. But you also need to make sure you keep up with any changes. If you get a new website, change store locations, adjust store hours, add new product lines, etc., you need to update those things on your Facebook page.
2. Post regularly on Facebook
If you haven’t posted any new content on your Facebook page in over a year, you’ve given the platform no incentive to offer you verification status. Make sure you’re staying active on Facebook and regularly posting new content to engage your followers.
3. Engage with the community
Build a community by engaging with commenters, sharing content that your audience seems to enjoy, holding live broadcasts to interact with your audience in real-time and more. If you have an engaged Facebook audience, it proves to the platform that you’re a notable brand and people want to follow you, increasing your chances of getting verified.
4. Stick to community guidelines
Just because you’ve been verified doesn’t mean you’re going to stay verified. If you’re consistently violating community guidelines, the platform reserves the right to rescind your verification. Ensuring you’re compliant (which isn’t difficult to do), turning on two-factor authentication and implementing a proper Facebook marketing strategy will all help you to remain verified.
Get verified on Facebook today
Now that you know how to get verified on Facebook, it’s time to start gathering all of the information you need so you can submit your form. From there, your biggest job is making sure you’ve got a stellar Facebook marketing strategy to increase reach and engagement, get your audience interested in your business and generate sales.
- Categories
11 Facebook analytics tools to measure your marketing success in 2024
Published on April 17, 2024 Reading time 5 minutes - Categories
Best times to post on Facebook in 2024
Published on April 15, 2024 Reading time 10 minutes - Categories
13 Strategies to increase Facebook engagement
Published on April 2, 2024 Reading time 11 minutes - Categories
24 Facebook statistics marketers should know in 2024
Published on March 19, 2024 Reading time 8 minutes
Share